
|
|
#481
 Tue 19 November 2013, 21:07 |
|||
|
|||
 Level #2 Machine It is really nice to see people taking their machines to the next level. I really envy your creativity. Do you have any idea when you will be adding your 4th axis to the table.

|
|
#482
Tue 19 November 2013, 22:00
|
|||
|
|||
|
Hopes were for this year. I have all the designs done but funds where drained for other projects. I hope to start on some of the implementation in the coming weeks but nothing will be complete until the new year.
|
|
#483
Wed 20 November 2013, 19:54
|
|||
|
|||
|
|
|
#484
Thu 21 November 2013, 15:35
|
|||
|
|||
|
|
|
#485
Sat 23 November 2013, 20:37
|
|||
|
|||
|
Got an email from someone wondering about the WJ200 and spindle operations. I thought I would include this here with better screenshots. It ones further back in the thread are not that great.
The reason my spindle did not turn in reverse is by default. All my cutters are for CW direction. The reason in the program it did not turn in reverse was....Top Picture...Ports & Pins...Spindle Setup tab, Relay Control. I have CCW (M4) set to Output #1. If I set it to Output#2 it turns the Spindle CCW. Since it is not needed at this time I will put it back to Output 1 so no unintentional M4 in a program will cause any problems when I am running a program. Below it is the Brain. I hope this helps someone else that has a Hitachi WJ200. If you follow the link to Flickr and right click over the photo you can view the original size which is a lot larger and clearer. If you are reading this in the future they may have changed how to view the original but it works this way as of today.  PortsPinsSpindle, on Flickr  BrainSpindle, on Flickr Last edited by pblackburn; Sat 23 November 2013 at 20:41..
|
|
#486
Sun 24 November 2013, 07:19
|
|||
|
|||
|
Cool Ladybug!!
|
|
#487
Sun 24 November 2013, 10:12
|
|||
|
|||
|
Darren,
That was my second one. It is cut a little loose for the kids pre-school to play with. Total height out of 1/4" material is 11 3/8". The first cutout was not so good. I cut it with tight tolerances. In assembly, I found some interferences with the design. I checked the cut out part's dimensions to the drawings and they were spot on. So I examined the areas on the plans in cad to see if they would fit together properly and there were interference issues on the plans. I emailed makecnc.com with screenshots and explanations of what I found and they responded promptly. They were a little shocked with the items I found but told me they would check and rework the model if necessary and send me an update. I was in a hurry to complete it so I opened the dxf in cad and re-worked 1/2" scale to fix the problems and re-cut two days later. The nice thing about their plans is it is all scalable. Fix a problem on the largest one and open it in Aspire and set the size percentage to the material you are working with and you are ready. At least with the ladybug. Truth be told, I did not expect an update. For the small cost of the plans compared to other places, the plans are almost free compared to the price of a 3D model or an already pre-designed cutout for small furniture. I told them I did not want anything is return only to help them out. True to their word, I received an updated plan one week later with a 'Thank you' note. I could not have been treated better and in fact I have had a lot worse experiences with larger companies. I would recommend the puzzles to anyone even with the little rework that was needed. I spoke with Julie on the phone and they are 'very down to earth' people and more than willing to help and give information. The plans come as you said before with three sizes and with assembly instructions.
|
|
#488
Sun 24 November 2013, 11:38
|
|||
|
|||
|
Glad you had good luck with them.
I'm very satisfied as well. I'm sure I'll be ordering more from them... my wife is eying up a couple patterns from there.
|
|
#490
Tue 26 November 2013, 16:57
|
|||
|
|||
|
Kinda Creepy Cool!!
|
|
#491
Tue 26 November 2013, 17:09
|
|||
|
|||
|
Boys got hold of it, now has a pirate shirt and tie on it.
 I purchased all 6 volumes when I made my purchase. I will be cutting for a while. Mostly looking at the 1/4" stuff. Gave the Ladybug to the boys preschool. The kids loved it. Their premium pattern houses and doll houses look awesome.
|
|
#492
Thu 28 November 2013, 09:48
|
|||
|
|||
|
To those who partake, Happy Turkey Day
|
|
#493
Thu 28 November 2013, 11:47
|
|||
|
|||
|
Thanks Pete, you too!

|
|
#494
Fri 29 November 2013, 01:27
|
|||
|
|||
|
MakeCNC has a black friday sale on right now guys. Thought you might be interested as you have already got a few of them.
|
|
#495
Fri 29 November 2013, 06:30
|
|||
|
|||
|
Thanks, Bruce, I'll check it out.
|
|
#496
Sat 30 November 2013, 10:07
|
|||
|
|||
|
Spent several hours troubleshooting a limit switch this morning. The X-Axis switch is failing. It was fluttering. Luckily all the switches are the same. After switching it to a different position the problem moved. Now I at least know what I need. Have a spare on the A axis that I am not using since it is not installed yet. It will be my replacement until I can get another one for it.
|
|
#497
Sat 30 November 2013, 13:14
|
|||
|
|||
|
A little bit of relief. This home/limit fiasco all started in between a two step process. The project I am working on requires two halves that will be combined to make one piece. The problem is the first piece was cut out last night. They must be cut out to allow threaded inserts, electronic components and wires. Then all sandwich together. So when the home/limit switch problem occurred, I was worried about racking and squareness. It took a while to get both X and B to turn off at the same time so when Mach is done homing the off points are the same. Then,... I forgot to check for square and cut out the second piece and thankfully everything is still on. The pieces lined up perfectly. A little luck was with me today.
|
|
#498
Sat 30 November 2013, 22:22
|
|||
|
|||
|
Pictures Please...
|
|
#499
Sun 01 December 2013, 04:59
|
|||
|
|||
|
I have not forgotten.
|
|
#500
Tue 03 December 2013, 15:46
|
|||
|
|||
|
This wasn't without its form of frustration but it turned out nice in the end. Material is 0.500 Acrylic and 0.750" MDF. The LED's are remote controlled. I don't really like MDF for some things but it is nice for others. Everything has its place in life. I don't want this to turn into a debate on why MDF is bad or good (
have seen that on most every forum  ). This is an indoor sign obviously. The color is a black metallic. The acrylic was supplied and not in the best of shape. I had a good deal of polishing to do on it. Many coats of paint and sanding on the frame with 320 and 600 grit paper to get the appearance I wanted. I used EZ-Lok knife thread insert nuts with brass screws to hold together. Tom, I told you I had not forgotten and here they are...... Pictures  View 1, on Flickr  View 2 , on Flickr  View 3 , on Flickr  View 4 , on Flickr  View 5, on Flickr  View 6, on Flickr  View 7, on Flickr  View 8, on Flickr  View 9, on Flickr  View 10, on Flickr  View 11, on Flickr  View 12, on Flickr  View 13, on Flickr And the videos  First cut and testing, on YouTube  Assembled, on YouTube  After Assembly and same position as first video listed above, on YouTube
|
|
#501
Tue 03 December 2013, 16:17
|
|||
|
|||
|
Absolutely beautiful. Great job...
|
|
#502
Tue 03 December 2013, 16:19
|
|||
|
|||
|
Wow nice job!
|
|
#503
Tue 03 December 2013, 19:03
|
|||
|
|||
|
Thank you Gentlemen.
|
|
#504
Tue 03 December 2013, 20:02
|
|||
|
|||
|
very professional look, very nice.
|
|
#505
Tue 03 December 2013, 20:12
|
|||
|
|||
|
Very Nice!
|
|
#506
Tue 03 December 2013, 23:30
|
|||
|
|||
|
Attention to detail pays off, nice job.
Ross
|
|
#507
Wed 04 December 2013, 02:42
|
|||
|
|||
|
Super Nice Pete, Inspiring!
|
|
#508
Wed 04 December 2013, 17:12
|
|||
|
|||
|
Thanks again everyone,
The next adventure. I have a Jet 2HP Vortex dust collector. It works well, I am not complaining. Removes virtually all dust while I am cutting so I am happy with its performance. I have never seen anything but fine dust in the filter (but then again, neither do most that have one without the cone). The bag changing is not so bad but it definitely could be improved upon. A clear canister with a flexible connection hose with an air tight clamp would be ideal. The separation is not too bad but I would prefer to make a multi-part system. I usually transfer the dust to another bag for a friend who uses it. Clean the filter, cone, housing and contact area on the bag and reinstall. Since I use 55 gallon bags for the media that I give away, a small 30 to 55 gallon inline interceptor would be ideal. So I am making a Thien baffle directly before the collector. The only thing I did different from the original design was to make it flange mount. I made a flange to fit up around the lip of the container and sealed it to the container. I made two grooves and installed 0.139" o-rings. I have seen how important a sealed system is from working with vacuum at work. I know that any leak will affect performance. I expect to see a loss of suction because of this addition so I am trying to maintain a sealed system. If I can achieved an 85/15 ratio between the two systems as far as media collection is concerned. I will be pleased. I looked at the top hat design but went with this for the trial run. The top hat would require knife inserts as I do not want to break the surface into the chamber. If I go with a top hat, it will be flange mounted as well and i will be able to use the existing flange. Parts are setting up with sealant now. I do not make near the dust as most of you here. As I said before, I do this for a hobby. I would like to change the top of the system from one filter to two using a Y connector to improve on the surface area for air to flow. Venting outside here requires a permit.
|
|
#509
Thu 05 December 2013, 20:18
|
|||
|
|||
|
I'd love to see pics of your Thein baffled inline interceptor. Sounds intriguing.
Maybe what the Dr. ordered for my dust collection efforts.
|
|
#510
Fri 06 December 2013, 15:19
|
|||
|
|||
|
First Test, pictures and video below
 Orings on Flange and dust in container , on Flickr  Close up shot, on Flickr  Inside Assembly, on Flickr 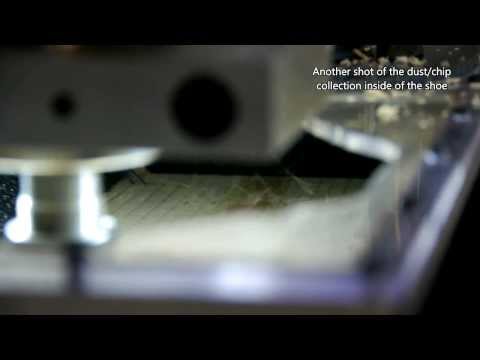 Thien Before Jet DC Vortex , on YouTube
|
 |
|
|
 Similar Threads |
||||
| Thread | Thread Starter | Forum | Replies | Last Post |
| Parts arrived !!! Time to get to work !! - Pennsylvania USA | Rapid | Introduce yourself and start planning | 51 | Fri 06 June 2014 07:53 |
| Newbe here - Pennsylvania, USA | Dave | Introduce yourself and start planning | 19 | Wed 11 December 2013 17:30 |
| Sign for my self | danilom | The Show Room | 6 | Fri 04 March 2011 04:50 |
| Hot Rod Shop Sign | woody | The Show Room | 4 | Fri 23 April 2010 12:14 |
| Edge lit sign | Jayson | The Show Room | 4 | Fri 20 March 2009 22:55 |


