|
#151
 Fri 30 May 2008, 04:34
|
|||
|
|||
|
Sorry if I am interrupting, but look at this one,seems to be a nice package for the limits and affordable too.
  http://www.cnc4pc.com/Store/osc/prod...roducts_id=183 what say? is it comparable enough to the proximity switches? 
|
|
#152
Fri 30 May 2008, 07:32
|
|||
|
|||
|
The opto devices will work, BUT, as always there may be a problem.
As you can see, the device is built in a "U" shape. On one side of the "U" is the infared LED, on the other side of the "U" is the detector. In the face of the "U", is usually found a hole (1/8", 3mm). That hole is small enough that dust and debris can easily clog it. Normally, whenever the light beam is interrupted, whether by clogging or by sensing the target, the machine would stop. With the amount of heavy dust that a CNC router makes, it would be very difficult to use that kind of detector.
|
|
#153
Fri 30 May 2008, 16:02
|
|||
|
|||
|
I'm sure you could make these work, though be aware of:
|
|
#154
Fri 30 May 2008, 17:18
|
|||
|
|||
|
I should have take a picture of my machine today.
The "snow plow" effect was working well. I had inches of buildup on the end of the machine and proximities worked the whole time. Optical scares me in this application. Sean
|
|
#155
Fri 30 May 2008, 20:54
|
|||
|
|||
|
Quote:
|
|
#156
Fri 30 May 2008, 22:36
|
|||
|
|||
|
Found some interesting reading about the capacitive proximity switches. I kind of understand now why the dust doesn't affect them.
http://www.kirbyrisk.com/allen-bradl...ximit/2922.pdf
|
|
#157
Sat 31 May 2008, 00:42
|
|||
|
|||
|
Thanks all for your inputs. anywayz this thread does point to wiring of the proximity switches to the mechmate control box dosnt it........wait let me look back.
|
|
#158
Sat 31 May 2008, 00:43
|
|||
|
|||
|
how, thank's a lot for this reading, i understand a lot of thing's now i start with this.
a question to Gerald, how did you fix the proximity target in 20mm hole after adjustement. thank's
|
|
#159
Sat 31 May 2008, 08:02
|
|||
|
|||
|
hi mickey, I haven't seen any posts lately by gerald he must still be on vacation.
If you epoxy them it would be a permenant set, would it be better to use a spot of silicone? That stuff holds well but yet can be removed later if needed, and it shouldn't take much at all to hold those into place. I am not sure if you would ever need to remove them if they are in the correct spot but for some reason it seems IMHO not to epoxy or JB weld them into place.
|
|
#160
Sat 31 May 2008, 08:12
|
|||
|
|||
|
ok ED thank's, i go with epoxy it's very strong and if i make litle spot i can remove it if i whant to make change.
|
|
#161
Sat 31 May 2008, 16:10
|
|||
|
|||
|
The adjustment for the proximity limit can be either with the ecentric disk that is in the drawing package, or, like I have done, have a G-code offset programmed into mach 3. This lets you home the machine to what-ever the proximity limit is, then the machine offsets each time back to the G-code values.
It's a great thing to know you can rehome a machine to the "HARD" limits and find your soft position again. I have found that even if I E-stop the machine and reset everything, I was able to get back to where I stopped. NOW, I don't recommend this method...I was just curious to see If I could do it!
|
|
#162
Sun 01 June 2008, 05:06
|
|||
|
|||
|
Quote:
|
|
#163
Sat 07 June 2008, 22:14
|
|||
|
|||
|
Whats difference between a npn and a pnp NC proximity switch.
|
|
#165
Sun 08 June 2008, 11:11
|
|||
|
|||
|
Thanks G' got it!
|
|
#166
Thu 12 June 2008, 22:40
|
|||
|
|||
|
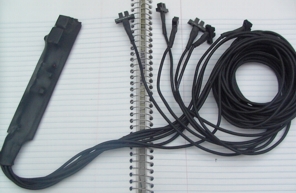
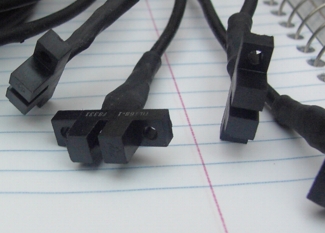
My proxi setup
Works wonderfully well ! Last edited by javeria; Thu 12 June 2008 at 22:44..
|
|
#167
Sat 14 June 2008, 20:41
|
|||
|
|||
|
Sean, In your post May 14th you set Map home to pin #15 are you putting Y++ ,Y-- ,x++, x--,z++ and z-- all to pin #15?
|
|
#168
Sun 15 June 2008, 09:03
|
|||
|
|||
|
Yes,
Everyone is mapped to the same input. Mach knows how to cycle the inputs based on the active axis when homing. Sean
|
|
#169
Tue 24 June 2008, 13:35
|
|||
|
|||
|
Quote:
Sean is right but it doesn't have to be pin #15 in peticular, I think I used pin #12. I wasn't sure if you may have been asking if a different pin besides #15 would work. Anyway any of the unused pins except for GND on J5 will work as as long as you map home to the same pin that your proximities are hard wired to. Don't forget to also map home your slave motor too if your using one on your x axis. I figured that one out after some gear grinding.
|
|
#170
Tue 24 June 2008, 17:42
|
|||
|
|||
|
Hi Sean & Greg,
I was reading back into this thread and it slap me right in my face !!  For some reason I can’t remember why or it got lost ( I doubt that one !) I never got back to thanks you guys for the extra effort & time for your reply to my call !! (#136) Sorry, no offences guys  Amicalement, Robert 
|
|
#171
Mon 01 September 2008, 08:35
|
|||
|
|||
|
HI Folks,
while setting up my other CNC machine where I have used the proxi's i came across people tellin me that u need a good machine zero setting so that when power fails - the software uses the machine zero to accurately position itself relatively to the job. so the Q here by me is - are the proxi's good enough to be used for Zeroing the machine in case of power failures - I am still learning folks - hope this Q is not a dumb one. RGDS IRfan Last edited by javeria; Mon 01 September 2008 at 08:37..
|
|
#172
Mon 01 September 2008, 09:10
|
|||
|
|||
|
That is a question that most people should think to ask, but they don't.
Apparently, the prox switch is very "repeatable" and switches at exactly the same distance every time, provided that you always approach the "target" at the same speed. This is what I hear from the regular users - havn't tried it myself yet.
|
|
#173
Mon 01 September 2008, 09:36
|
|||
|
|||
|
I use proximity switches to calibrate/zero my machine ion X and Y.
No matter which type of zeroing system you use (and how much you pay for), you should test it with a dial indicator to see how accurate you can recover a cut after an event such as a power failure or machine crash. My system get me back to work within 0.005" +/- 0.002 which is very acceptable for my requirements... and it was very affordable (proximity switches). Last edited by paco; Mon 01 September 2008 at 09:42.. Reason: Added content.
|
|
#174
Mon 01 September 2008, 09:47
|
|||
|
|||
|
I believe that once limits and home are set in Mach, mach slows down the machine when approaching them, so we might assume that the limits approach the targets with a similar velocity every time.
aint that right!
|
|
#175
Mon 01 September 2008, 09:49
|
|||
|
|||
|
Thanks G and paco, its relieved me of tension on the proximity switch front.!

|
|
#176
Fri 05 September 2008, 17:46
|
|||
|
|||
|
HI G' and All,
This is particularly a Q on Mach and the proximites, so kindly move this thread if this is not in the right place. I put on the proximites like we did here on my other cnc - all 3 of em now report to Pin11 on the parallel port. I have the auto limit over ride activated. Now if I move the X towards limits and then then the limits are activated and then reset - and the axis remains in the same position - and now Y is in movement then we have a situation where the other limits dont work. My Q is - 1. will this be a problem? 2. Am I doing some thing wrong by activating the Limit Auto Overide. 3. Since I have not yet homed the machine, will it be a problem in homing the machine axes? as once Y has homed then the limits get activated and then X needs to be homed and still the limits are activated - i mean all the proxies report to the same pin right? 4. Do ya think I still need a lesson in Mach for proximities settings? thats it folks RGDS IRfan
|
|
#177
Fri 05 September 2008, 18:59
|
|||
|
|||
|
If I understand your situation right, the limit override is there so you can move the active axis off the limit switch then continue.
|
|
#178
Fri 05 September 2008, 20:30
|
|||
|
|||
|
what about homing the axis initially, I will try it today though.
|
|
#179
Sat 06 September 2008, 08:15
|
|||
|
|||
|
JR is right from what I understand in Mach 3 the overide button is to move away from a tripped limit switch or sensor.
there should be some info on the initial set up earlier in this thread if I remember correct, but you will have to go into Mach 3 and set your home coordinates, also assingn the pin # on your BOB that you have your sensors wired to and then go to homing in mach 3 and assign the axis's to home. I think I had to watch the the Mach 3 tutorial a few times on homing before I figured out what to do. Don't forget to assign the slave motor also so you don't grind your pinion gears when you try to home. If you have it set up correct you can hit the ref all home button in mach 3 (long vertical button by the axis coordinate buttons) and it should start traveling twards home. Mine all went the right direction the first time but I think it is possible that sometimes they will move the wrong direction and you will have to correct this. (I forgot already how to reverse direction but I know Gerald has a post somewhere on that if it happens, it is pretty simple to do).
|
|
#180
Sat 06 September 2008, 11:06
|
|||
|
|||
|
yup even me after seeing the videos - the homing in Mach - is like it sees the limit switch and then comes back a step, but what I did not understand is the setting of soft limits - anyways learning and learning as usual
and yes it was number 4 "4. Do ya think I still need a lesson in Mach for proximities settings?"
|
 |
|
|


