|
#211
 Sat 29 May 2010, 04:54
|
|||
|
|||
|
Aracnophobia "Spiders, They Are Everywhere"
Hi All,
Cold rainy day here today so an ideal time to go do some work in the garage!! spent some time today working on the spiders!! Still need to fine tune them but pretty happy with the end result  Bushes and nuts all welded in place with the V wheels fitted. 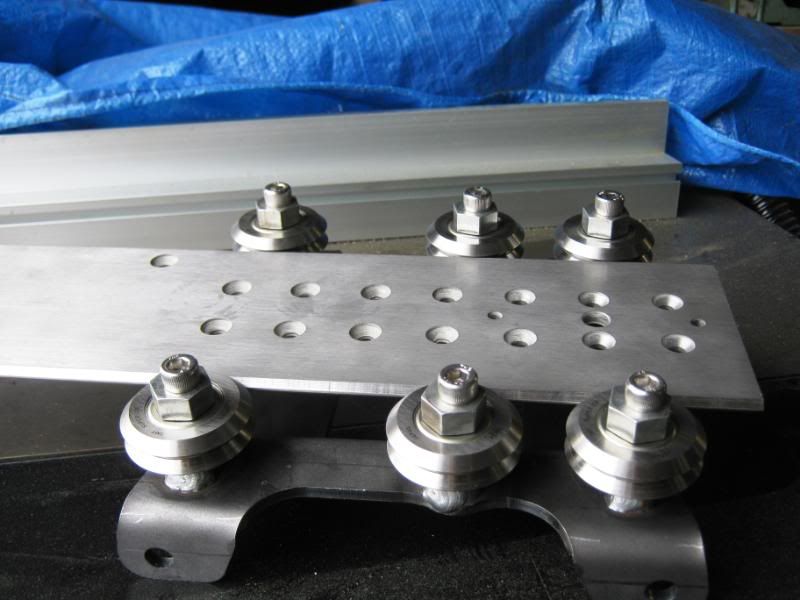 Marked, drilled and tapped then fitted the 50 x 25 x 3mm RHS to the v plate and slid on the spider  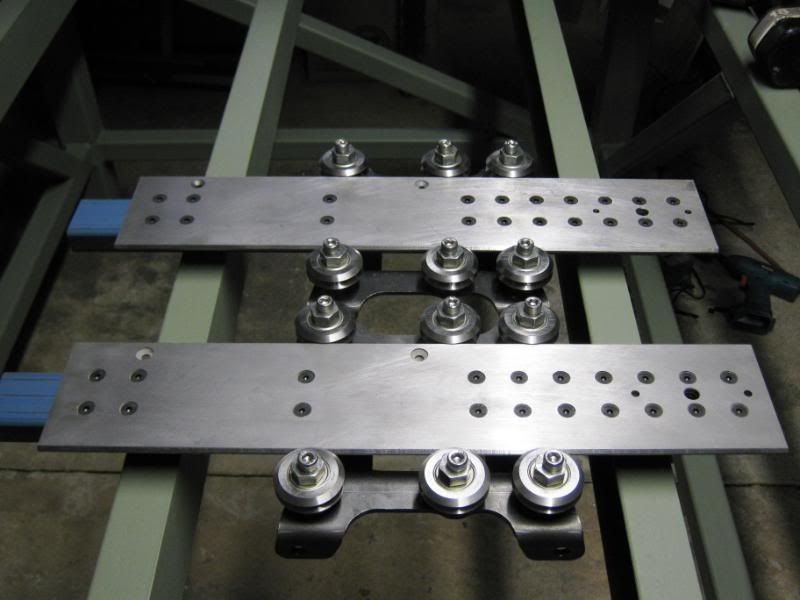 Skippy and I will be working on the MM's again tomorrow, not sure what we will be working on yet but I'm sure we will find plenty to do!! Cheers Tony. 
|
|
#212
Sun 30 May 2010, 04:13
|
|||
|
|||
|
Today's Update!!
Another good day today with Paul and I getting a fair amount finished on both MM's. We started the day cutting the teflon washers and making the additional brackets to support the cable tray on the Y gantry. 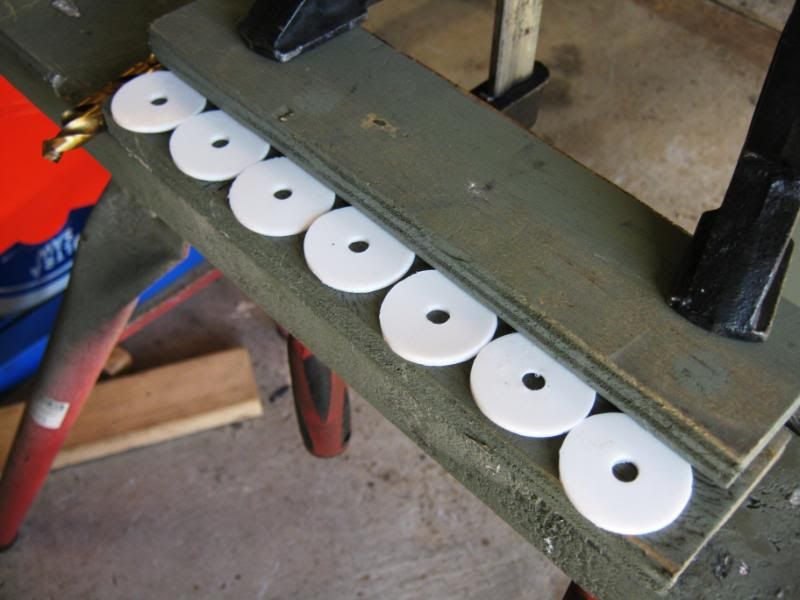 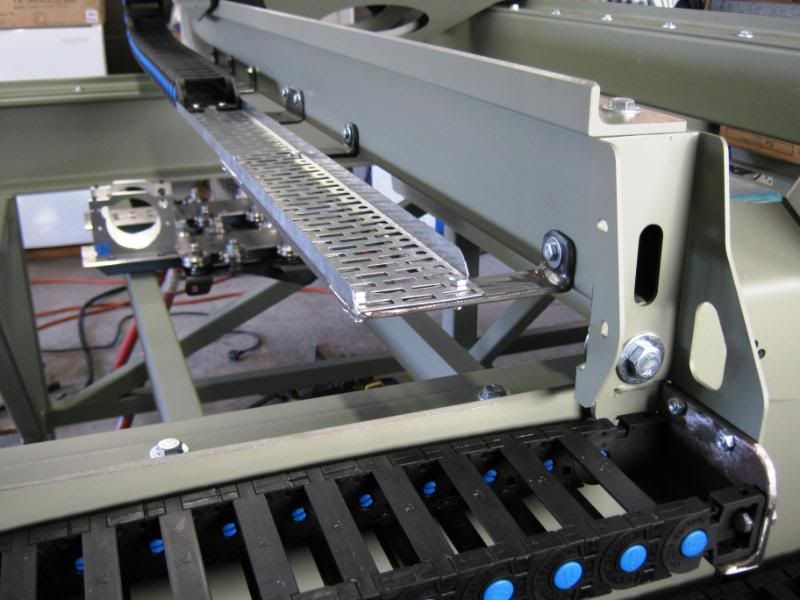 whilst we had the welder set up we welded up the idler arm for the Y gantry. 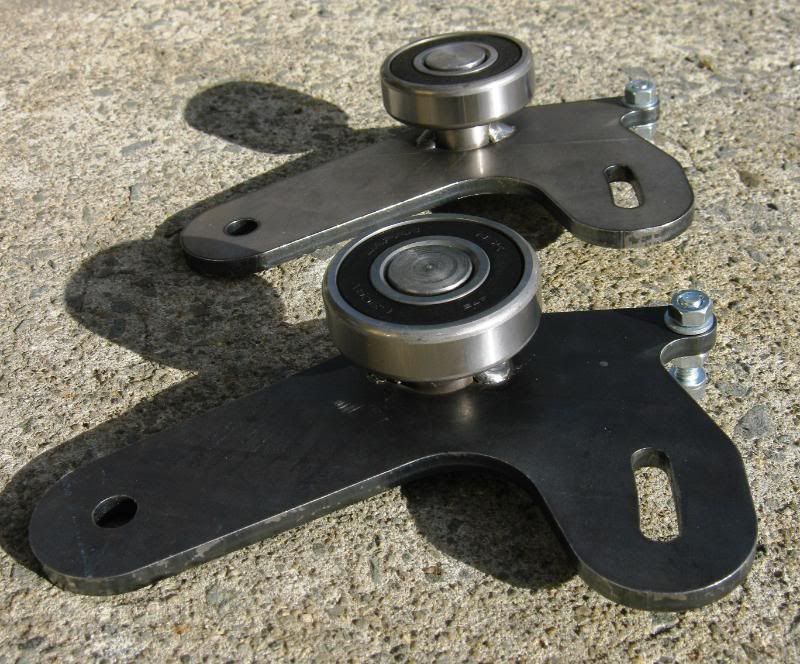 It was then onto counter sinking the necessary holes in the motor mounting plates so we could start to assemble them, along with the motors to try everything out. 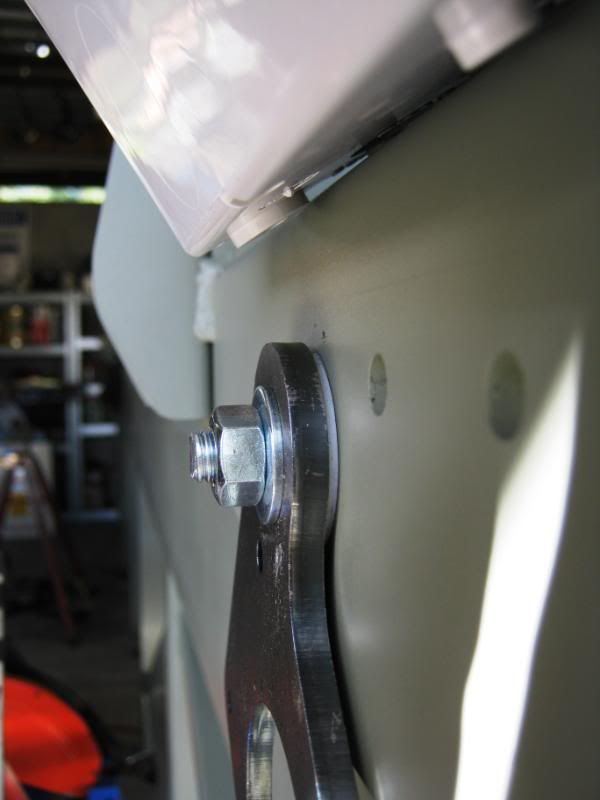 First of the X axis motors mounted. 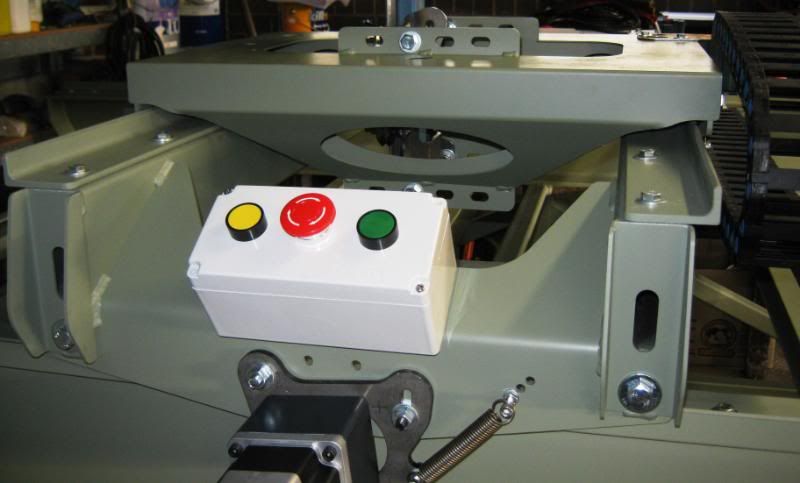 Second of the X axis motors mounted. 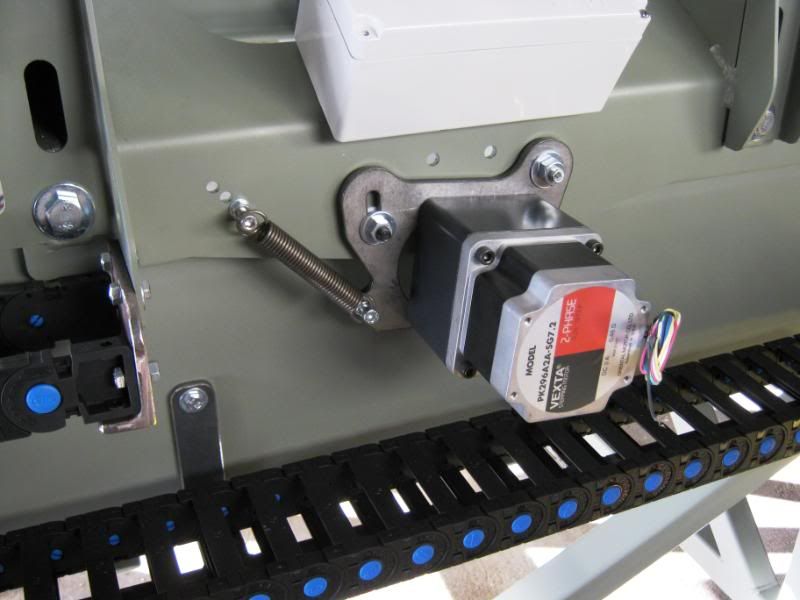 Y gantry motor all mounted. 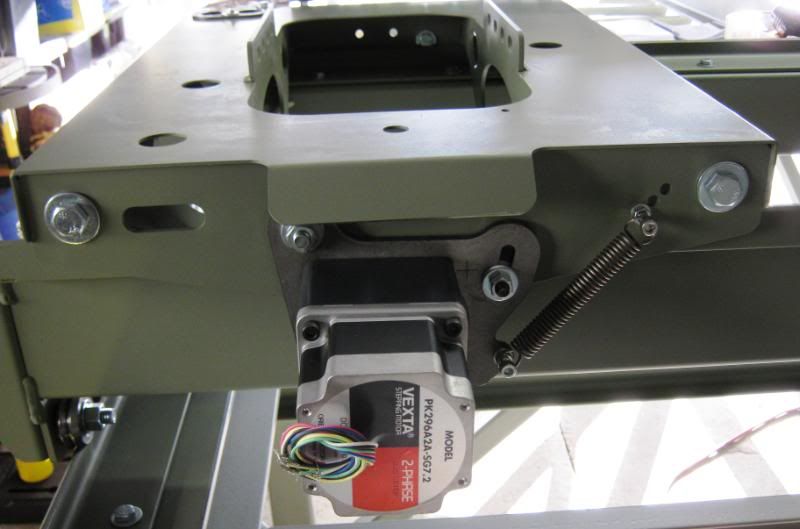 Idler arm mounted to the car for the Y axis. 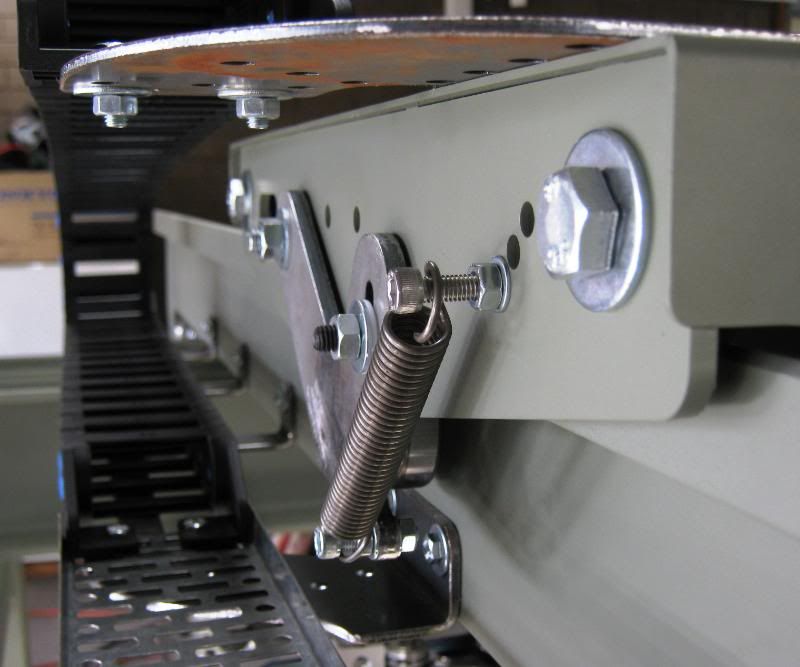 Z axis being fitted. 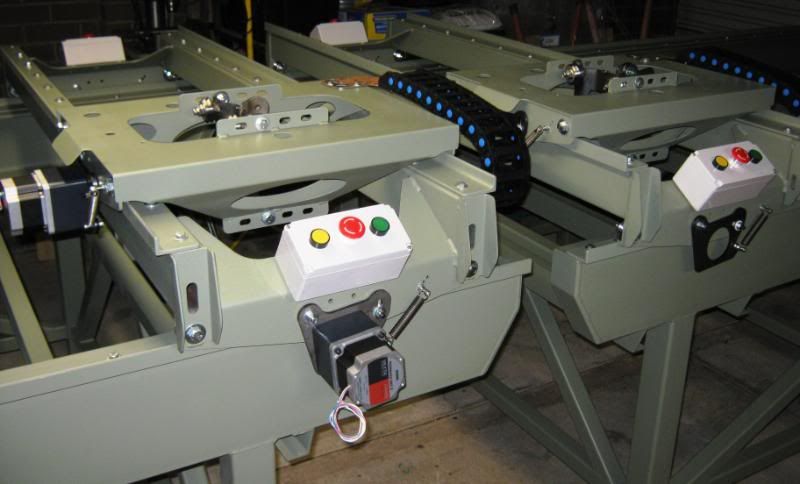  And a couple of random shots showing our overall progress on both MM's. 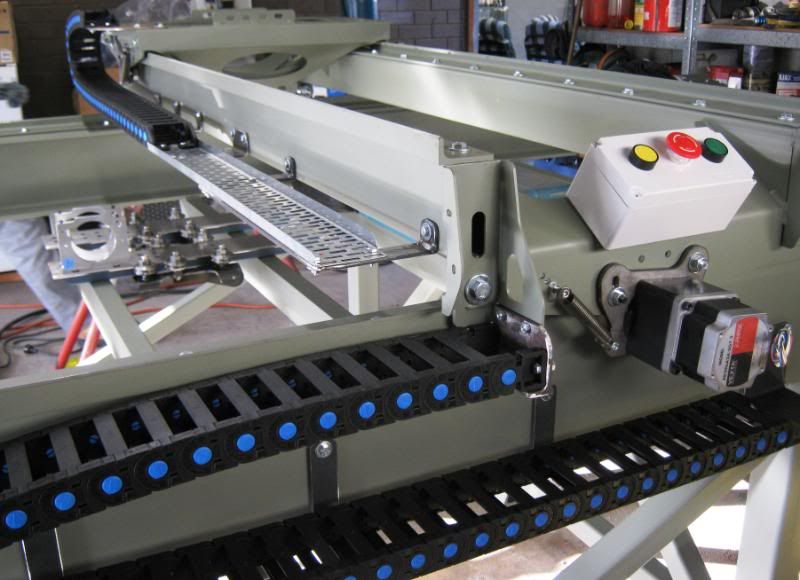 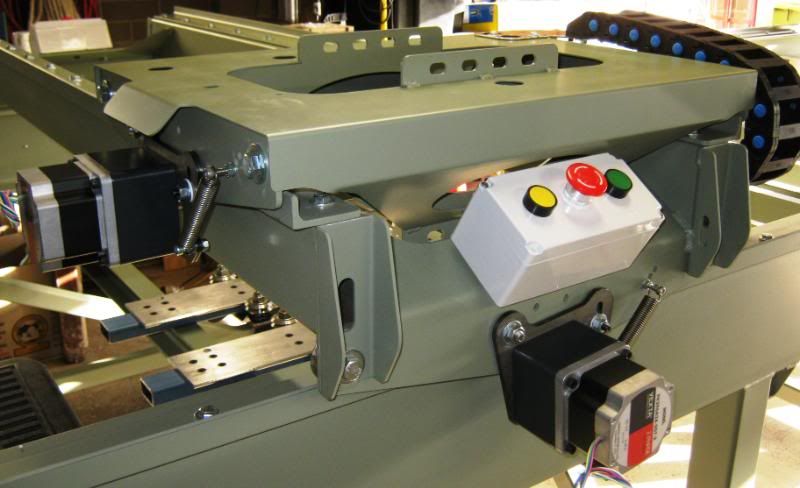 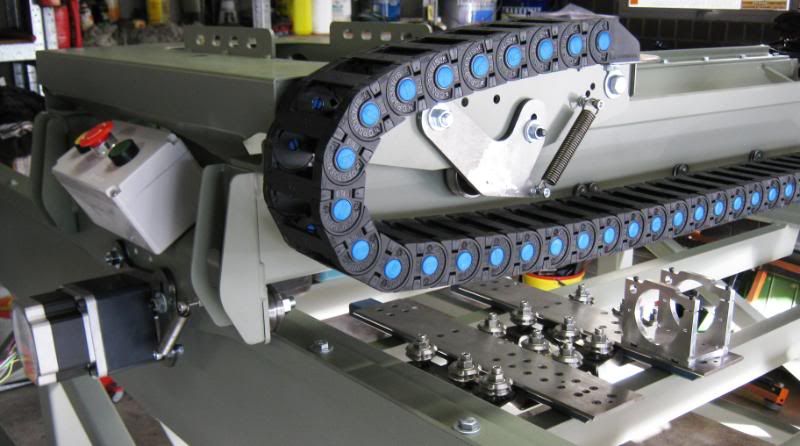 Overall a pretty good days work!! boy will I sleep tonight We still have a few things to purchase and few other bits and pieces to follow up on, but almost getting to the stage where we will be pulling it down for painting Cheers Tony.
|
|
#213
Sun 30 May 2010, 04:58
|
|||
|
|||
|
Well done those machines are really going to look good when finished.
|
|
#214
Sun 30 May 2010, 08:09
|
|||
|
|||
|
Pulling down for painting?
 And there I was thinking the military olive drab is quite appealing.
|
|
#215
Sun 30 May 2010, 11:42
|
|||
|
|||
|
Me too Gerald
I like the color and the contrast it makes with the cable chain, motors..etc. Very nice job guys, keep it up. I admire those welds. I covered mine (sorry Gerlad)  with lots of plastic steel. with lots of plastic steel.
|
|
#216
Fri 04 June 2010, 02:35
|
|||
|
|||
|
Haha!!
Our machines will be a nice blue colour once finished  Been catching up on some other little bits and pieces for all the gantry and car stops. No need to worry about the stops Mike 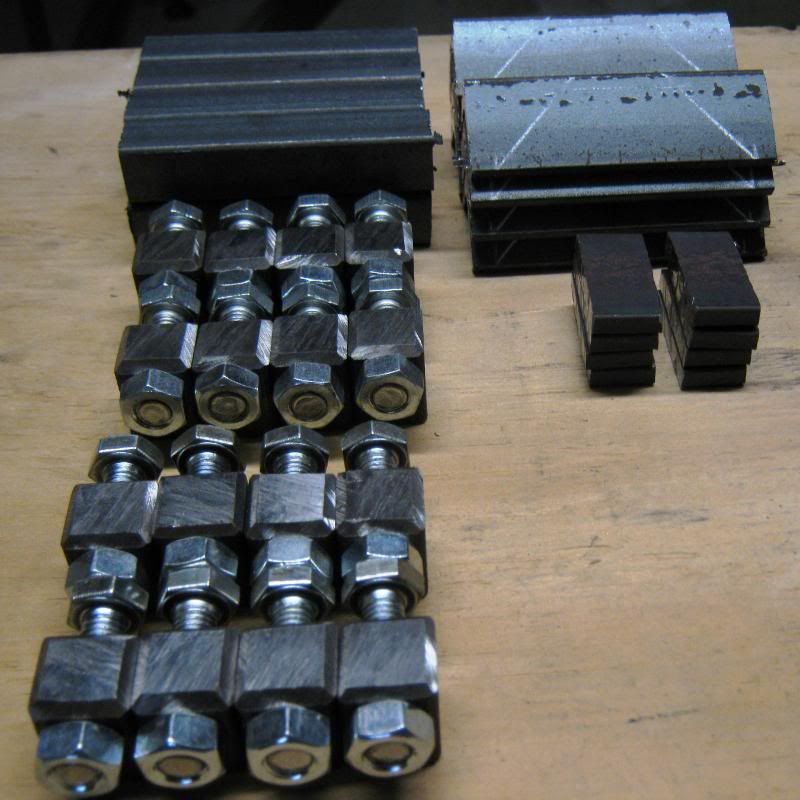 More work happening tomorrow all going well. Cheers Tony.
|
|
#217
Fri 04 June 2010, 13:50
|
|||
|
|||
|
Tony,
You only need one set of stops for the Y car, so you will have an extra set. You really only need 6 units for fabrication.
|
|
#218
Fri 04 June 2010, 16:15
|
|||
|
|||
|
Hi Sean,
Yeh I am aware that each of the cars only requires one stop, but I like the idea of having the two just in case I always like things to stop evenly and not with any sign of jarring, so thought I would fit two just because I can, plus gives it a little bit more massCheers Tony.
|
|
#219
Fri 04 June 2010, 17:40
|
|||
|
|||
|
Understood.
Also, since I have my quality control hat on. Remember that the Y car stops are shorter than the ones used on the x - axis. You might have to take about 4-7mm off the y car set to make them clear. Good luck! SEan
|
|
#220
Fri 04 June 2010, 23:17
|
|||
|
|||
|
Hi Tony, maybe you can send some of those stops to me so that I can square my gantry
|
|
#221
Sat 05 June 2010, 00:35
|
|||
|
|||
|
Sean is right, the tall stops (with screws) are too tall for the y-car . . . . unless your y-rails are taller than 28mm or you grind clearance notches into the laser cut profile of the y-car.
Last edited by Gerald D; Sat 05 June 2010 at 06:34.. Reason: typo
|
|
#222
Sat 05 June 2010, 05:29
|
|||
|
|||
|
Thanks Guys!!
Been in the garage all day again today working on both MM's, come to the Y car stops and had missed that they are a different size, logged onto the forum tonight and sure enough you guys had picked it up!! thanks for the heads up. So I will be cutting the ones down for the Gantry Y Car stops Welded up the Stop/Proxy brackets and mounted them today so thats another job done and dusted 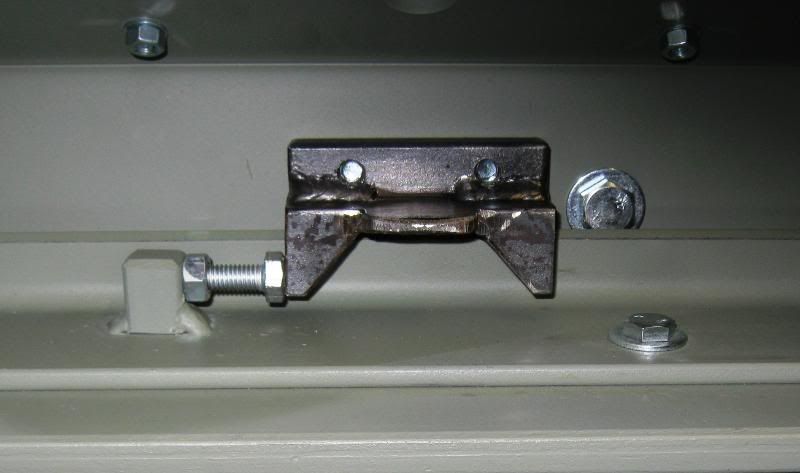 And here is the Y Car ones which will do the job, but will need to be cut down to clear the underside of the car, about 4mm should do the job 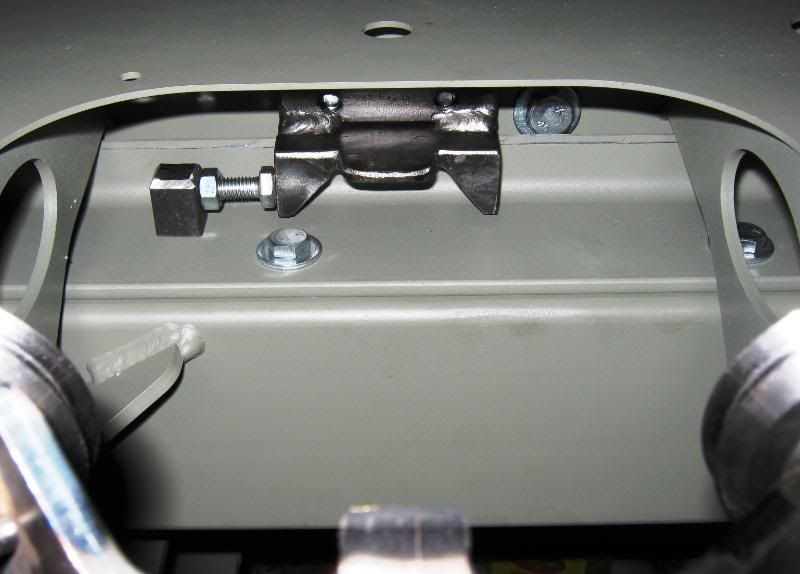 Mounted the Z axis motor mounting plate and hopefully next weekend we should have the rack to the Z and X axis all done!! 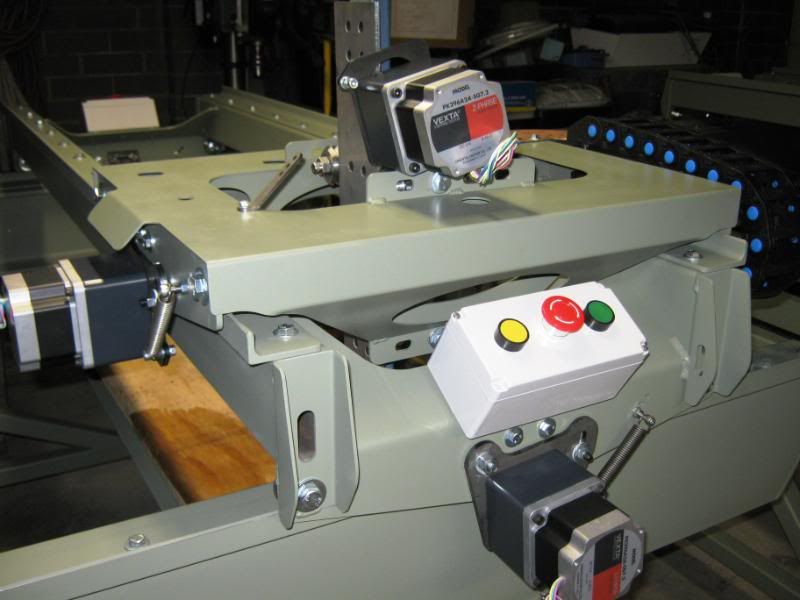 And lastly mounted all the Geckos to our heat sink as well as the fan and covers to keep them all nice and cool  Still lots to do, but can see the end in sight, after another 2 or 3 weeks we should hopefully be starting the finishing run!!  Cheers Tony.
|
|
#223
Sat 12 June 2010, 04:25
|
|||
|
|||
|
Update,
Took a while to get motivated today as it was fairly cold in the garage this morning. Cut and mounted both racks to the Z axis's, also started preping and welding the racks for the X axis. Lost some time today due to breaking drill bits and a tap, but got there in the end. I should not complain I guess, as we are nearing the end of the main part of the build. Hopefully next week should see the racks finished and all going well the Z's as well. Off to do some reading on the gas struts for the Z's Cheers Tony.
|
|
#224
Sat 19 June 2010, 05:44
|
|||
|
|||
|
Todays Update!!
Welded and adjusted all the adjustable stops to the Y gantry, sure does stop the car nice and smooth having 2 stops at each end. no jarring of the car.  Modified our spindle mounts so that they clear the v wheels of the spiders. 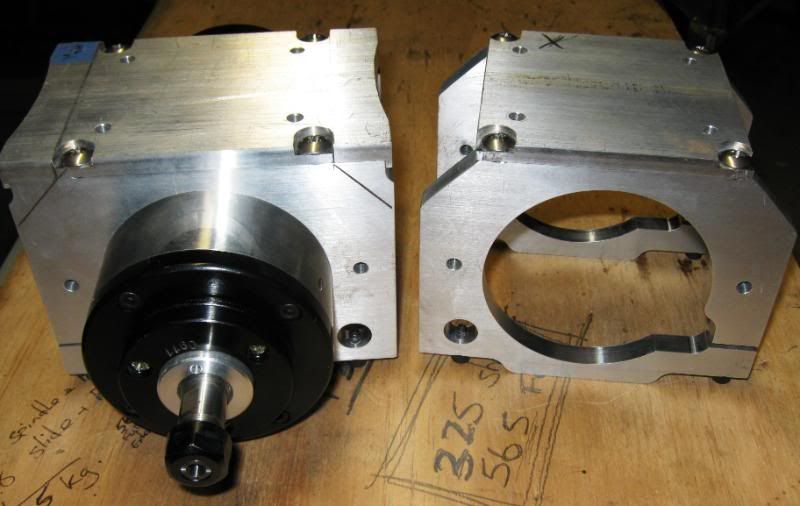 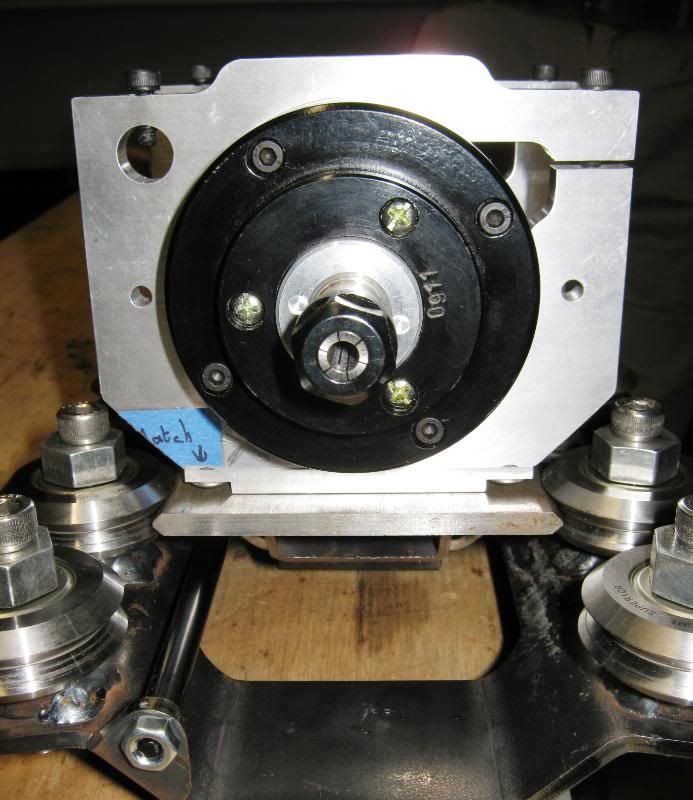 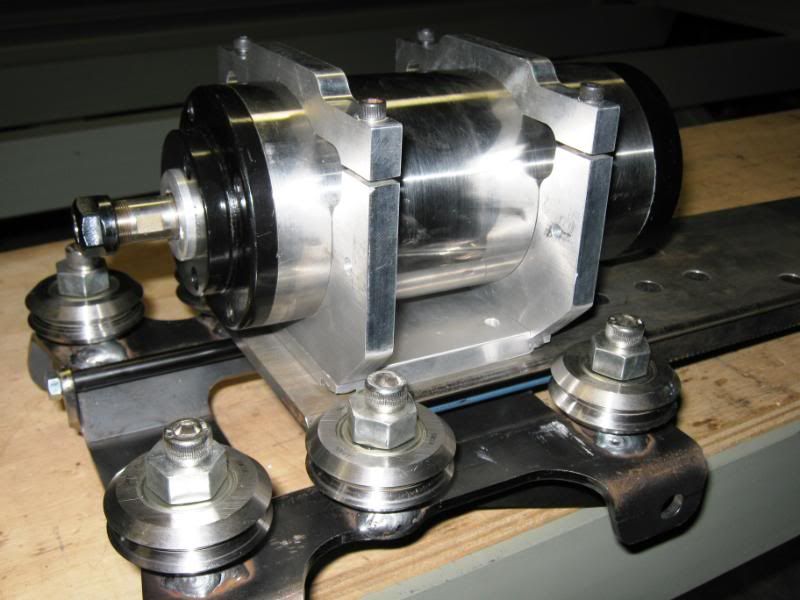 Also mounted our supports to the back of our spiders for support of our dust extraction, need to do a little bit more homework on the dust extrasion setups, I have a preference for the dust foot to travel up and down with the Z axis. 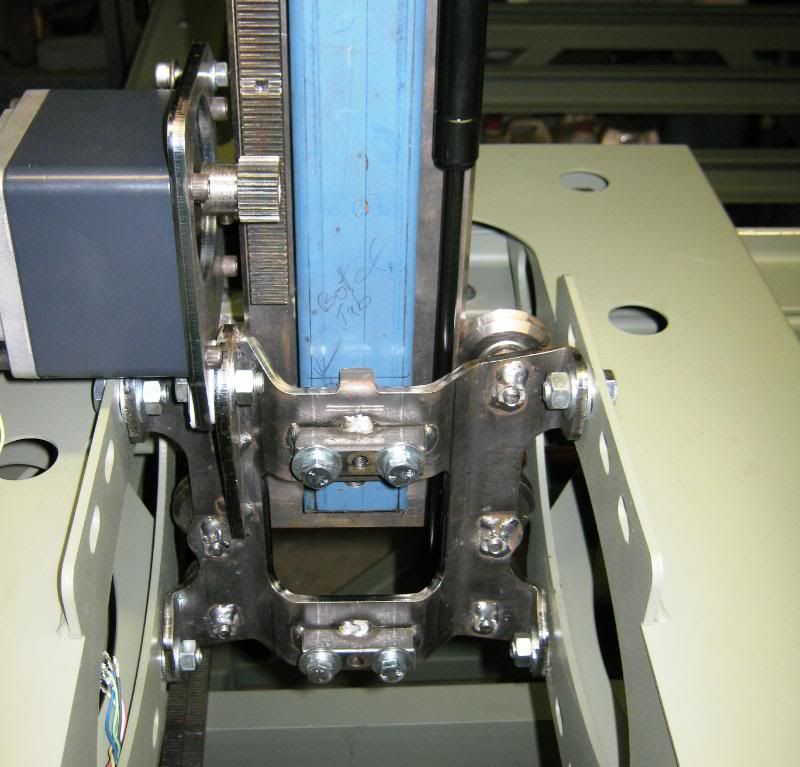 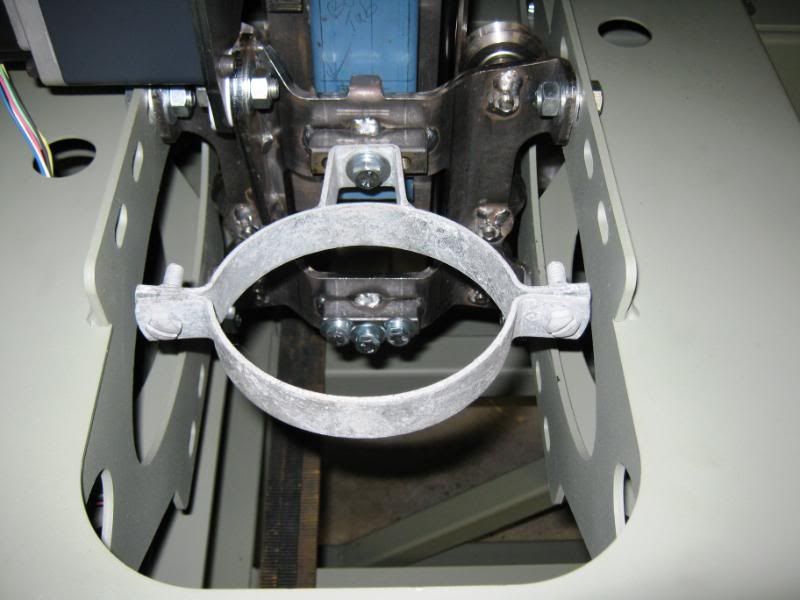 Also got all the X axis and Y axis racks welded. Spindle mounting plate and Z axis E-chain to finish and then its pull down for that nice shade of blue paint Cheers Tony.
|
|
#225
Sun 20 June 2010, 02:41
|
|||
|
|||
|
Mechanical Build now Finished Electrical WIP
Todays Update,
Made up a couple of little angle brackets and mounted the Z axis E-Chain. Also fitted the control box to the car.  I also mounted the proximity sensor for the Y axis car and both the proximity sensors for the X axis and fed all the proximity wires into the nearest control box. 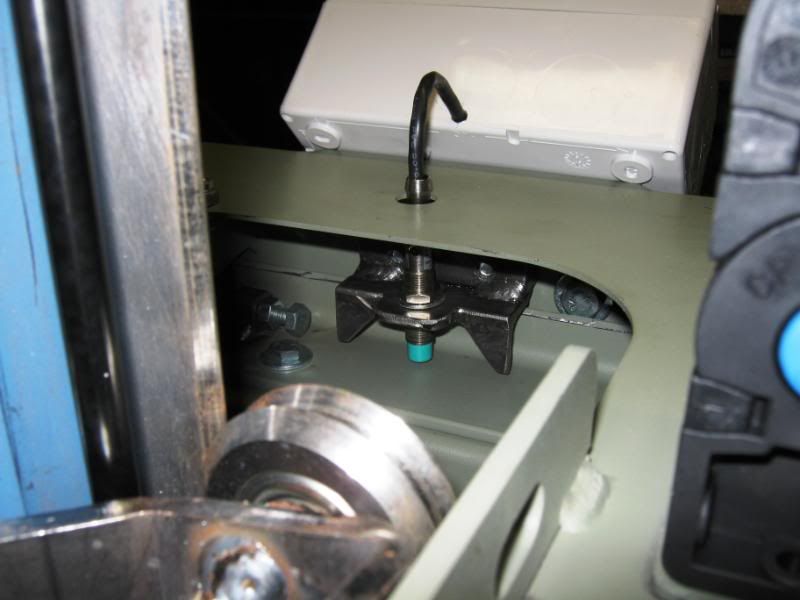 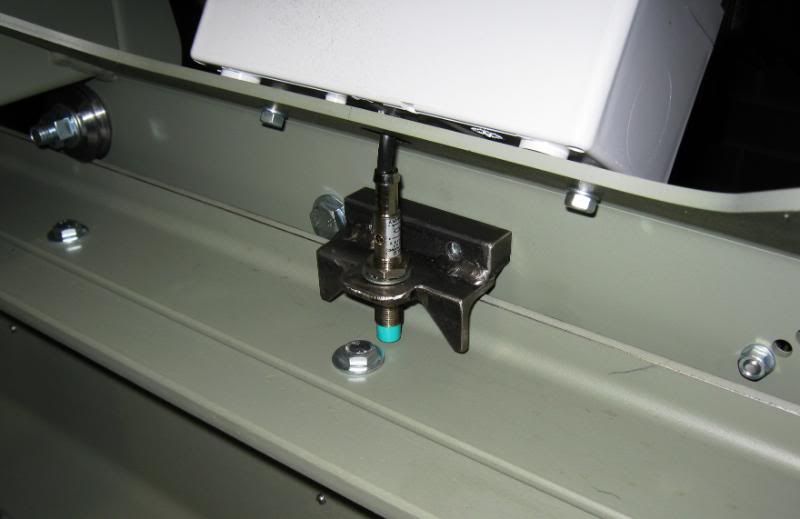 So that is all the mechanical build now finished. Now ready to start pulling down and let the painting begin Cheers Tony.
|
|
#226
Sun 20 June 2010, 04:29
|
|||
|
|||
|
Great job, Tony. Looks "finished". Really nice pictures, too...lighting and clarity are wonderful.
|
|
#227
Sun 20 June 2010, 09:39
|
|||
|
|||
|
Re second pic; where is the hole that triggers the prox switch?
|
|
#228
Sun 20 June 2010, 15:32
|
|||
|
|||
|
Gerald,
You have a good eye for picking up on the things others miss I will be drilling all the proxy holes, in all the rails when I remove the rails from the table and gantry for painting, not a big job and need to touch up around the stops with primer anyway Cheers Tony.
|
|
#229
Sun 20 June 2010, 17:07
|
|||
|
|||
|
Gerald and Tony
The adjustment Tony has included in the Y rail stoppers moves the proxy holder back into the clear away from a bolt holding the rail down, a fit up to would have been required to see where to drill the hole. Tony when you get some time I would appreciate any details of the gas spring you have selected as I feel the length specification I initially gave you was incorrect. Yesterday I found on the plans a spec of 350mm throw for the 250mm slide. Hope you spotted this and did not buy one without doing your own calcs as a check. Regards Ross
|
|
#230
Sun 20 June 2010, 23:37
|
|||
|
|||
|
Hi Ross,
After trying to find some info on the gas springs available, and what was required by design, I decided to get it right. So I thought it was best to take the whole spider assembly to Ron at http://www.gasstrutsales.com.au/ With Ron I looked at the min and max travel of the Z and worked out the best gas strut from there. Ron gasses them in his workshop to the force you advice, I went 15kg. However he is able to increase that later if so required. Be carefull with the diameter of, and the positioning of the gas strut as it can hit the spider plate. For your reference we used the 18mm diameter gas strut, which provided slightly more clearance. If you need any further info drop me a note, will give you a call later. Cheers Tony.
|
|
#231
Sat 03 July 2010, 03:21
|
|||
|
|||
|
Ready for Some Blue Paint !!!
Latest Update!!
Has been a bit slow the last couple of weeks, however we managed to do some more work today. First on the list was to dismantle everything right down to the last nut and bolt. Then we drilled all the 20mm holes in the rails for the sensor switching. Paul also done some prep on my control panel so that is now well underway. I also surfaced my spider using the top of my table saw, some contact adhesive and some wet and dry sandpaper, took about 5 to 10mins and now it sits perfectly on the table saw top. 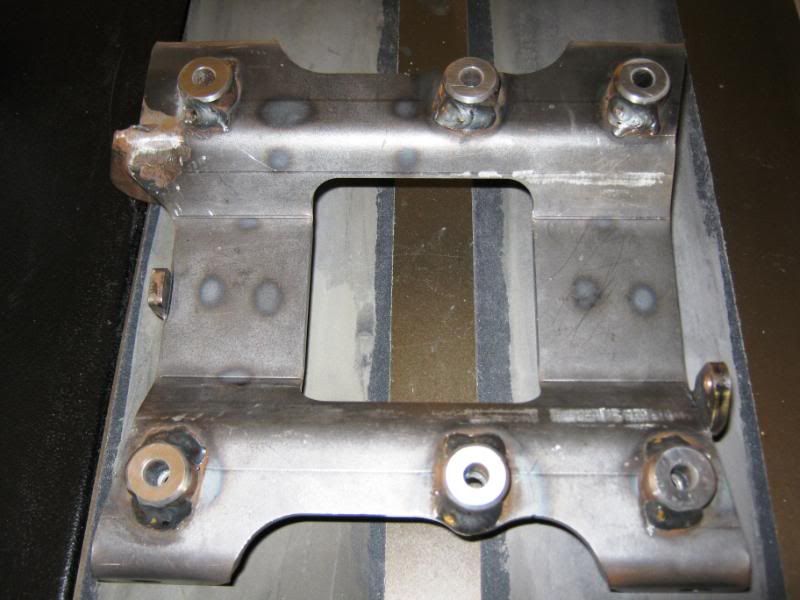 couple of pics with both MM's dismantled ready for all the small parts to be preped and primed and all the larger parts ready for that nice new shiny Blue Paint!! just too cold at the moment  I sure do hope it warms up again sometime soon!! I sure do hope it warms up again sometime soon!!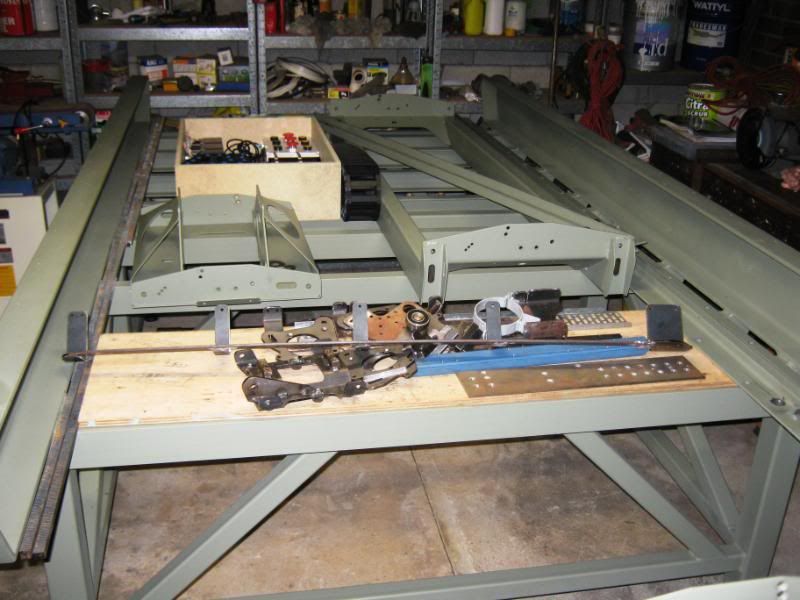 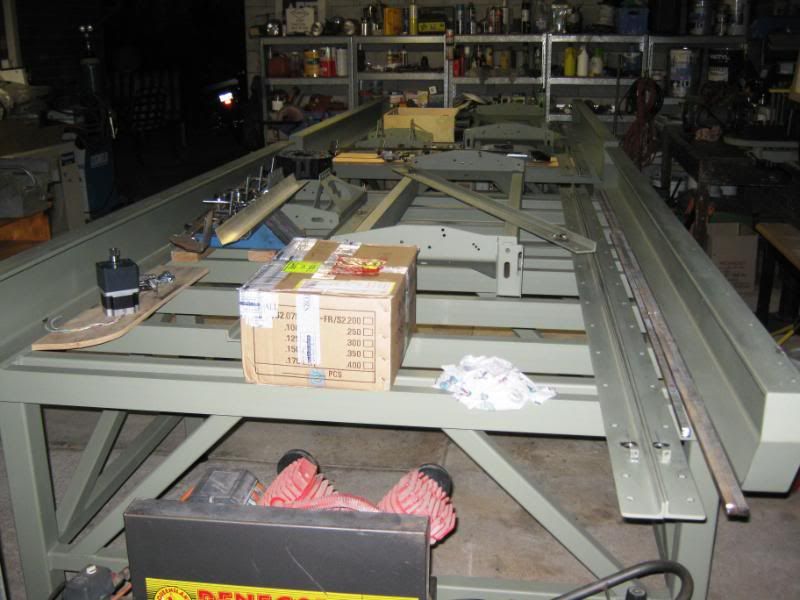 Cheers Tony.
|
|
#232
Tue 06 July 2010, 17:56
|
|||
|
|||
|
Great Job
Tony having a look at all the others you and Paul have done a great Job.
Would love to one day come and have a look once you have it painted. Cheers Peter
|
|
#233
Sat 17 July 2010, 06:50
|
|||
|
|||
|
Hi Pete!!
Not a problem to visit one day sent you a Pm just let me know when suits and we can arrange, although it might be better once we start to re assemble as there is really not much to see at the moment except a lot of parts lying around Todays Update!! Not much left to do now!! finished modifying the last of the spindle mounts and we tried out our quick release mounting plates for the spindle which are working well.  Also mounted a piece of flat to the back of the spider to take the Z sensor, the sensor will detect on the heads of an upper and lower bolt which is tapped into the back of the 50 x 25 RHS. We are going to look at using a shorter sensor to clear the dust extraction or heat and mould a recess into the Pvc pipe to clear the sensor we have. 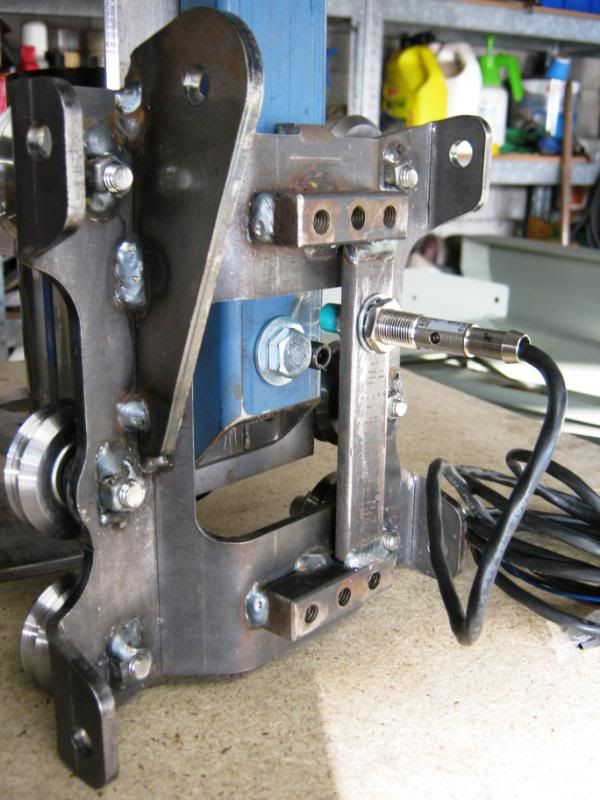 Hopefully back onto finishing off the preping and priming of all the smaller parts brackets and motor mounts, before then starting the top finishing coats. Cheers Tony.
|
|
#234
Sat 17 July 2010, 21:11
|
|||
|
|||
|
Hi All,
We as in Paul and I purchased two 1.5hp 240v single phase 10amp 1600cfm dust extraction sytems yesterday for our MM's they might even be the right colour Assembled mine this morning and fired it up!! it is reasonably quite as far as dust extractors go so thats good. 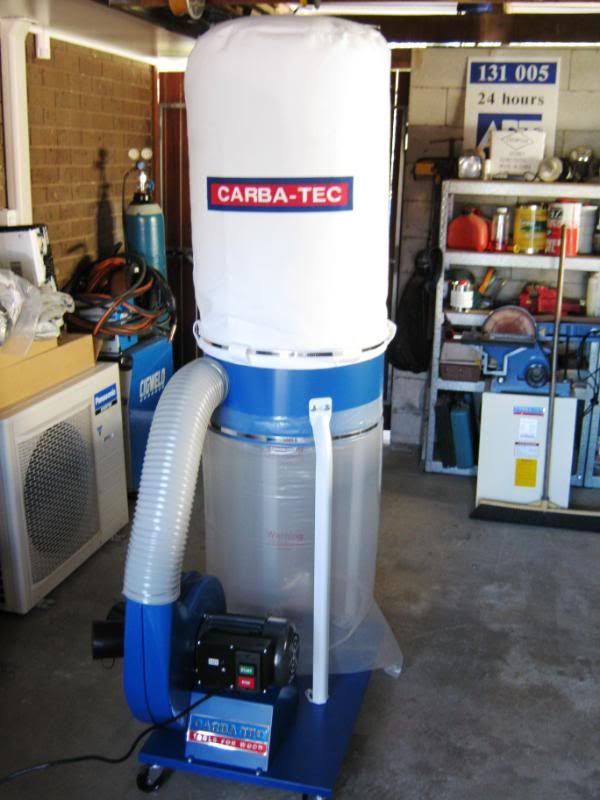 Modifications to improve the dust extraction will happen further down the track, once good old MM can cut it's own parts to do so. The dust extractor also has a double inlet so I guess that is going to come in handy for the table saw dust extraction too We also bought a couple of part kits with blast gates and fittings so should be able to set it all up to work pretty efficiently with my other equipment. 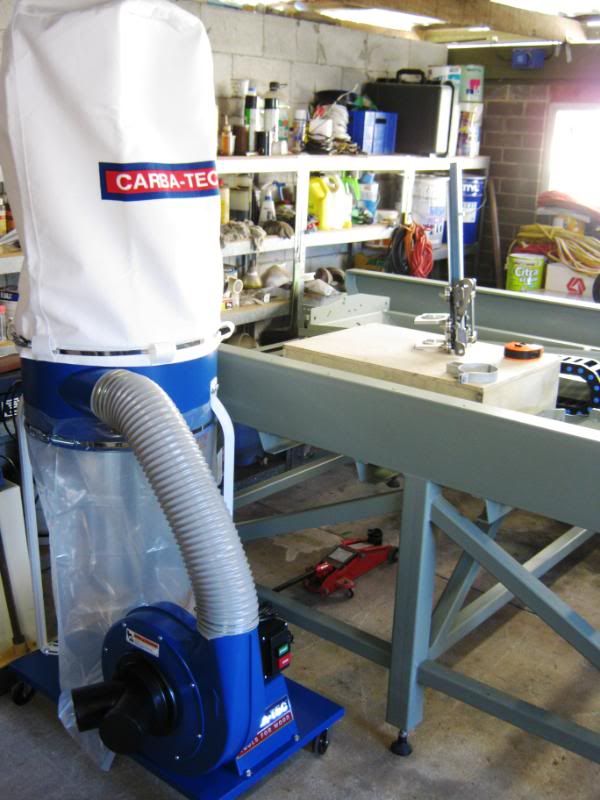 Cheers Tony.
|
|
#235
Sat 24 July 2010, 04:37
|
|||
|
|||
|
All prep & Priming complete
Todays Update!!
Finally !! we are now at the stage for final top coat painting Skippy and I preped and primed all the smaller metal parts today as well as the touch ups to all the rails where we mounted the rail stops and drilled the holes in the rails for the sensors. We also preped and primed the Z axis components and all E-chain brackets and mounts, as well as all the racks. Some of the shiny parts before priming!! 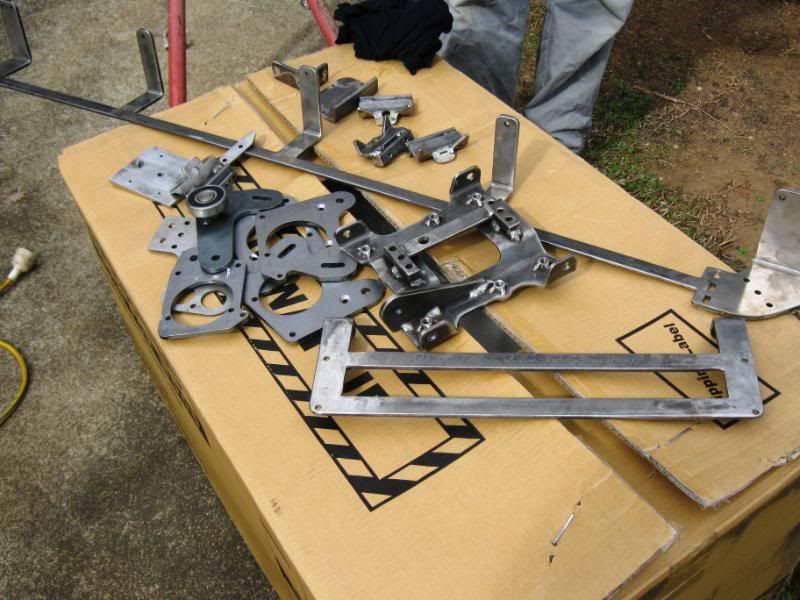 Our simple little setup made the painting nice and quick and very easy. 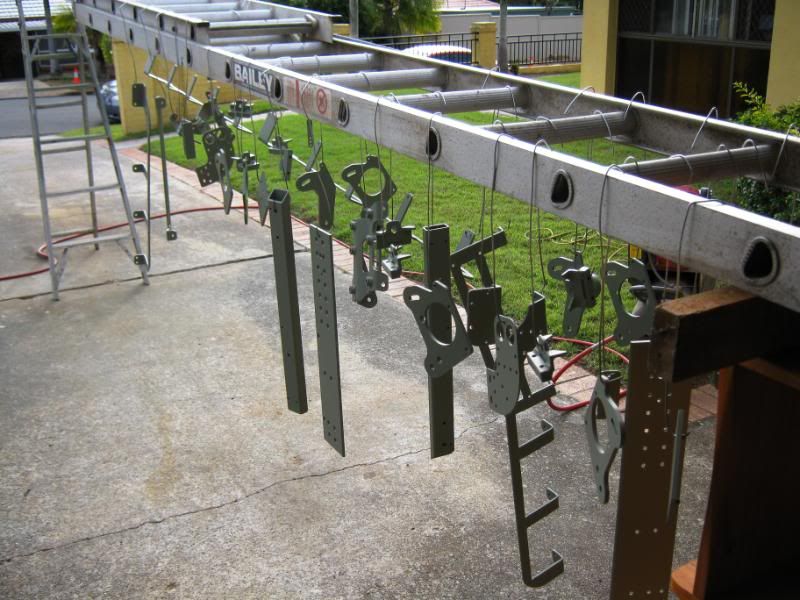 And the finished results !! 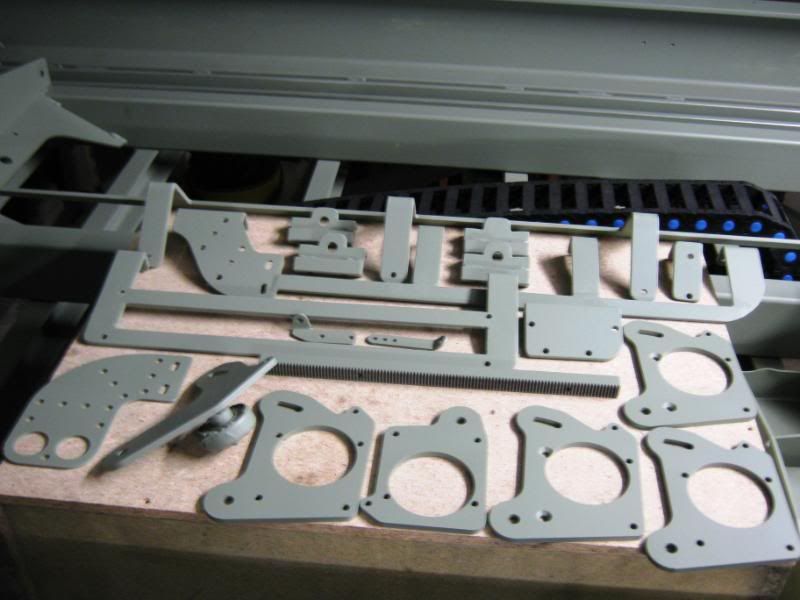 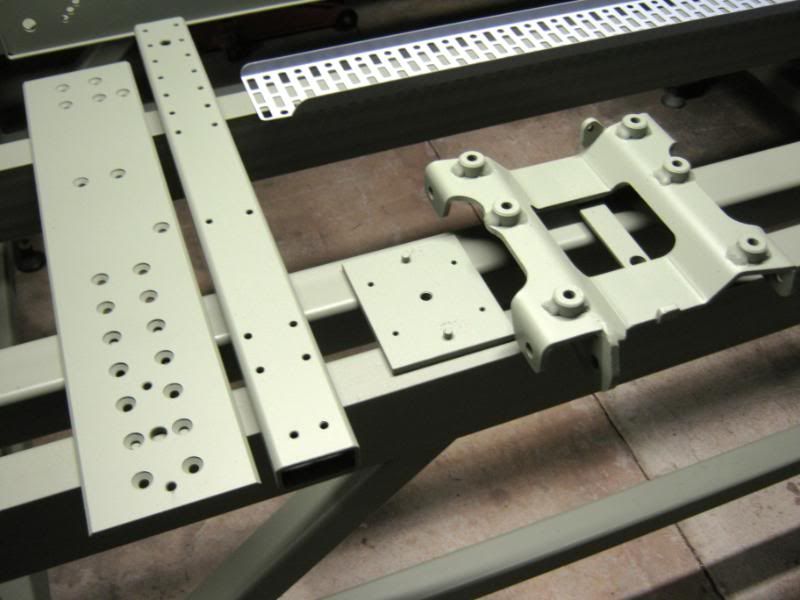 And everything together. 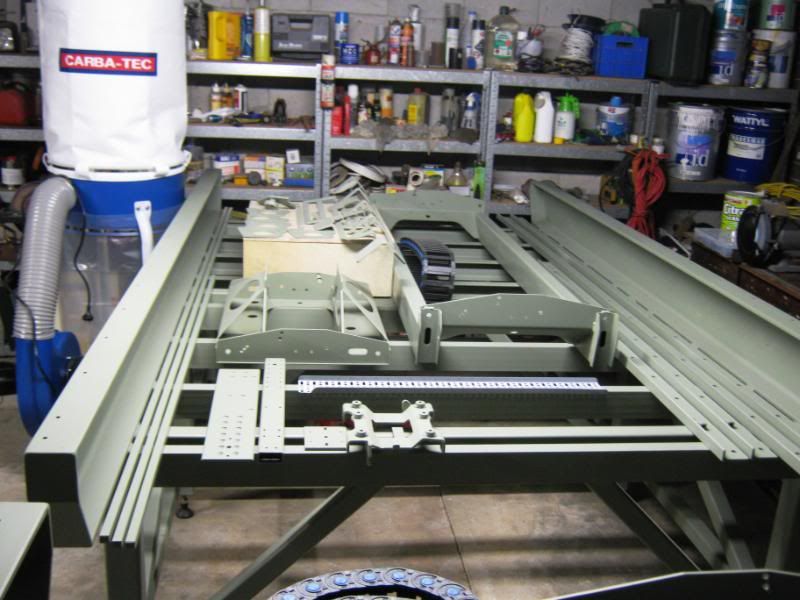 Cheers Tony.
|
|
#236
Sat 24 July 2010, 05:05
|
|||
|
|||
|
Tony - you said you would paint and paint you did.
Your preparation and work flow is as I have come to expect. I see some 25mm box section -my guess is you are thinking about dust collection pipes already, sure is no flies on you fella. Regards Ross
|
|
#237
Mon 26 July 2010, 08:51
|
|||
|
|||
|
Progress is coming along nicely
Ive just purchased a welder for my build and have to get myself a cut off saw in the next few weeks. Have you got any info on where you got yours from and a Brand/Model or price? Im not too sure if I should go an abrasive or cold cut off saw. Price will be the decider, But if its not too much more it will be worth it in the long run. John
|
|
#238
Mon 26 July 2010, 09:16
|
|||
|
|||
|
Saw
Hi there,
Where possible I would try to get the cold saw, we purchased ours of ebay and it's been great. I still cant believe how quick and easy they cut. Chris
|
|
#239
Mon 26 July 2010, 18:07
|
|||
|
|||
|
I love the « bailley » paint rack
Nicely going .. Congrats Robert
|
|
#240
Wed 28 July 2010, 18:25
|
|||
|
|||
|
Quote:
Definately worth going with the Cold cut saw, however it's probably double the price of the normal chop saw, but cuts through the steel with ease and accuracy. I bought mine through QLD Tradetools look them up on the net. Cheers Tony.
|
 |
|
|
 Similar Threads
|
||||
| Thread | Thread Starter | Forum | Replies | Last Post |
| Making Skins #74 - Brisbane Australia | Surfcnc | MechMates already cutting | 1078 | Sun 20 September 2015 11:05 |
| Touch Probes Have Arrived #72 - Brisbane, Australia | skippy | MechMates already cutting | 130 | Mon 04 March 2013 04:31 |
| Do my legs look fat? - Brisbane Australia | tangocharlie123 | Construction started, but not cutting yet | 60 | Wed 22 June 2011 06:32 |
| New member - Brisbane Australia | stan stuart | Introduce yourself and start planning | 3 | Tue 11 May 2010 20:48 |
| Commercial Signs | Hugo Carradini | The Show Room | 17 | Wed 21 January 2009 22:51 |


