|
#181
 Tue 04 May 2010, 07:11
|
|||
|
|||
|
Hi Tony,
I use a short length of flexible washing machine discharge hose because they are sitting infront of me... rather then a cable chain for the Z-slide, IMHO, I'm only carrying a 4-core shielded spindle power cable & the 2x 6mm water tube for the spindle is stiff enough to be left dangling in the air without any harm., cable chain is over-kill for my purpose, I don't like to expend more then required if I can help it, its a hard habbit to break... your choice may very. About the grinder, I'm serious with the statement. When I was running a 30 man strong steel fabrication workshop (yes, I ran the shop but unfortunately, I'm not among the workforce & I don't like to sit in the office for too long & leave everything to the supervisors...), we use ANY grinder for ALL kind of works & as long as we allow the grinder to cool down & work within their limits, they can last longer then they are worth. Maybe steel in our part of the world is softer then others  
|
|
#182
Wed 05 May 2010, 04:36
|
|||
|
|||
|
I dont think its got anything to do with the steel Ken!! and definately nothing to do with how the grinder was used, let me assure you of that!! I think its got more to do with they do not make things like they used too!! My old 4"Hitachi grinder I have had for twenty odd years and over those years it has had some very serious heavy use in those twenty odd years and is still going strong, it is built better and works harder than all the new plastic stuff we have on offer nowadays.
Cheers Tony.
|
|
#183
Wed 05 May 2010, 05:03
|
|||
|
|||
|
I think it has everything to do with duty cycle and cooling. Our rail cutting and grinding operations can be close to continuous duty for tools that are designed for short bursts of use (at least in the modern designs). There is a trade-off between how many cooling breaks you are willing to take (time) and how hot your grinder gets (tool life). I used frozen gel packs to speed the cooling time of my grinders, but in the end, the disposable $20 HF grinder was ... disposed. The better built Milwaukee survived, even though it was run hot. If I'd run the grinders at what I consider appropriate duty cycles to save the tool, it would have taken me three times as long to complete the job, so I was willing to take the risk and burn out the cheap grinder.
|
|
#184
Wed 05 May 2010, 20:53
|
|||
|
|||
|
Quote:
I can only say michines built in the "old" era was over engineered because the people that created & using them did not have all the understanding of the equipment then... so they over-built them for that "just-in-case" scenario ... & look as us human, we generally live longer & also more knowledgeable. who can deny that? Quote:
|
|
#185
Thu 06 May 2010, 04:34
|
|||
|
|||
|
I would still have an older car over any new car any day built to last they were!!
 Lets just get on with the MM build. Cheers Tony.
|
|
#186
Fri 07 May 2010, 04:09
|
|||
|
|||
|
I would still have an older car over any new car any day built to last they were!!
Agreed.. but i still lub my xr6T ^^
|
|
#187
Fri 07 May 2010, 05:27
|
|||
|
|||
|
Quote:
|
|
#188
Fri 07 May 2010, 05:30
|
|||
|
|||
|
Really guys - focus and leave the whole grinder thing ALONE.
Ross
|
|
#189
Fri 07 May 2010, 05:30
|
|||
|
|||
|
Want that be very painfull changing them in the skate each time???
Cheers Tony.
|
|
#190
Fri 07 May 2010, 06:35
|
|||
|
|||
|
Come on Guys new grinder has been purchase and I have it (Been in the boot of my car for last coupe of days) and will be handed over to Tony tomorrow and the other one will be take back to shop for warranty replacement / credit.
 Now can we please leave this topic alone and move on with the Mechmate build. Now can we please leave this topic alone and move on with the Mechmate build.Regards Paul
|
|
#191
Fri 07 May 2010, 22:04
|
|||
|
|||
|
Paul, Tony,
IMHO, the well being of the grinder is important to the build. Especially if one wish to have an uninterupted progress. Unless you enjoy going through the warranty claim chore... I highlight this in all good intention.Anyway, I'll keep mum on this topic here from here on. Pablo, Using 2 set of grinder & skates is a good strategy, if you are in a hurry. but you must be careful with the height & angle setting of the skates. Eventually, taking a laid back attitude toward the grinding process worked best for me, yours may vary.
|
|
#192
Sat 08 May 2010, 06:09
|
|||
|
|||
|
Todays Update,
With the new grinder in hand, all the rail grinding for both tables was completed today And I might add!! I am so glad that job is now out of the way!!My tips for rail cutting and grinding would be as follows. 1. Use the 1mm thick cutting disks and have plenty of them!! 2. After cutting the rails to height I would suggest using a grinding disk and grind the top of the rail flat as the 1mm cutting disks leave the rail with some small humps and bumps due to disk flex which need to be removed prior to grinding the V to maintain eveness in the V. 3. When you start the grinding I found that using a very light chain oil lubricant allowed the head of the adjuster bolts to slide free on the top of the rail without digging in too much. 4. Grind very very small amounts at any given time and practice on a smaller piece before starting on the rails required for your MM, Once you have the feel for it start on your rails. 5. If you have the time design a better skate or use the one that has the bearings incorporated as I think that will provide for much easier use and a better qaulity finish. 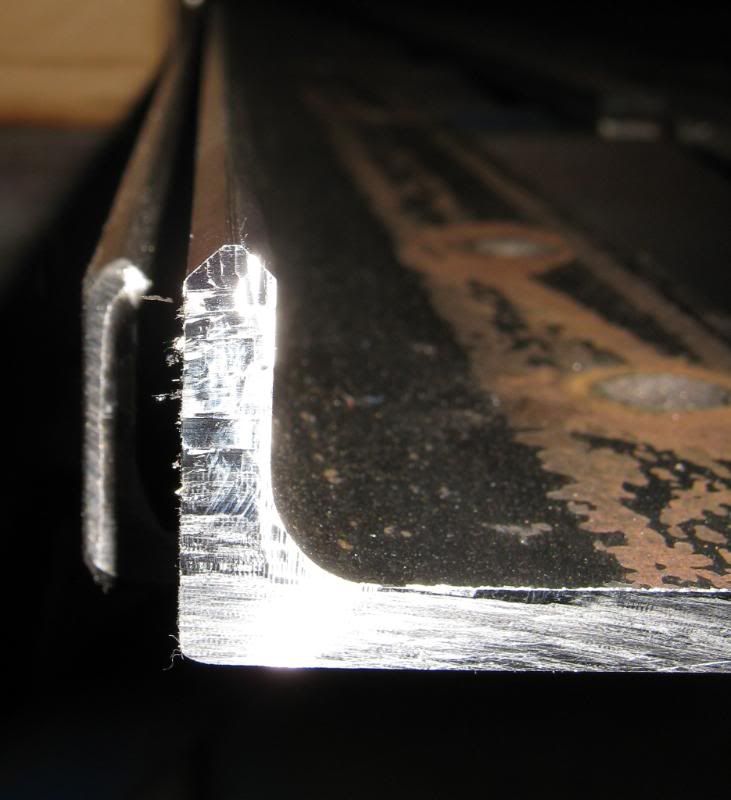 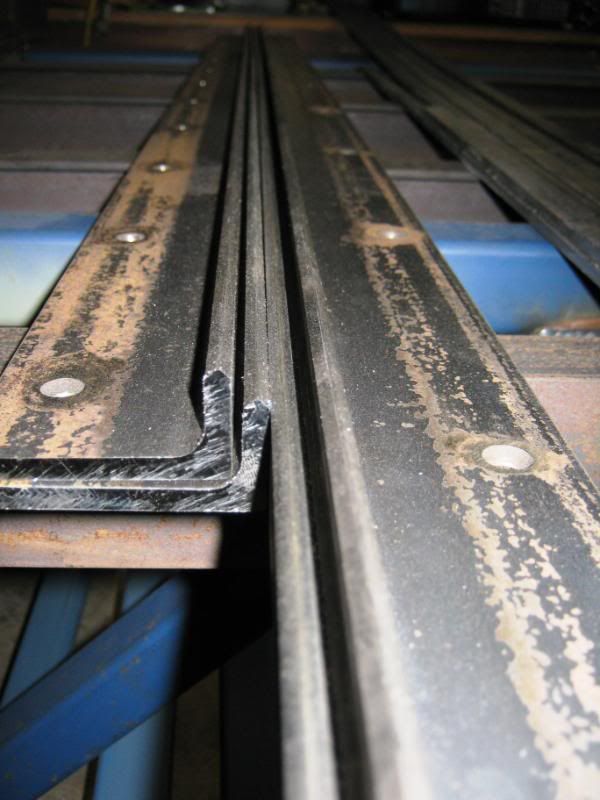 we also got one complete set of X & Y rails all degreased, wire brushed and rust converted and primed.  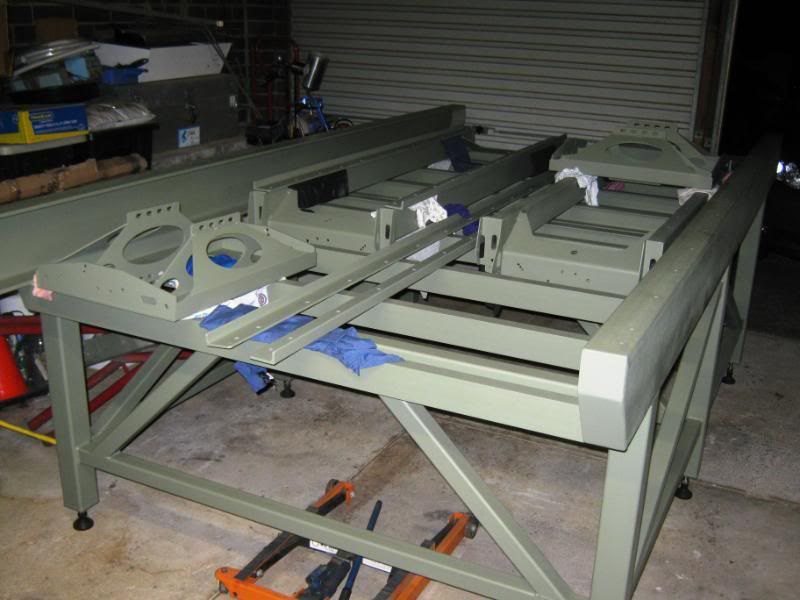 We also cut and prepared all the E-Chain laser cut brackets and used the offcuts from the rails for the E-Chain rail which is attached to the brackets, so hopefully next working day we should have all the rails cleaned and primed as well as the E-Chain brackets Cheers Tony.
|
|
#193
Sun 16 May 2010, 04:52
|
|||
|
|||
|
Update!!
Both tables and both sets of rails are all now in primer and ready to get rolling!! Just need to find someone local for the purchase of shim washers for both the rails and for the adjusting of the V wheels on both the gantry and the car. 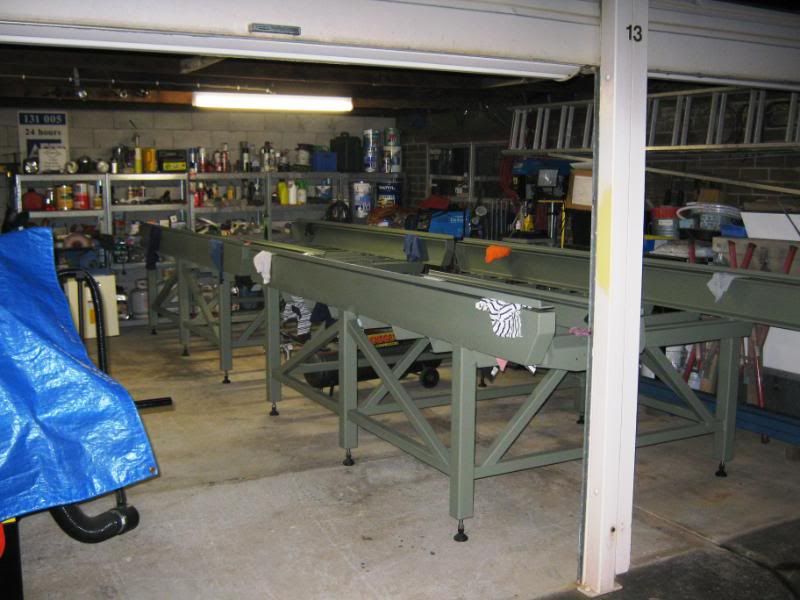 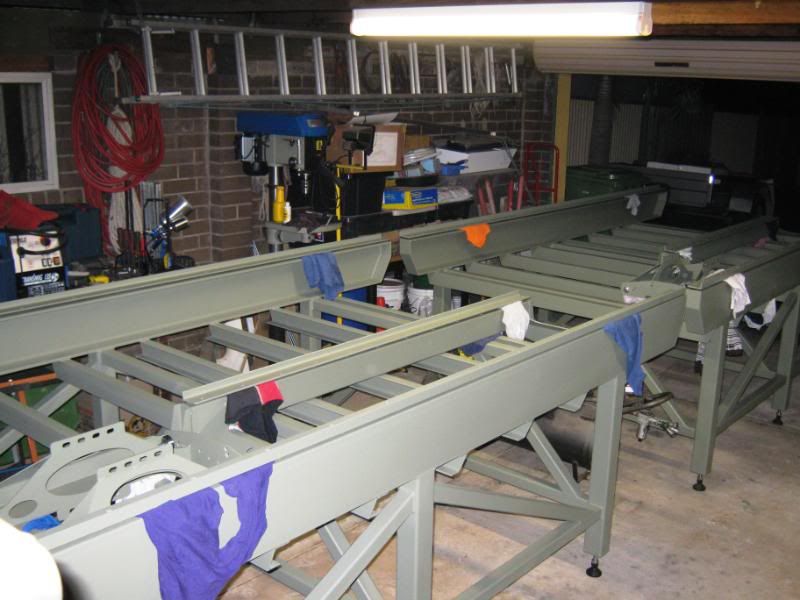 Cheers Tony.
|
|
#194
Sun 16 May 2010, 05:20
|
|||
|
|||
|
Hi Guys.
Looking good. I got our shim washers from the local autoparts store and I also used the shims from my scribing blade on the panel saw so you might want to try your local saw sharpening shop as well. Cheers Chris
|
|
#195
Sun 16 May 2010, 10:17
|
|||
|
|||
|
It will be a pain to use washers for shimming the rails, because you have to pull the screw right out before you can change washers. We use rectangular strips, about 40x10mm, packed either side of the screw. Cut them from drinks cans and any other old scrap.
|
|
#196
Sun 16 May 2010, 23:02
|
|||
|
|||
|
All we need is a piece of dimensionally stable thin gauge sheet stock for the shim. steel, bronze, aluminium, plastics, FRP.... or even titanium, gold or silver
I took Gerald's advise & went with using soda cans as shims. I find the Coke cans has the most consistent 0.1mm thickness, other cans do varies in thickness a little. Gerald also advised on biscuit tins for thicker shims but I can't find enough of them & hence normal washers instead. I punch out shim washers, it does add more preparation & installation chore but once in place I don't have to worry about the shim moving around before tightening the screw. Oh yes, it is a PITA pulling out the screw every time for add/reduce shims. Anyway, I did spend more time then necessary in cross checking this part of the build then other parts of my build. BUT there are many who prefer to buy ready shims, it's a personal choice. One good advantage of can shims is you will have unlimited supply of locally produced shims if you keep your drinking habit
|
|
#197
Mon 17 May 2010, 03:11
|
|||
|
|||
|
Thanks guys,
I found these guys, so all should be good . http://australia.rs-online.com/web/s...&cm_vc=prev_auThese shims should be ideal for the rails, and they have proper shimming washers which should take care of the shimming for the V wheels. Failing that Paul and I have a stash of aluminium cans of Rum & Coke which should make for some good shims, we just need to drink all the rum Cheers Tony.
|
|
#198
Mon 17 May 2010, 03:55
|
|||
|
|||
|
Here is the backup plan for the shims we hope not, but we will enjoy then after a day of build the MechMates
Regards Paul
|
|
#199
Mon 17 May 2010, 06:37
|
|||
|
|||
|
It is easier to do the shimming before the racks are fitted. And remember that if parts of shims are left sticking out, they could foul the rack. (We trim away protruding shim with a strong knife)
|
|
#200
Fri 21 May 2010, 04:34
|
|||
|
|||
|
Rollin!! Rollin!! Rollin!! Raw Hide!!
Decided to do a little bit in the garage tonight and now have both gantrys and cars rolling.
Table # 1 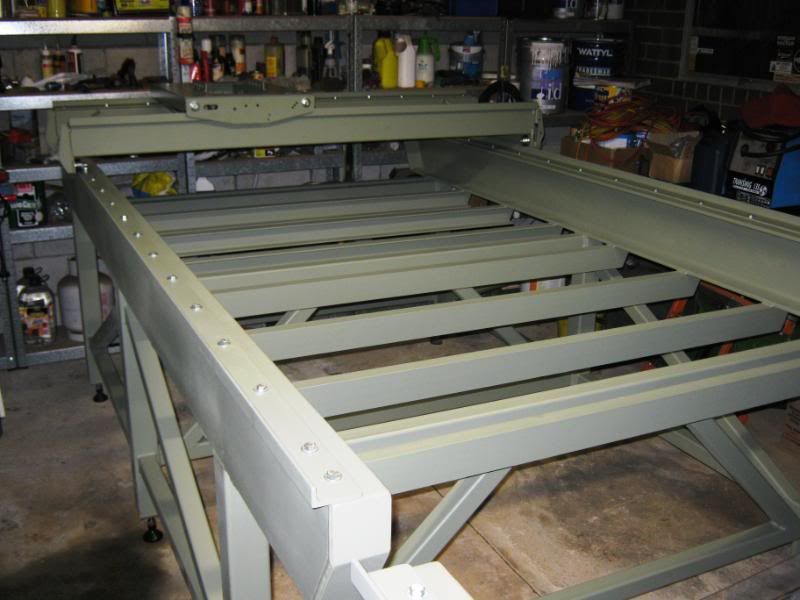 Table # 2 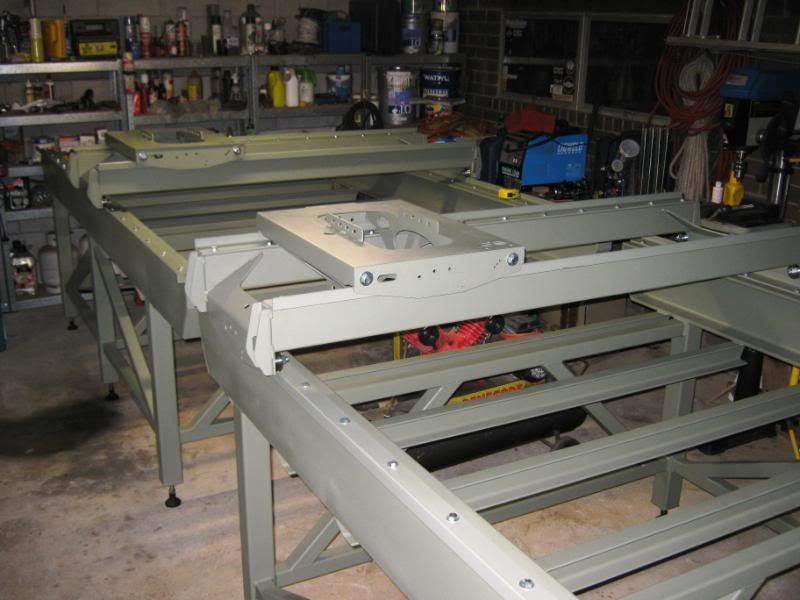 Also picked up our additional E-Chain brackets we required for both tables whilst I was in Melbourne the other day. so should be setting up the E-Chain support brackets, E-Chains and very soon the Z axis
|
|
#201
Sat 22 May 2010, 03:26
|
|||
|
|||
|
Today's Progress,
Finished making up all the E-Chain support brackets for both the Z axis and the Y axis for both tables. We had to elongate all holes in the laser cut brackets and had to make an adapter bracket to attach our X axis E-Chain on to the gantry. X axis E-Chain all mounted 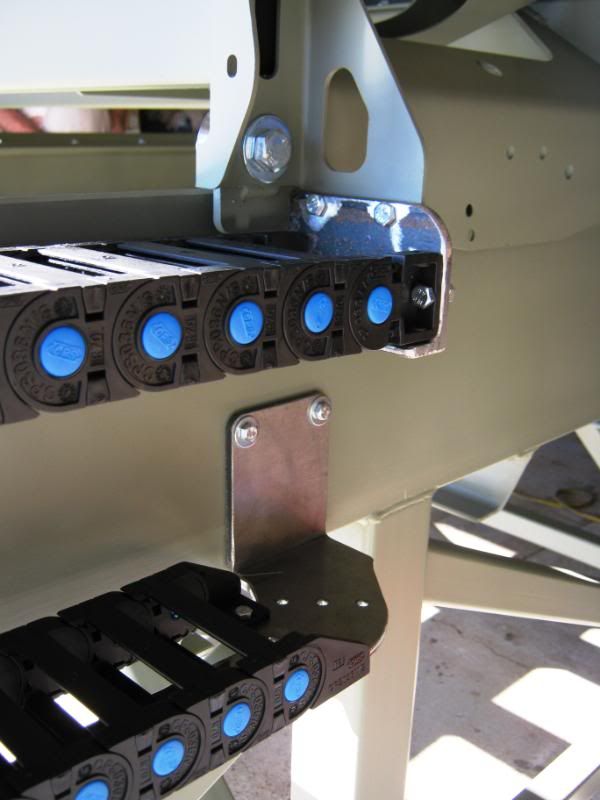 E-Chain Support Brackets all rounded off and slots elongated. 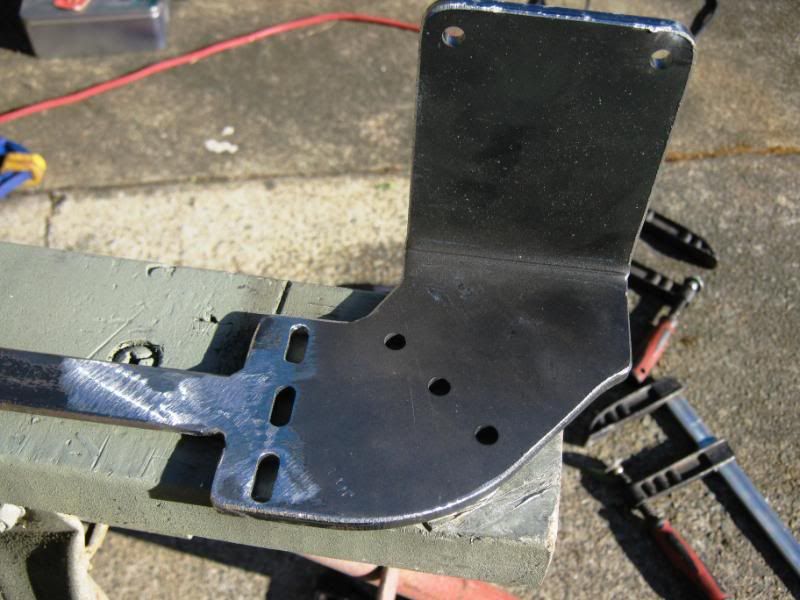 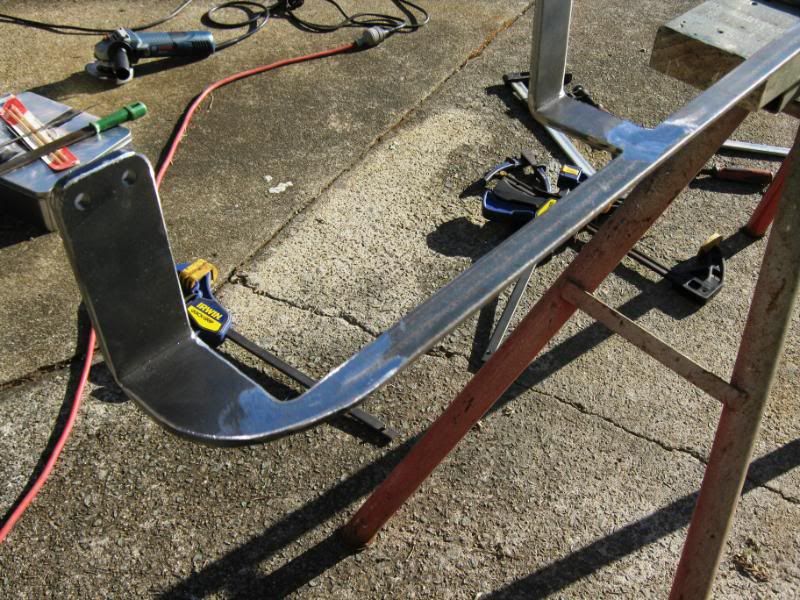 X and Y axis E-Chains all finished to both tables. 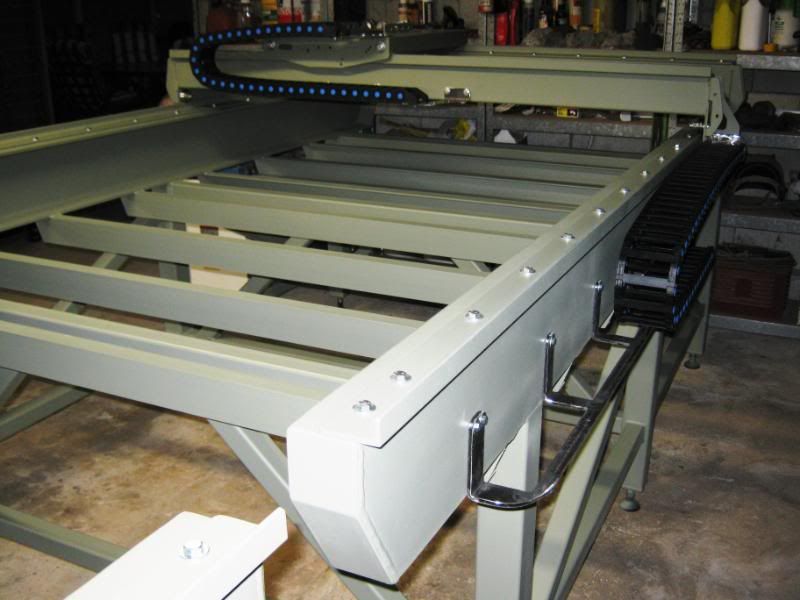 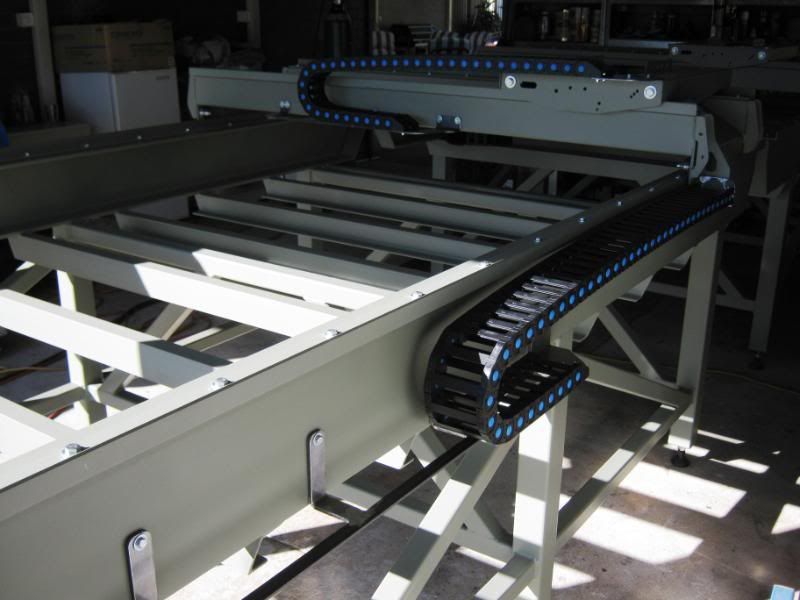 Few more nuts and bolts to purchase, and then we should be making a start on the Z slide. Cheers Tony.
|
|
#202
Sun 23 May 2010, 01:12
|
|||
|
|||
|
Hi Tony And Paul
The attachment bracket to the top of the X axis cable chain is very tidy - a good solution to use the angle and have the end connector sit "on" it. Also the cable chains sit well, they get a big tick in the looks department. regards Ross
|
|
#203
Mon 24 May 2010, 02:50
|
|||
|
|||
|
Thanks Ross
Mounted our push button boxes to each end of both gantry's tonight, tables are starting to look like MM's now Cheers Tony.
|
|
#204
Wed 26 May 2010, 03:49
|
|||
|
|||
|
Let's go back to the shims a second. Start off using the strips ( cause it's easy) then when you are finished count the strips under each bolt and replace them all at the same time with washers of the same material.
|
|
#205
Thu 27 May 2010, 02:34
|
|||
|
|||
|
JR,
Skippy and I ended up purchasing some flat sheet in various thickness's for shimming further down the track, all the other pre cut shims were way too expensive!!  So I think we are all under control again So I think we are all under control again I have also had some interest in our supplier of E-Chains and thought I would post the info here. They also have some other gear of interest too, so yeh check them out. Alistair is a great guy to deal with and very helpfull. Alistair Jansz Sales Representative VGL - Allied Connectors (T) +61 3 9793 4666 (F) +61 3 9706 7010 (M) 0411 405 659 (W) www.alliedconnectors.com Cheers Tony.
|
|
#206
Thu 27 May 2010, 13:01
|
|||
|
|||
|
I think I recall Gerald likes to use EMPTY beer cans for his shims!
|
|
#207
Thu 27 May 2010, 13:23
|
|||
|
|||
|
Only if he is allowed to empty it himself.
|
|
#208
Thu 27 May 2010, 14:48
|
|||
|
|||
|
What happens then when your rails are really bad and you need a LOT of shims?

|
|
#209
Thu 27 May 2010, 16:32
|
|||
|
|||
|
The rails start to look better after a few shims, of course.
|
|
#210
Fri 28 May 2010, 00:52
|
|||
|
|||
|
Hahaha!!! In our case (pardon the pun) its a case of Rum!!!
Now on with the build!! Cheers Tony.
|
 |
|
|
 Similar Threads
|
||||
| Thread | Thread Starter | Forum | Replies | Last Post |
| Making Skins #74 - Brisbane Australia | Surfcnc | MechMates already cutting | 1078 | Sun 20 September 2015 11:05 |
| Touch Probes Have Arrived #72 - Brisbane, Australia | skippy | MechMates already cutting | 130 | Mon 04 March 2013 04:31 |
| Do my legs look fat? - Brisbane Australia | tangocharlie123 | Construction started, but not cutting yet | 60 | Wed 22 June 2011 06:32 |
| New member - Brisbane Australia | stan stuart | Introduce yourself and start planning | 3 | Tue 11 May 2010 20:48 |
| Commercial Signs | Hugo Carradini | The Show Room | 17 | Wed 21 January 2009 22:51 |


