|
#301
 Wed 27 October 2010, 23:06
|
|||
|
|||
|
Kobus,
See what turned up in the mail today. Already been playing around with it, as I was able to download it and register it once I had paid for it. No fuss and quick service from the Aspire guys!!  What I have seen of it so far I'm impressed   Cheers Tony. 
|
|
#302
Thu 28 October 2010, 03:55
|
|||
|
|||
|
Ok Ok rub it in...

|
|
#303
Sat 30 October 2010, 06:19
|
|||
|
|||
|
Todays Update!!
We started the day by finishing off the last of the wiring to my table, we were also able to pre cut some of the wiring for Pauls table whilst doing mine. 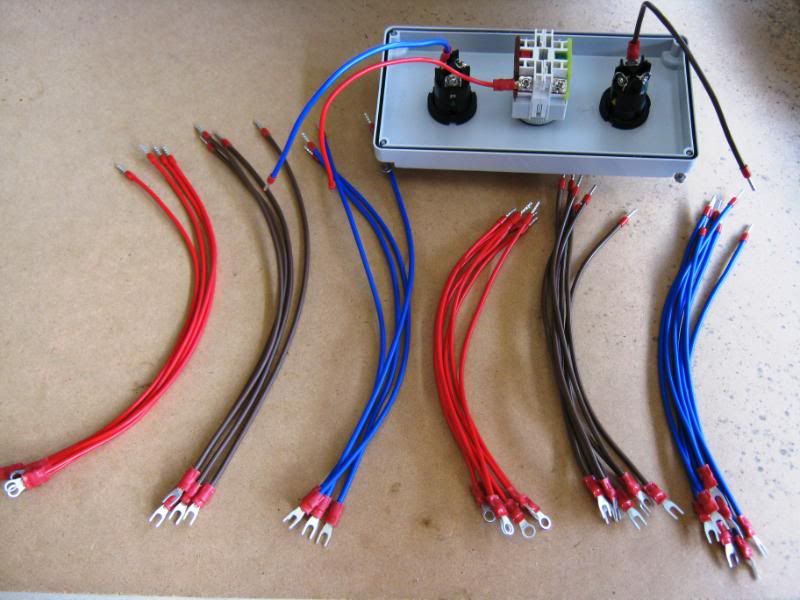 I'm so glad we changed the main switch box to a larger box as it made things a whole lot easier to fit everything in and to do the wiring. 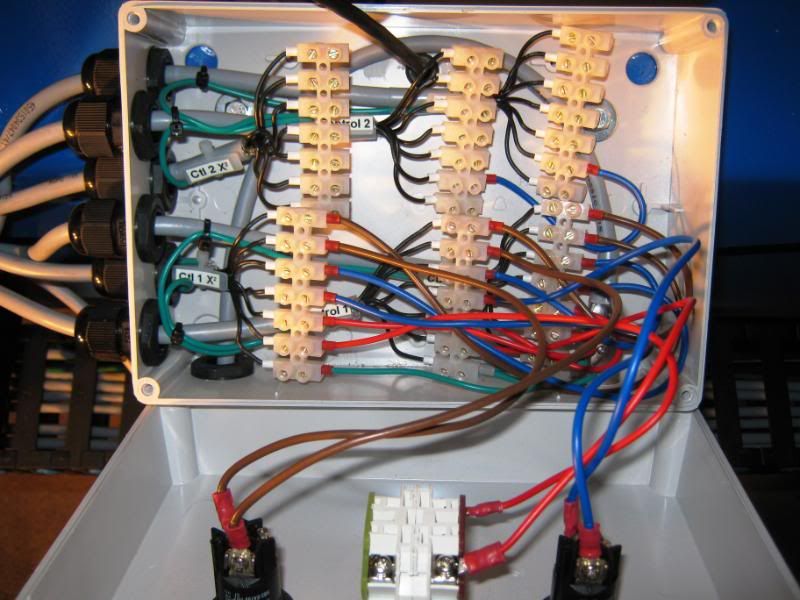 Also managed to find the time in between jobs today to paint up the mounting brackets that will be used for the dust collection on the back of the spider as well as our coolant reservoir for the spindles. 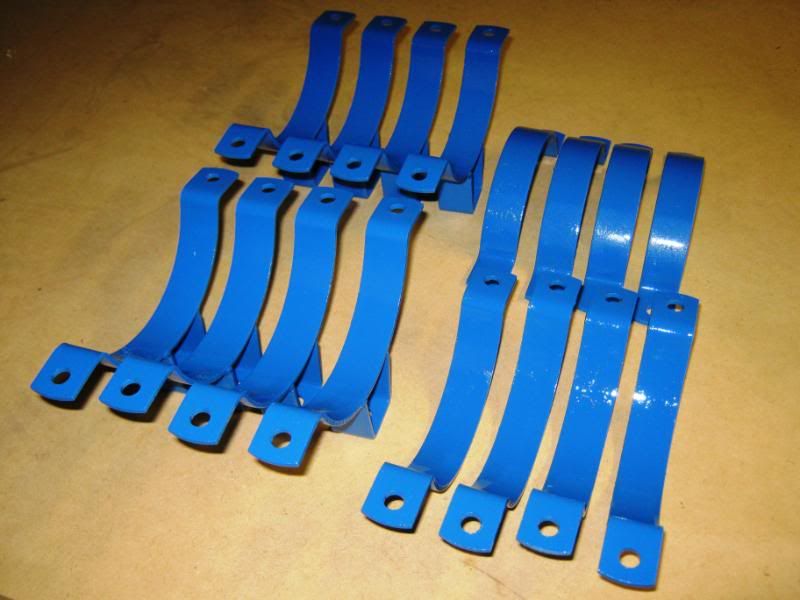 Paul (Skippy) hard at work pulling the last of the cables through the E-Chain. 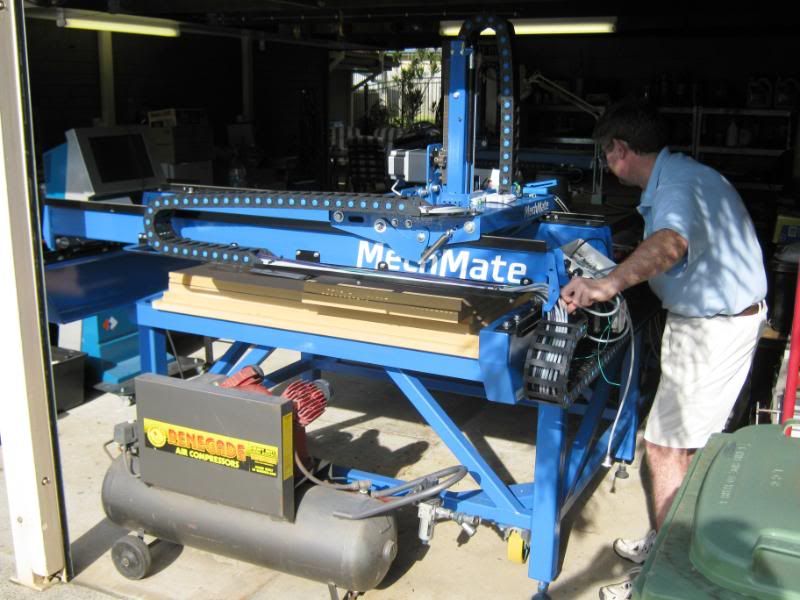 And finally both tables fully wired, with all circuits being checked and found to be all good got to be happy with that!!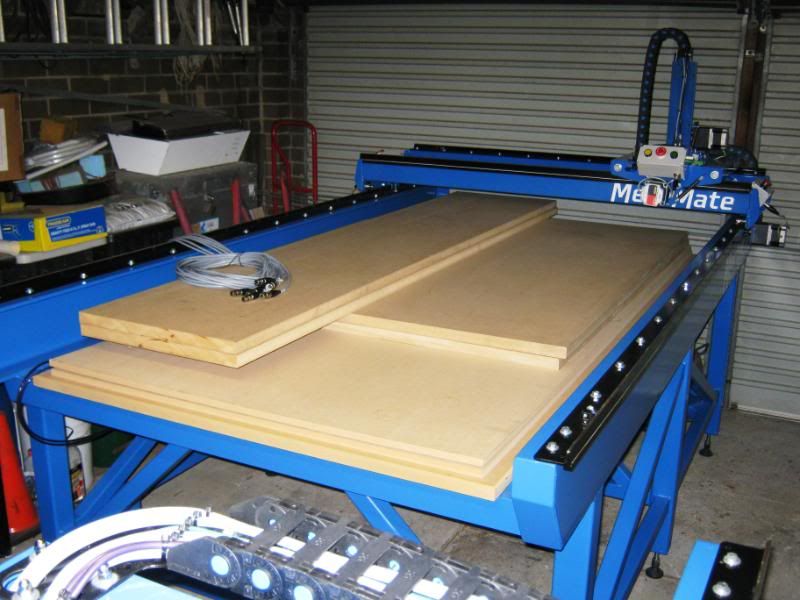 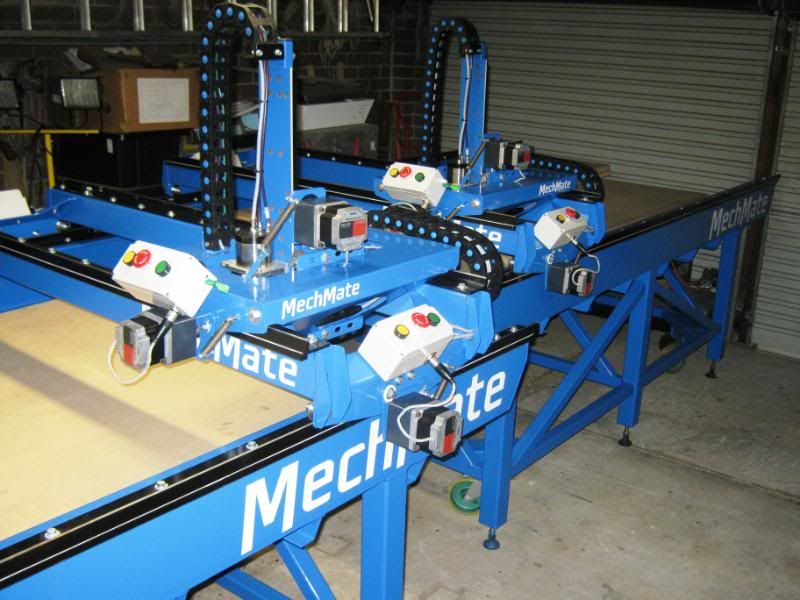 Next weekend we will be tackling the control boxes. We have a fair amount of work and modifications we wish to do to them, so probably another 2 to 3 full days and we should be getting close to at least having the Big Blue MM's moving under their own steam!! Cheers For now!! Tony.
|
|
#304
Thu 04 November 2010, 11:51
|
|||
|
|||
|
|
|
#305
Fri 05 November 2010, 06:26
|
|||
|
|||
|
Kobus,
Congrats on your purchase looking forward to seeing what you do with it now Cheers Tony.
|
|
#306
Sat 06 November 2010, 05:32
|
|||
|
|||
|
Todays Update,
With the tables all wired, it was time to start on the control boxes. We had to remove a lot of the existing parts from the box to allow for installation of the Geckos, and the bobs, and all the transformer stuff was retro fitted into the existing power box of the cabinet. We also had to remove the existing work shelf as it was too small and had some metal sections fitted to it that were going to get in the way of a keyboard. To this shelf but inside the box we also fitted a backboard and lined it with aluminium sheet before then installing the VFD and filter directly to that. Everything fitted in and is all looking very neat. I am having to go interstate again so no work for a couple of weeks, but as soon as I am back we are into it again wiring the box and then fitting our coolant resorvoir and flow control, then we should be ready for some cutting Anyway heres some photos of todays progress.  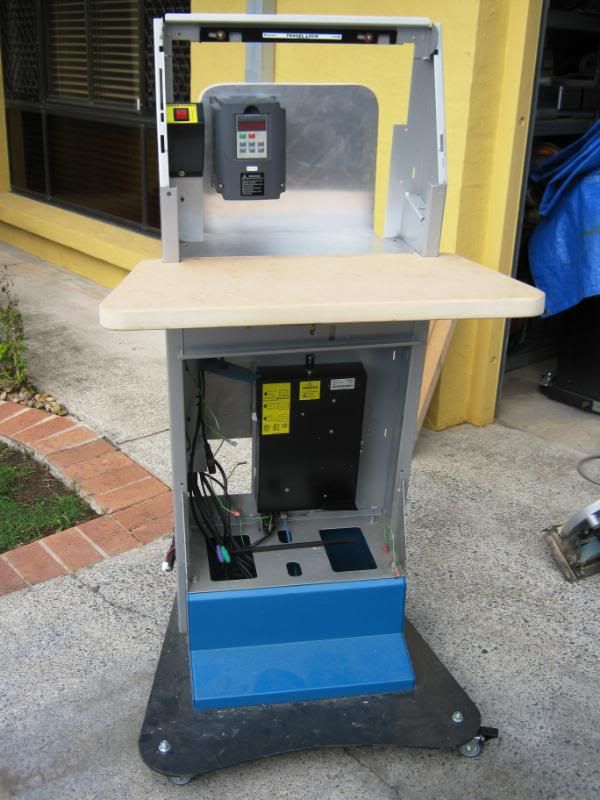 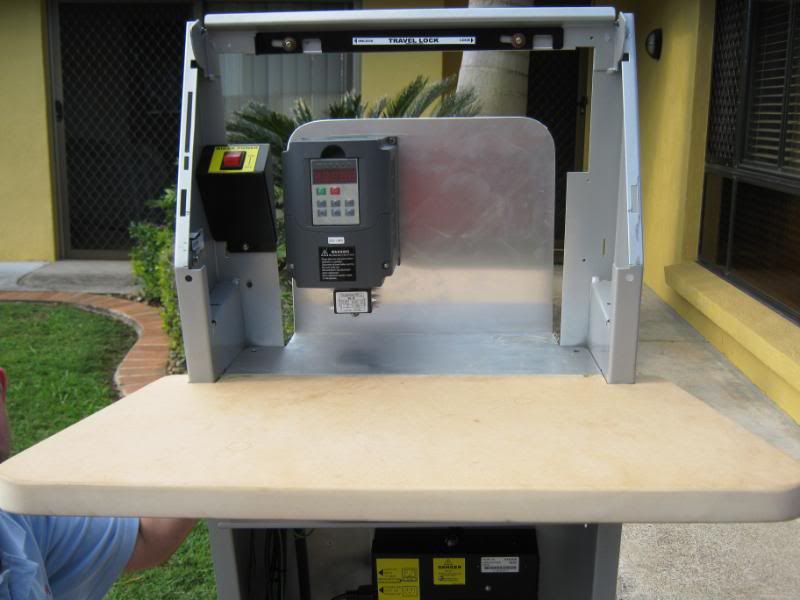 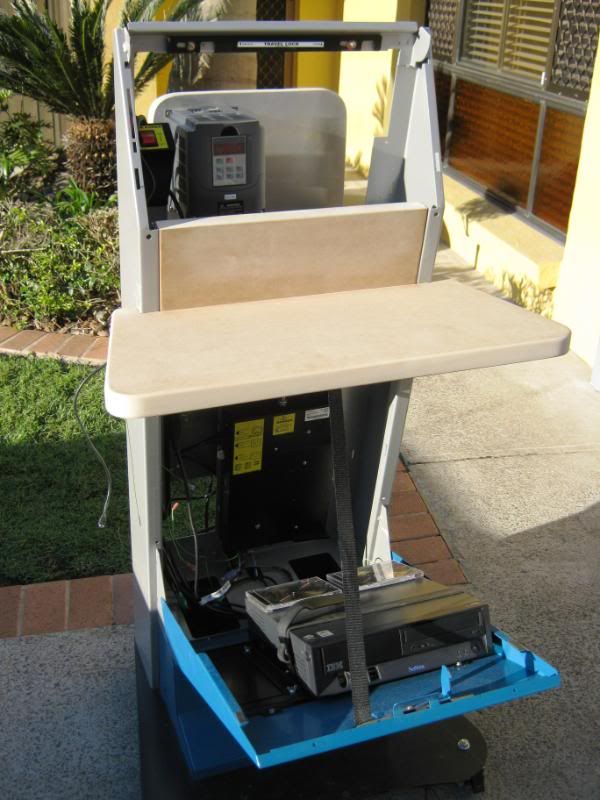 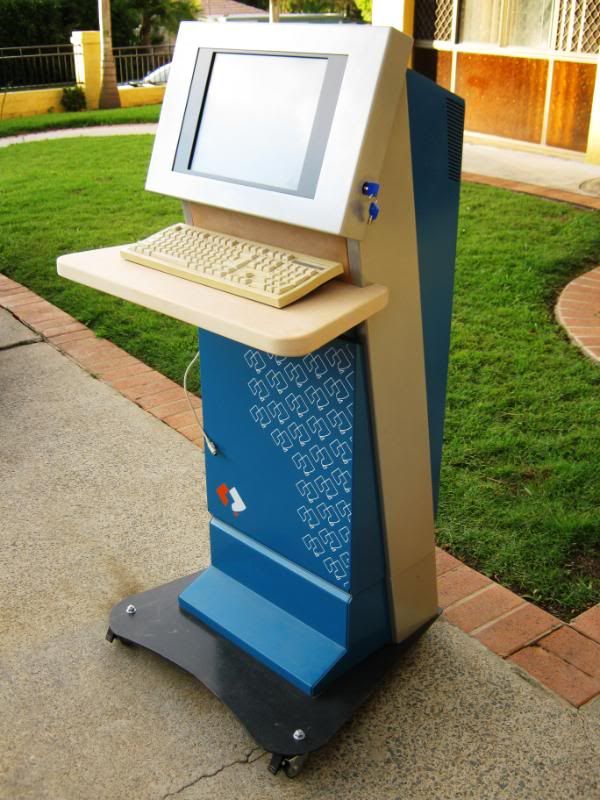 Once we are up and running the control box will be preped and painted to match MM. Cheers Tony.
|
|
#307
Sat 06 November 2010, 05:49
|
|||
|
|||
|
Very Spiffey - I like it
|
|
#308
Sat 06 November 2010, 07:45
|
|||
|
|||
|
Wow !!! That is super nice !!! time to read back on those cabinets!!!
|
|
#309
Sun 07 November 2010, 03:56
|
|||
|
|||
|
Hi Boys
I see the support board offcuts have come in handy already. Regards Ross
|
|
#310
Sun 07 November 2010, 05:15
|
|||
|
|||
|
Nice work, congratulations!
|
|
#311
Mon 08 November 2010, 09:35
|
|||
|
|||
|
two pmdx125 per machine? thats 4 parallel ports, how do you plan to use them with mach3? smoothstepper?
Nice build!!
|
|
#312
Mon 08 November 2010, 17:26
|
|||
|
|||
|
Very nice!
Would you be a dear & tell me the inclination angle of the screen? I'm planning to build a control station like the on you have here. Love it!
|
|
#313
Mon 08 November 2010, 22:11
|
|||
|
|||
|
Hi PEU as we are planning on running an indexer and the BOB's only support 4 motors plus I/O in standard mode. We decide to use two BOB's. You only need the secound parallel port if you as doing the Extended I/O. Also gave us and upgrade path to smoothsteppers as true parallel port on PC are getting rare.
We decided to wire up the Control box with 5 gecko's and all hardware to support the Indexer later on. Less work later on also. We can orginise to fit every thing in nice a neat and planned out. Control PC setup is Mach3 Plugins XBox 360 Controller (Jog) Flash (Maybe needed to run some screens) Barcode (Maybe) Screens MachBlue by Big Tex (Give us Zero Touch) Other software Touch Screen Driver (As we have Touch LCD screen) Dual PCI Parallel port Card Driver XBox 360 Driver (support XBox 360 plugin) Our Main PC Apsire Ver 2.5 soon to be Ver 3 with free upgrade CAD program as well
|
|
#314
Sat 20 November 2010, 04:14
|
|||
|
|||
|
Todays Update!!
All this small fidley stuff is taking longer than planned, but we are getting there. Still no movement as yet, hopefully next weekend we should have the control box finished and some movement happening. We will be doing some work on the control pc's upgrading them, setting them up and loading the software so fingers crossed we should not be too far away from maybe seeing some cutting being done 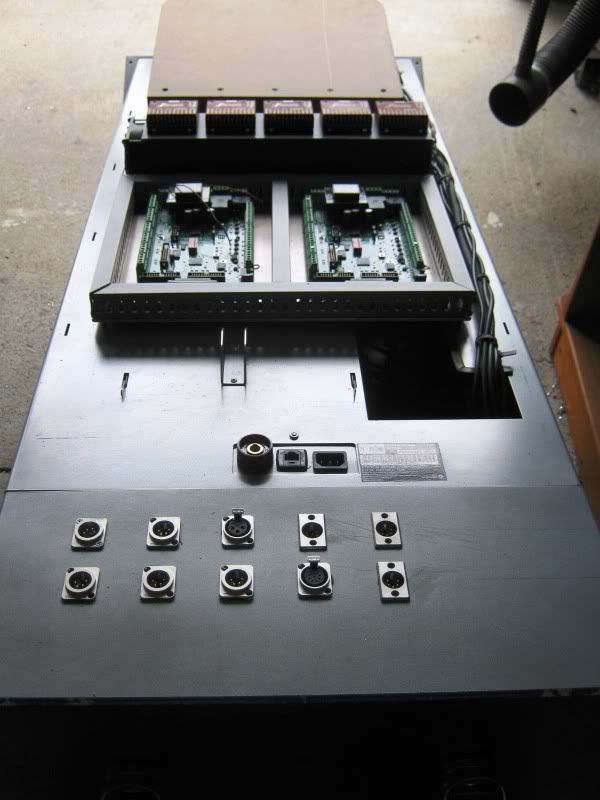 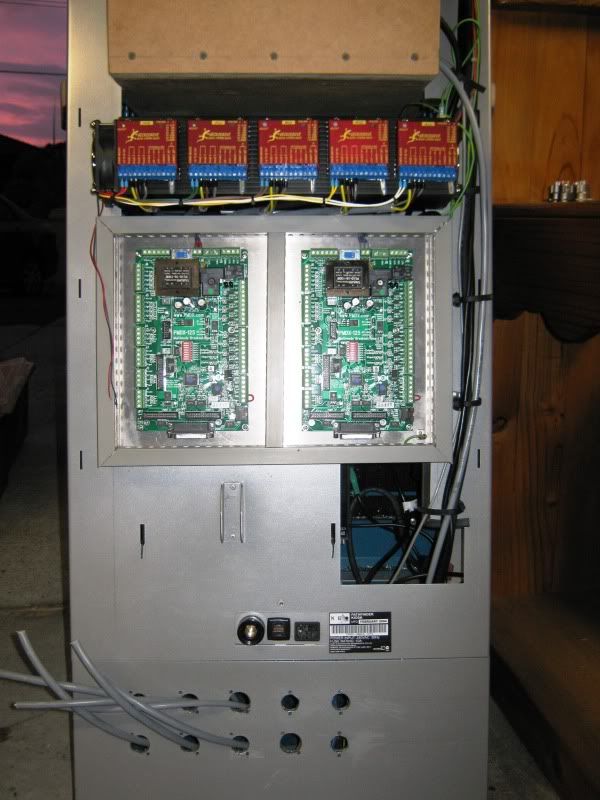 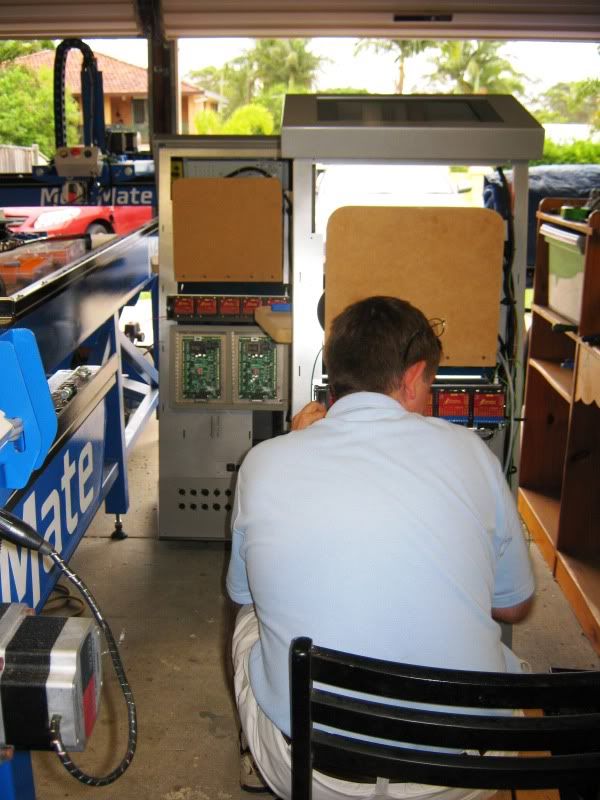  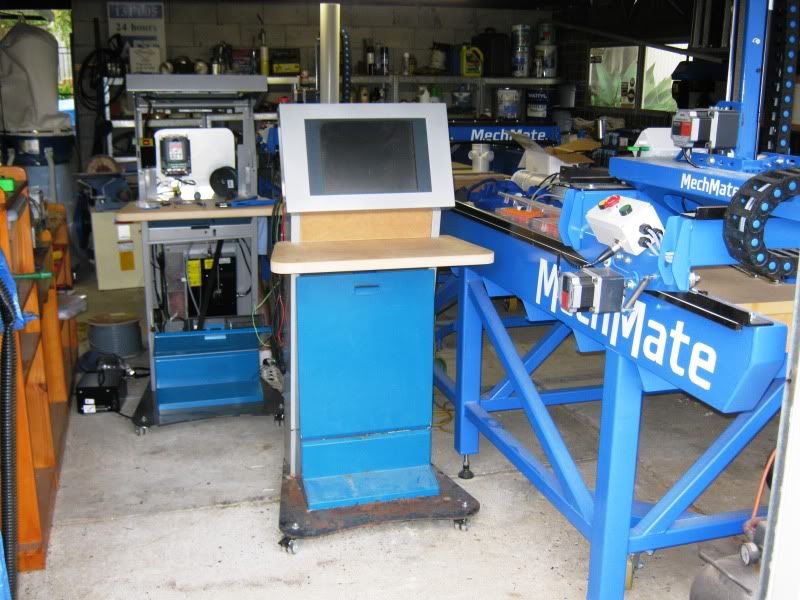 Cheers Tony.
|
|
#315
Sat 20 November 2010, 12:12
|
|||
|
|||
|
Tony,
Nice panel work. Be careful about the Male 4 pin connectors you used. The choice of male sex on the panel will allow motor voltage to be touched by your fingers if energized when not connected. Albeit, it's DC, it might bite a little  Of course, if the 4 pins aren't for your motors...then everything looks UL perfect! I am certain your aware of your choice, new comers to the forum may not see the little issue. Awesome work as always. Sean
|
|
#316
Sat 27 November 2010, 05:29
|
|||
|
|||
|
Sean,
You are absolutely correct regarding the male pin fittings, probably should have been female for the reasons you stated. Now on with todays update!! In our case they are going to stay that way for now as the plugs will never really be removed anyway.  We had a busy day again today, with Paul working away on the electrics wiring up and terminating the motors back to the Geckos. He also wired up the spindle and after a little bit of setup and installation and trialing of our coolant resorvoir we test run the spindle, boy these things are very quite.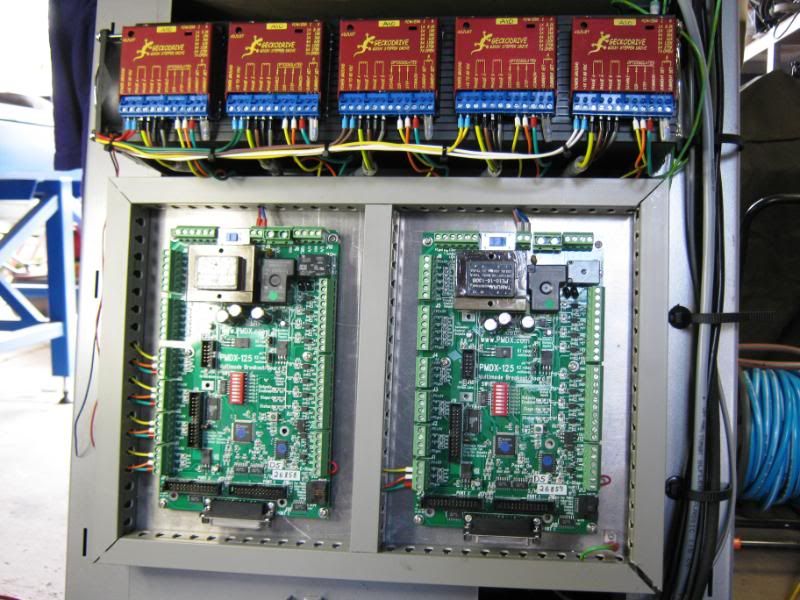 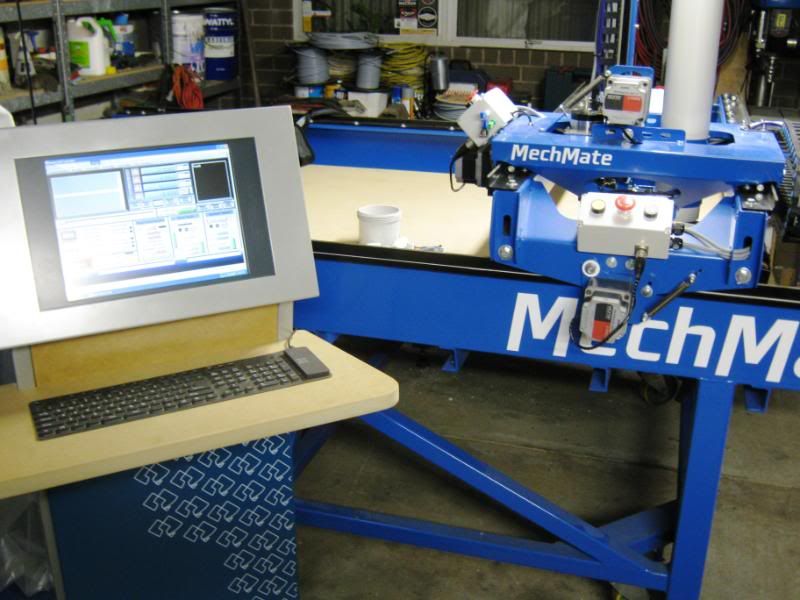 Some of the components to make up the coolant resorvoir. 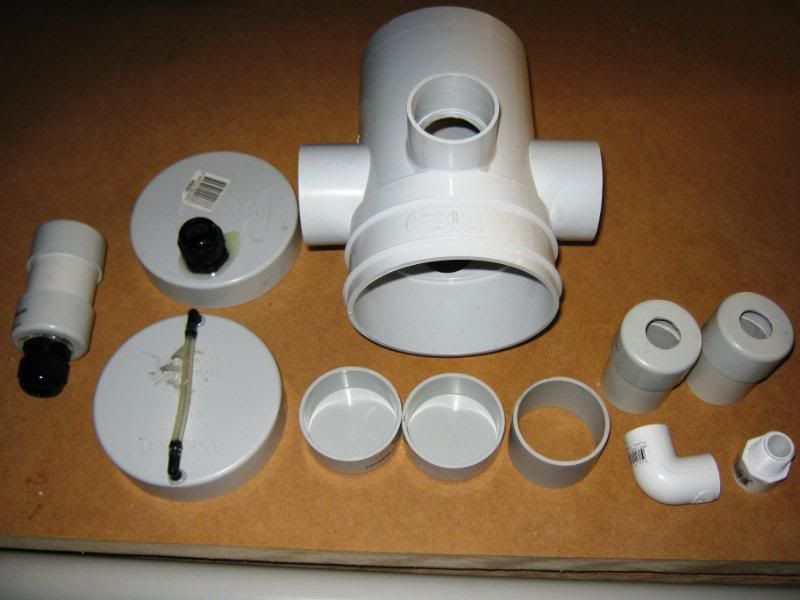 This photo shows the end of the coolant resorvoir where we are able to fill and top up from the top, we also have the return coolant line from the spindle feeding back in which is the small fitting on the left hand side. There is also a drain line on the bottom and a little coolant level viewer tube on the front. 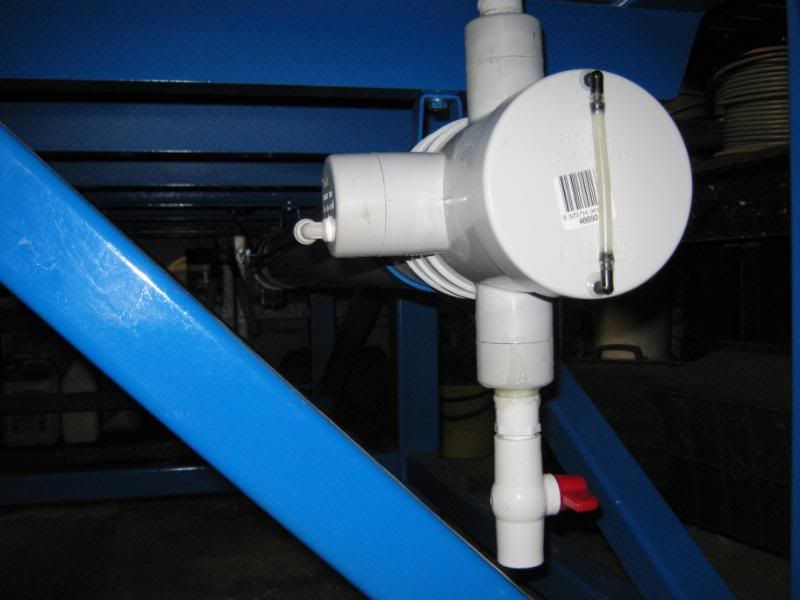 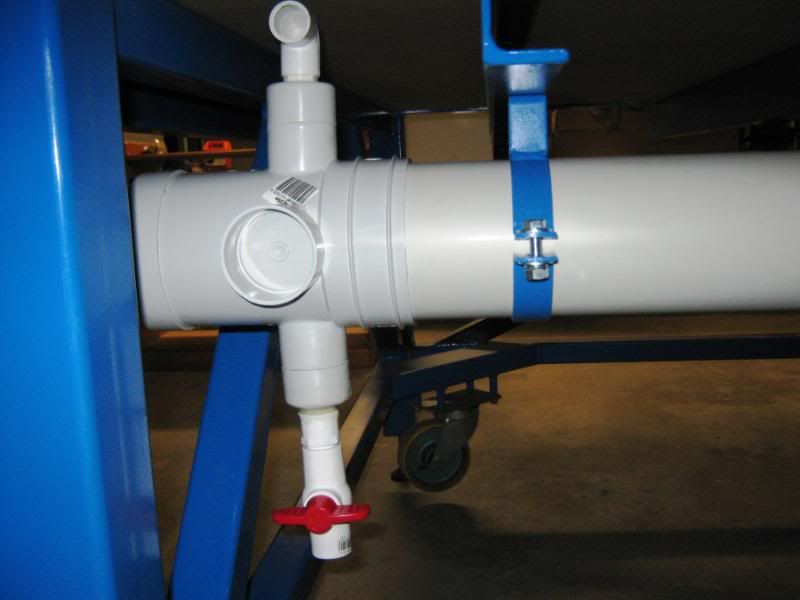 At the other end of the resorvoir we have the pump which draws from the resorvoir and pumps the coolant through the system. Resorvoir holds in excess of 15Ltrs of coolant. 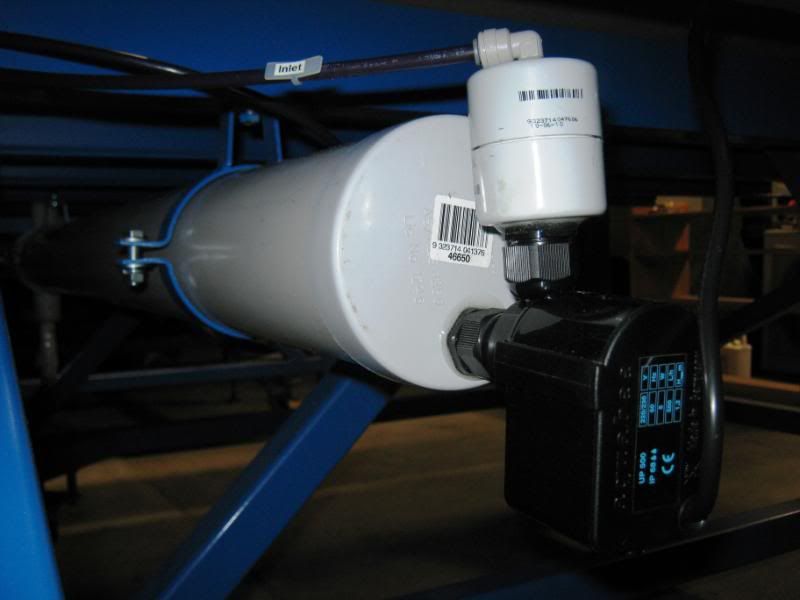 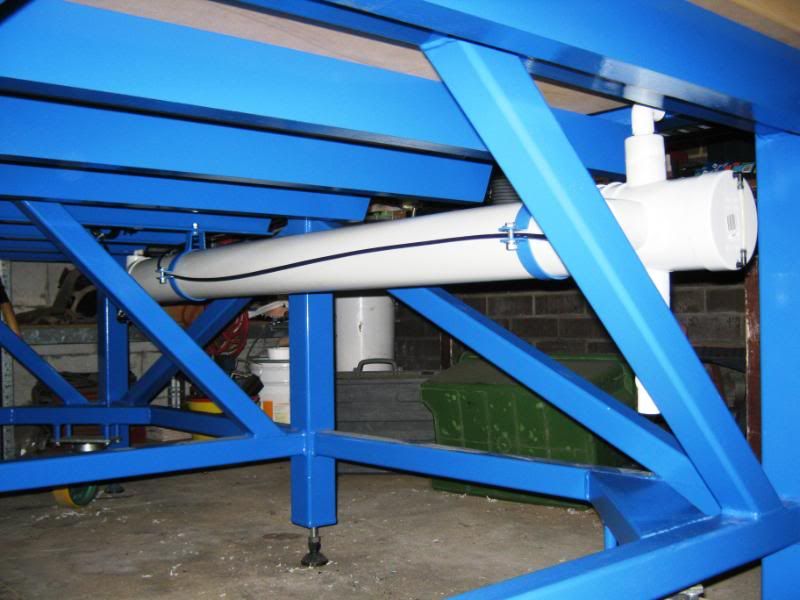 We also upgraded the ram for the computer to 1 Gig and installed Mach 3, pluggins, X-Box wireless controller, and spindle pluggins. Still need to do a lot of configuring but starting to get there. We did plunge the spindle with a cutting bit into a piece of Mdf today as well, so I guess we actually made some dust today all beit such a small amount. Who knows we might even be able to cut something next weekend Cheers Tony.
|
|
#317
Sat 27 November 2010, 09:58
|
|||
|
|||
|
Tony
Genius idea about the coolant reservoir and level indicator. Hopefully I didn't embarras you publicly about the connectors....your right; you really only make the connection once. But is sure makes it convenient when you want to move the machine, or move the controller inside the air conditioning to work on during the upgrades Awesome work. Sean
|
|
#318
Sat 27 November 2010, 14:45
|
|||
|
|||
|
No worries Sean
and thanks for your comments regarding our builds. Its great having people looking out for potential concerns with other MM builders, as some MM builders may not be as experienced as others in certain fields of the build especially when it comes to the electrics.I would rather people advise on things than not say anything, at least you can then make an informed decision as too what to do. Once again cheers. Tony.
|
|
#319
Sun 28 November 2010, 03:57
|
|||
|
|||
|
Sean
Don't worry we have will be wiring the E-Stop on the control box to turn the following power off Gecko, BOB's and VFD power but still let the computer run. So we can run the Computer running with out the other hardware running. Regards Paul (Skippy)
|
|
#320
Sun 28 November 2010, 05:26
|
|||
|
|||
|
Paul - the Estop (AKA kill switch) is typically used for an emergency situation and is not the accepted method for de-energising industrial equipment for routine service or repair. Sean's warning and Tony's acknowledgement of the potential risk might be a better perspective to have on the issue.
My sparky takes no prisoners on the safety side of things and just last night reminded me that he wanted to install a RCD (Residual Current Device or Safety Switch) on top of the existing 4 circuit breakers already installed in the control box. He has added expense with safety devices and wiring choices and is ruthless about the whole issue of safety. Although grudging it at first I now well and truly agree that inbuilt safety in the design is a requirement, not just an additional cost. On a more upbeat note - bet there was two happy blokes in the garage when the end mill hit the MDF for the first time. Every time I see your Saturday night pics on the forum it reminds me to get a wriggle on and work a bit harder. Kind regards Ross
|
|
#321
Sun 28 November 2010, 06:37
|
|||
|
|||
|
I strongly support the RCD. (It is even mentioned on the drawings, and has been discussed on this forum)
|
|
#322
Sat 04 December 2010, 01:36
|
|||
|
|||
|
Thx Guys,
Will be getting on to it trust me!! Today I made up the other water resorvoir for Skippy's table and mounted it under his table. I also drilled my 32mm thick support board and using a fostner bit pre drilled the holes to recess the heads of the bolts. I also painted the underside of the board in a semi gloss black enamel with a couple of coats just to seal it, so hopefully ready to bolt to the table tomorrow. We should also be doing more with the electrics tomorrow so hopefully we might get one possibly two of the tables moving. Who knows we might even be cutting Cheers Tony.
|
|
#323
Sun 05 December 2010, 04:11
|
|||
|
|||
|
Update for Today Sunday 5/12/10.
Mechmates are cutting Will do a little write up, and post a video as soon as I get it uploaded. Big thanks to Ross (surfcnc) for all his help today as well, much appreciated!! Couple of happy Chappies!! Cheers Tony.
|
|
#324
Sun 05 December 2010, 04:19
|
|||
|
|||
|
Well done those machine are looking AWSOME....now cover it in dust....lots and lots of dust.
|
|
#325
Sun 05 December 2010, 04:30
|
|||
|
|||
|
nice one, these two mechmates have set the bar very high for quaility.
|
|
#326
Sun 05 December 2010, 05:35
|
|||
|
|||
|
Thanks Guys,
Well the video has finally uploaded let me tell you it was great to see these machines finaly cut something under their own steam. Our builds have not been the quickest builds and cutting has been a long time coming, but its an awesome feeling standing there watching it go do its thing after such a long time working away week after week.Today was an interesting day with several hic-ups along the way that will still require some work and time to sort them out and I guess the biggest thing is we are now into a very different learning area, but I think this is going to be the fun part. I would like to thank everybody here on the forums for their patience and help in getting us this far, and when I look back on my first initial post I really wonder what I was worrying about. Big thanks to my build partner skippy aka Paul "WE DONE IT" and another big thanks to surfcnc aka Ross for his help along the way too. http://www.youtube.com/watch?v=cto0UMWR9M8 Cheers Tony.
|
|
#327
Sun 05 December 2010, 05:56
|
|||
|
|||
|
Hi Tony and Paul
I agree, to watch the machine cut by itself was very fulfilling. For the rest of you out there, let me tell you the smiles were pretty wide on Tony and Paul's faces. A great job and a well deserved milestone in your builds. Regards Ross
|
|
#328
Sun 05 December 2010, 07:56
|
|||
|
|||
|
Congratulations Tony & Paul
|
|
#329
Sun 05 December 2010, 08:32
|
|||
|
|||
|
Beautiful job!
|
|
#330
Sun 05 December 2010, 17:29
|
|||
|
|||
|
Congrats!
|
 |
|
|
 Similar Threads
|
||||
| Thread | Thread Starter | Forum | Replies | Last Post |
| Making Skins #74 - Brisbane Australia | Surfcnc | MechMates already cutting | 1078 | Sun 20 September 2015 11:05 |
| Touch Probes Have Arrived #72 - Brisbane, Australia | skippy | MechMates already cutting | 130 | Mon 04 March 2013 04:31 |
| Do my legs look fat? - Brisbane Australia | tangocharlie123 | Construction started, but not cutting yet | 60 | Wed 22 June 2011 06:32 |
| New member - Brisbane Australia | stan stuart | Introduce yourself and start planning | 3 | Tue 11 May 2010 20:48 |
| Commercial Signs | Hugo Carradini | The Show Room | 17 | Wed 21 January 2009 22:51 |


