|
#661
 Mon 27 October 2014, 05:59
|
|||
|
|||
|
Thanks guys.
I'd like to think I'm over the hump with treatment. I'm cutting some big corbels this week with holes for alignment dowels, 20"x30" 7 layers thick. This will be my first production vacuum bag glue up... 
|
|
#662
Mon 27 October 2014, 06:14
|
|||
|
|||
|
I understand and can relate w/you as I cut quite frequently some expensive solid wood glue ups to ! Even through the years, Im still quite nervous and dble & triple check every time !!
Wishing you prompt recovery.....and back to a solid health ! Looking forward for some pics from this productions run !
|
|
#663
Mon 27 October 2014, 06:54
|
|||
|
|||
|
You'll knock it over Darren, remember we have a pact to go to Dan Sawatzky's course one day

|
|
#664
Mon 27 October 2014, 07:02
|
|||
|
|||
|
Pictures please on the vacuum gluing. I have only seen it done in manufacturing settings. I am interested in the process you will use.
|
|
#665
Wed 29 October 2014, 12:48
|
|||
|
|||
|
I'll devote the next couple of posts to the corbels I made from 3/4" Extira.
Below is a pic of an individual piece, of which 7 were required for each of 6 brackets. I bored three 1/2" through holes in 5 of them and a .4" deep blind hole in two of them, one of which had to be mirrored to allow boring the correct side. 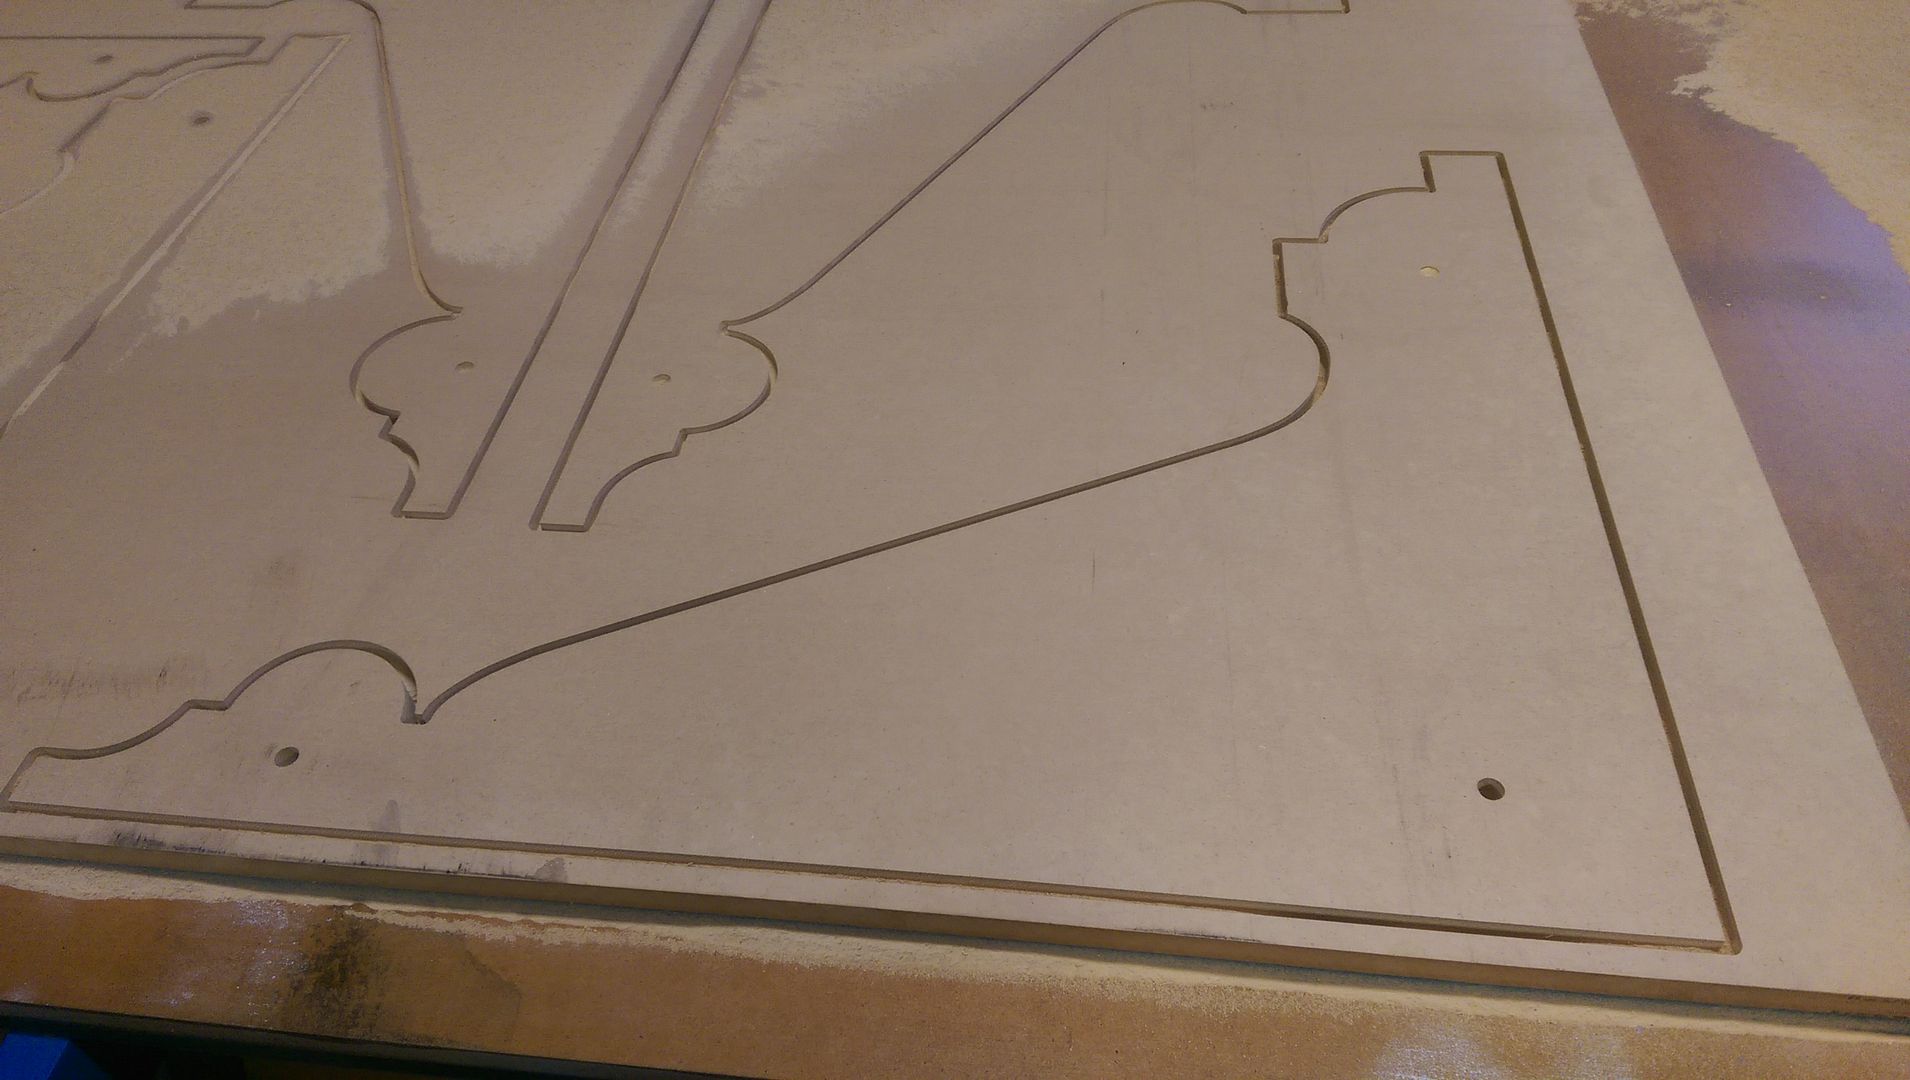
|
|
#666
Wed 29 October 2014, 12:53
|
|||
|
|||
|
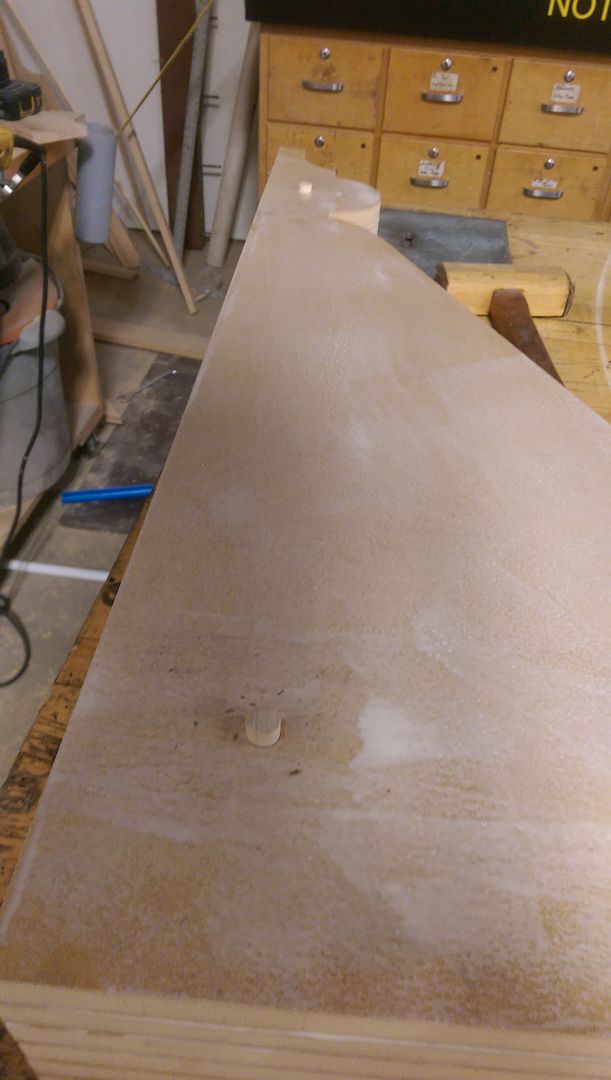
Then, a coat of Titebond 3 was rolled on both faces and a 1/2" alignment dowel driven into each of the three holes before the last piece was laid on. Keep in mind the outside pieces were blind drilled, to keep the dowels from showing.
 Last edited by darren salyer; Wed 29 October 2014 at 12:56..
|
|
#667
Wed 29 October 2014, 12:54
|
|||
|
|||
|
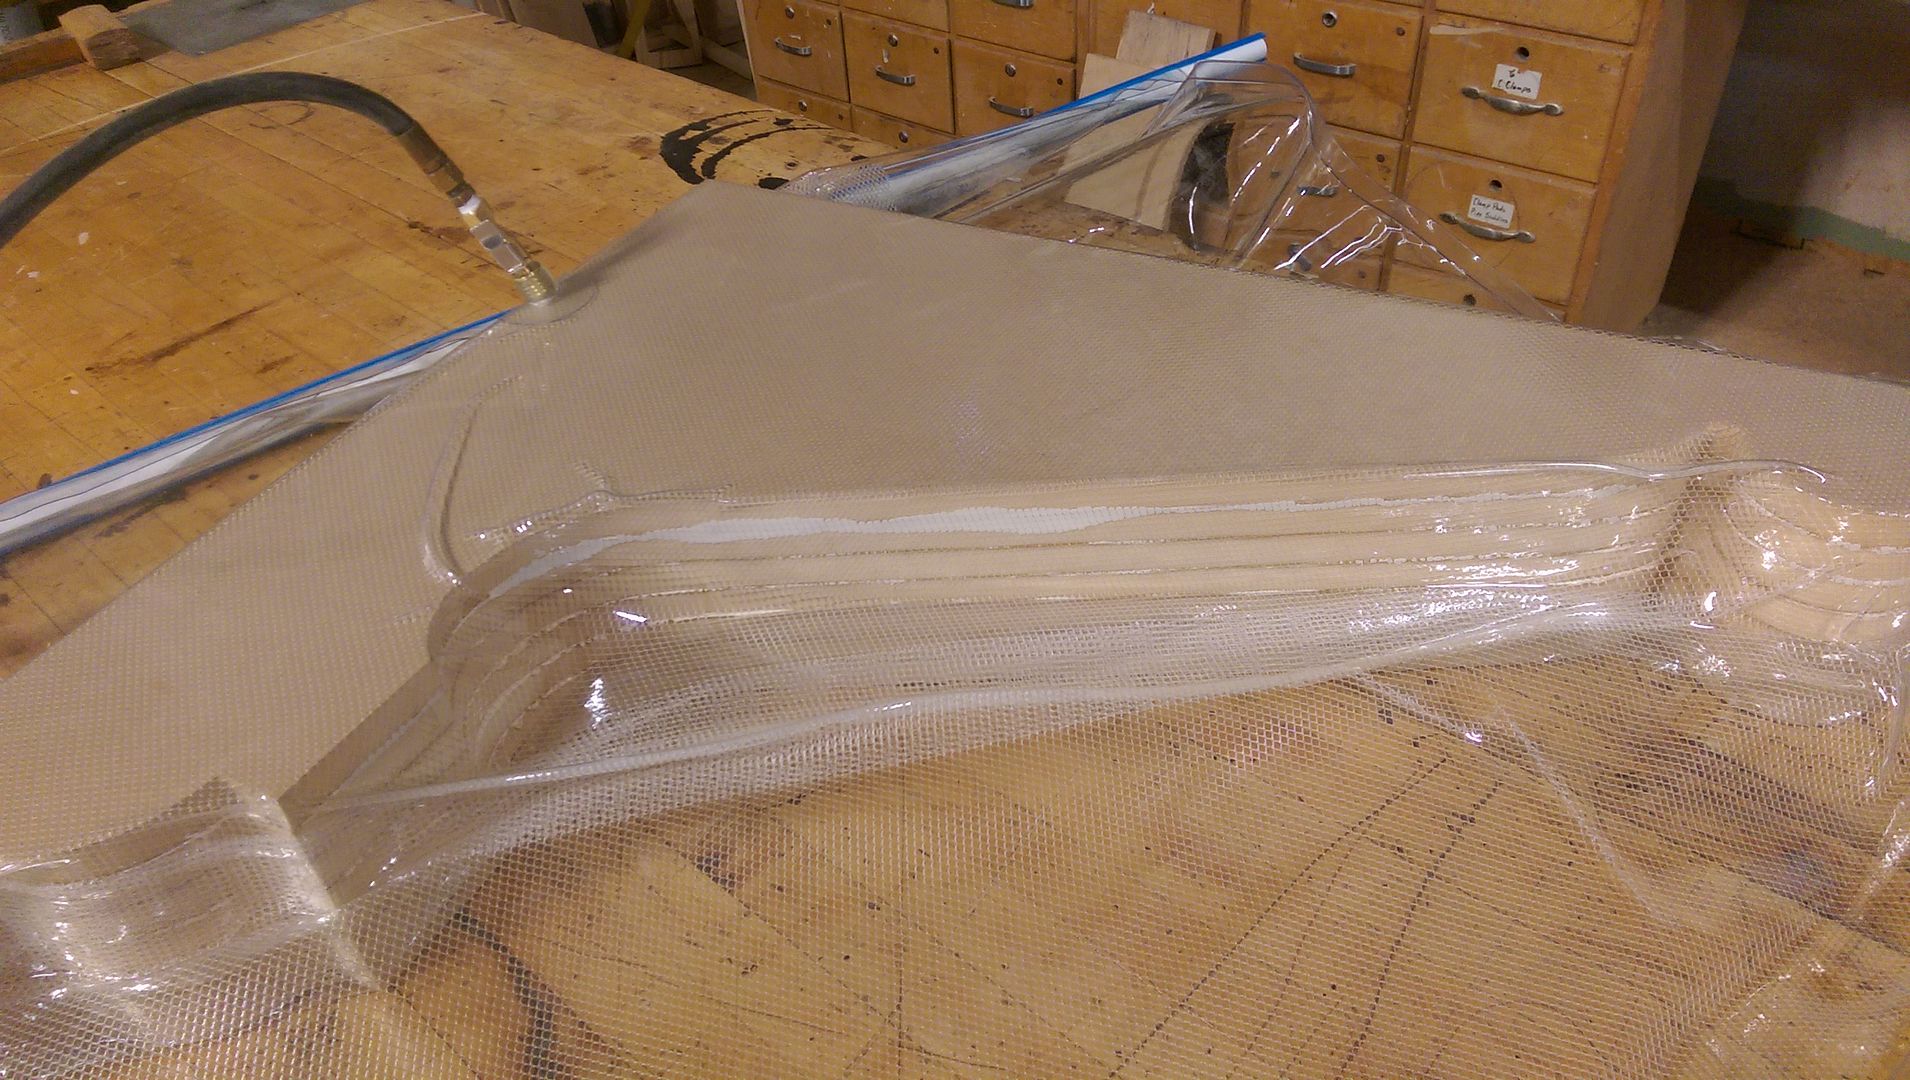
Lastly, the sandwich goes into the bag, breather mesh on top, and a 20" vacuum pulled for 1 1/2 hours. 20" is about 1700 lbs. of clamping pressure. Even with the thin layers of glue rolled on, there is squeezeout.
 Last edited by darren salyer; Wed 29 October 2014 at 12:58..
|
|
#668
Wed 29 October 2014, 13:42
|
|||
|
|||
|
Nice work....
assuming it's a commission order ??...or is it for you ?! Any chance you'd be able to take a pic installed ??! 
|
|
#669
Wed 29 October 2014, 18:32
|
|||
|
|||
|
These aren't for one of my jobs, but I am going to try to get an address to snap some pics after they are installed and painted.
|
|
#670
Wed 29 October 2014, 20:49
|
|||
|
|||
|
That be great !!
|
|
#671
Thu 30 October 2014, 03:30
|
|||
|
|||
|
Darren is that a mesh inside the bag? Almost looks as if it was made into the bag itself. I've never used an actual mesh but have used thick leftover fabrics (just keep it out of the glue). I do a lot of vacuum pressing, I'm on my second poly bag now so I guess the fabric works fine.
I bet that corbel has some weight.
|
|
#672
Thu 30 October 2014, 05:54
|
|||
|
|||
|
..... "Darren is that a mesh inside the bag?"
= " Lastly, the sandwich goes into the bag, breather mesh on top !!! 
|
|
#673
Thu 30 October 2014, 06:51
|
|||
|
|||
|
Yes Tom, the mesh is a separate piece that goes in the bag instead of fabric.
Its cheap, reuseable and glue doesn't stick to it. Heres a link to the page where I bought mine. http://www.veneersupplies.com/produc...r-MeshNet.html If you haven't been to this guys site, you should check it out. A wealth of info. This is where I got the plans and parts to build the vacuum pump from the old compressor I talked about a few pages back. http://www.joewoodworker.com/veneering/welcome.htm
|
|
#674
Fri 31 October 2014, 17:49
|
|||
|
|||
|
I've got one vain type pump and and a self contained compressor type. Does the mesh leave impressions in veneer? One of my bags has a seam near one of the ends and has to be avoided because it telegraphs into the veneer.
|
|
#675
Fri 31 October 2014, 17:51
|
|||
|
|||
|
If it does, I haven't noticed it.
|
|
#676
Tue 25 November 2014, 18:22
|
|||
|
|||
|
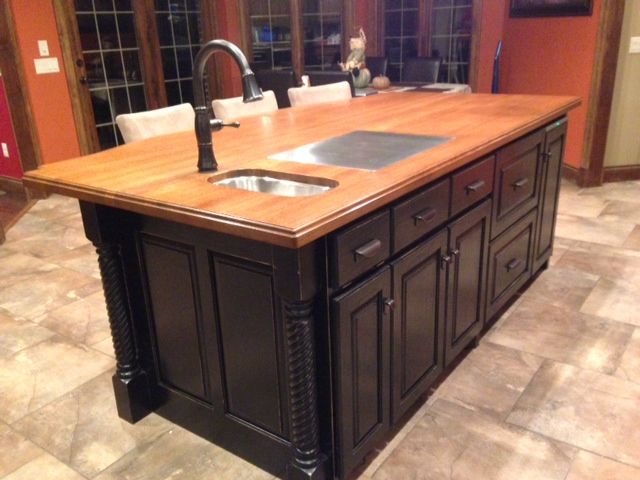
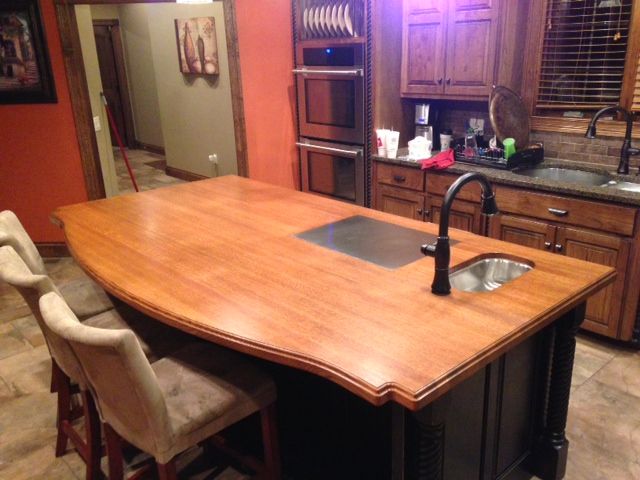
Owners sent a couple pics of the finished top.
|
|
#677
Tue 25 November 2014, 18:22
|
|||
|
|||
|
|
#678
Tue 25 November 2014, 18:48
|
|||
|
|||
|
Very nice
|
|
#679
Tue 25 November 2014, 19:27
|
|||
|
|||
|
Man, you sure do some nice work!
|
|
#680
Tue 25 November 2014, 19:44
|
|||
|
|||
|
Nicly done !!
Did your beast also rout the top contour profile or was it done by other means ?
|
|
#681
Tue 25 November 2014, 19:51
|
|||
|
|||
|
You definitely are a craftsman. Your work is always inspiring. Something I would like to achieve.
|
|
#682
Tue 25 November 2014, 21:00
|
|||
|
|||
|
Thanks for the kind words, everyone. They provided a new edge profile bit with a bearing, so I routed it with a multipass climb cut using a hand held router. Did NOT want any tear out on the edge.
|
|
#683
Tue 13 January 2015, 17:31
|
|||
|
|||
|
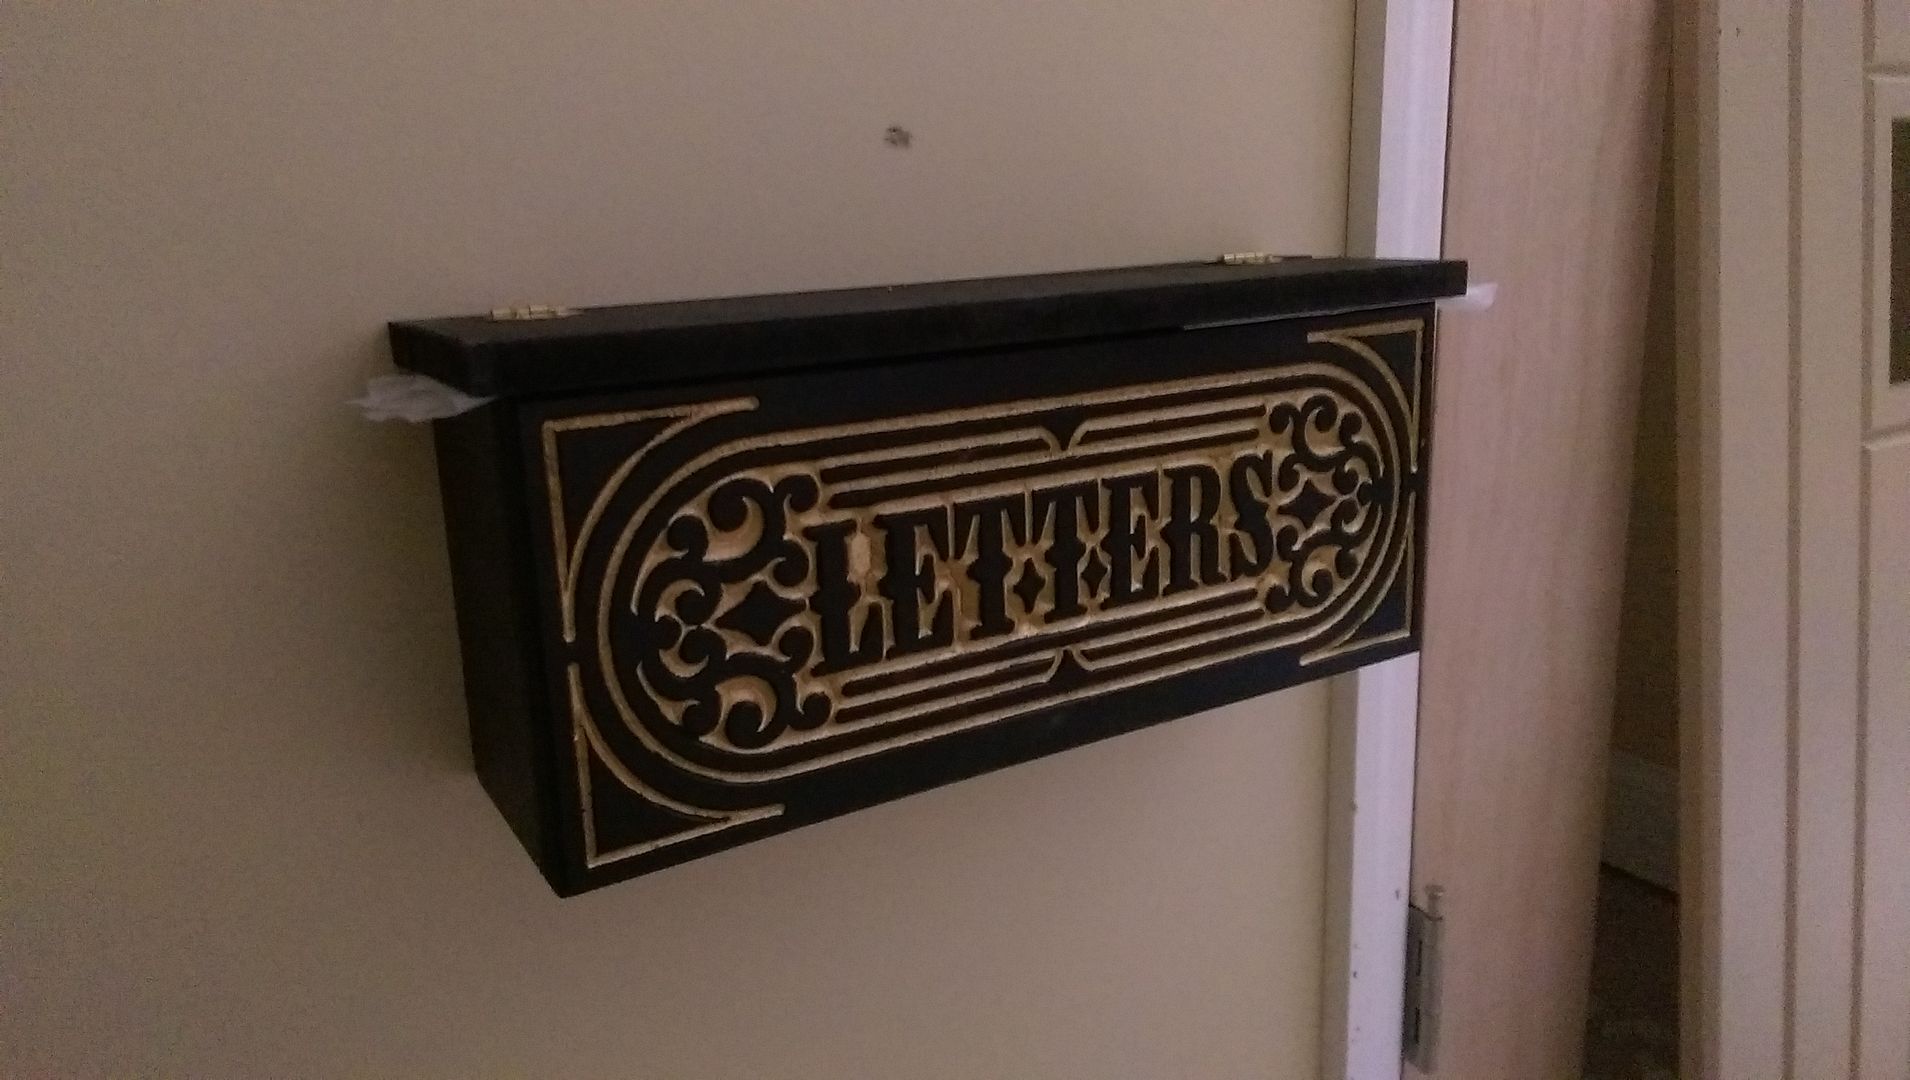
Been in a basement the last few weeks, and part of the build out is a small play area for the owners granddaughter, under the stairs. I'll be doing a small door, window with shutters, and a mailbox that Grandma can leave notes in...

|
|
#684
Thu 26 February 2015, 06:55
|
|||
|
|||
|
Homeowners were tickled when they came home and found this...
|
|
#685
Thu 26 February 2015, 07:01
|
|||
|
|||
|
These kind of extras are now super simple...
More fun than work, really. 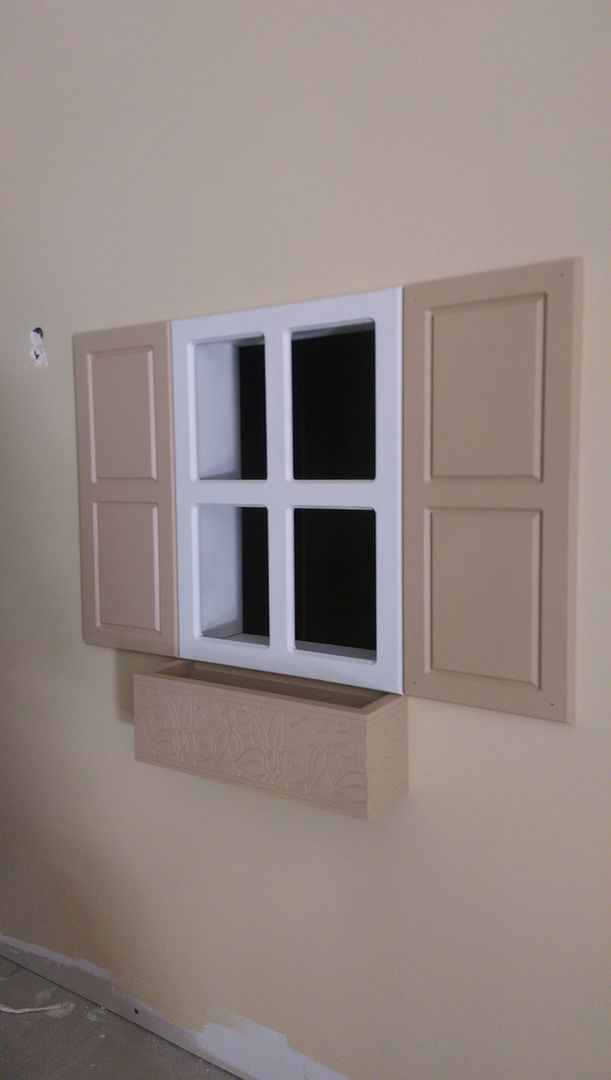
|
|
#686
Thu 26 February 2015, 07:05
|
|||
|
|||
|
Homeowner is planning a piece of foam in the bottom, with some fake flowers to "plant" when the granddaughter comes to visit...
I think this was a free Vectric pattern, that works well on the planter box. 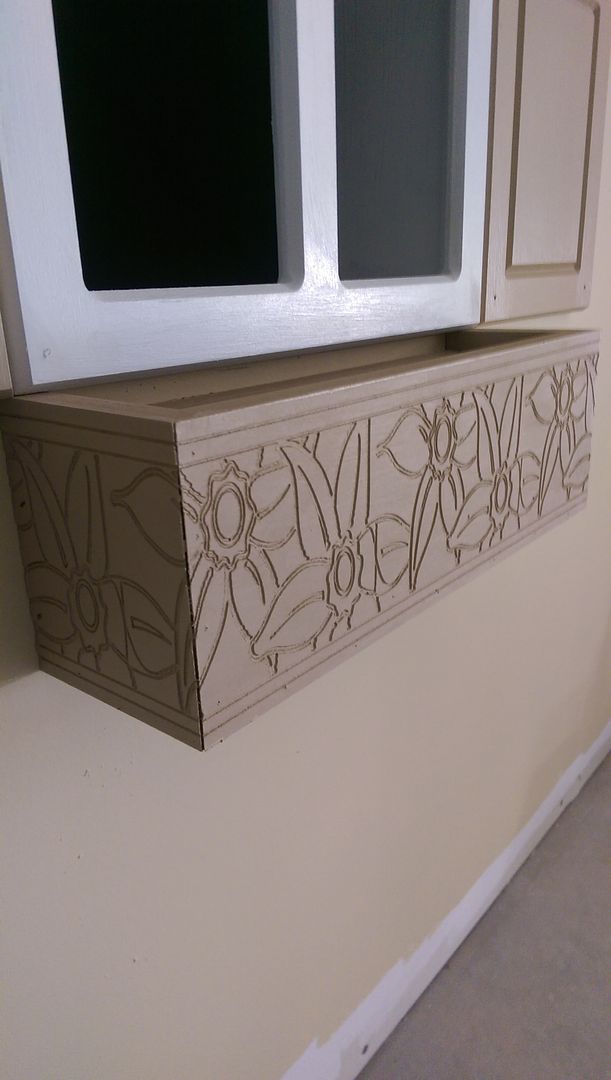
|
|
#687
Thu 26 February 2015, 07:08
|
|||
|
|||
|
Last one...Drew this "window frame" to put a mirror behind for our hallway at home.
Similar to a Cobblers kids having no shoes, haven't fond time to cut it out. 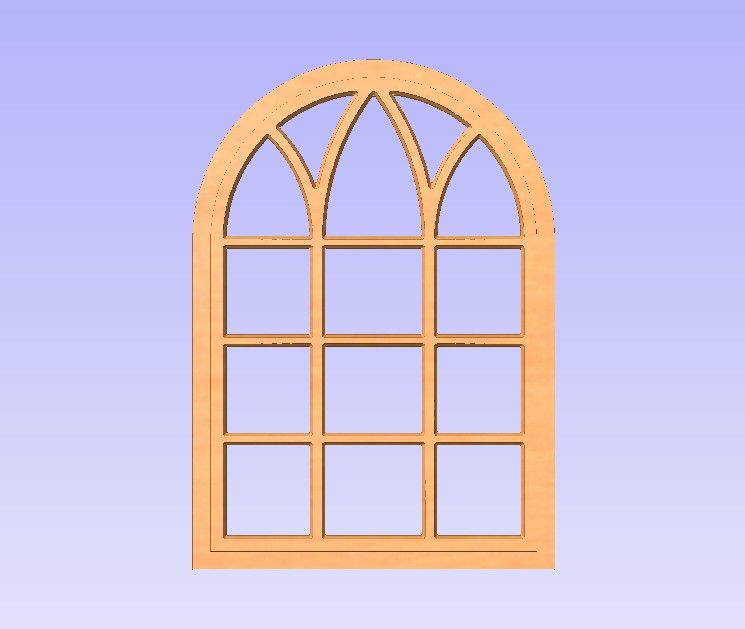
|
|
#688
Thu 26 February 2015, 07:10
|
|||
|
|||
|
Very nice
|
|
#689
Wed 08 April 2015, 06:45
|
|||
|
|||
|
Popped into my local Rockler store last night to pick up a bit I had to have for today...
They have a CNC Shark HD3 there for $4k...25"x25" cutting area... I grabbed the collet and was surprised to find with some effort, I could flex the collet a fair amount in every direction...at least .1"...
|
|
#690
Wed 08 April 2015, 07:46
|
|||
|
|||
|
where you expecting quality?
|
 |
|
|
 Similar Threads
|
||||
| Thread | Thread Starter | Forum | Replies | Last Post |
| University Of Missouri Saint Louis Theater | ganderson | Introduce yourself and start planning | 8 | Fri 31 October 2014 17:53 |
| Starting my MM Build - St Louis MO USA | inventek2000 | Construction started, but not cutting yet | 38 | Sun 25 September 2011 17:51 |
| my machine cnc | marcoscnc29 | Archives | 1 | Sat 24 April 2010 17:58 |


