|
#571
 Sun 19 January 2014, 18:17
|
|||
|
|||
|
I ordered this plastic 2.000"h x 1.750"w x 0.060"d 30.5mm legend plate at work wrong for a machine we are rewiring for a robot. I only specified the lettering 'DRIVE SPEED'. I forgot the rest of the markings and when the label came in I was cursing for forgetting to order the right thing and my fellow co-worker said 'You could make those all day at home'. I told him I could fix it easy enough. He obviously said 'They aren't paying you, you don't do it'. I agreed, but the challenge got the best of me. Since it was junk anyway and we were going to throw it out I wanted to see if I could do it. So I drew up the graduations in Aspire and made the toolpath using a 30° 0.005" engraving bit. I took my time to get the datum right on. Then I started to cut and Oh No. I oriented the piece in the wrong direction. So I stopped the program and took it then colored in the cut lines with permanent marker and oriented correctly. I ran the program again. This was the result. If not for the mistake in the beginning. You would never had known it was not ordered that way.

|
|
#572
Mon 20 January 2014, 03:03
|
|||
|
|||
|
It just goes to show that with a little imagination just about anything can be made on a MechMate, very good Pete.
|
|
#573
Mon 20 January 2014, 16:53
|
|||
|
|||
|
Air Velocity Readings at port inside the shoe. Some reduction but not as much as I expected. Then again, the original test was with coiled flex hose. With the velocities that are reading, I am happy with the end result especially compared to the original findings.
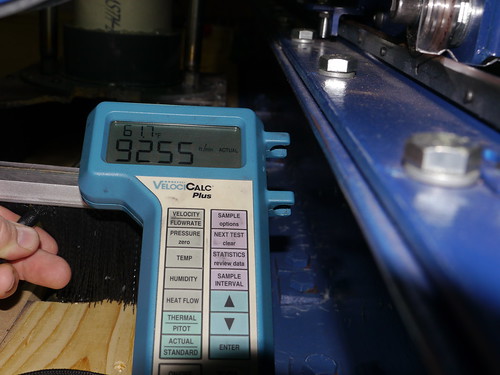 Right Side; 9255 LFM; 807.6 CFM, on Flickr 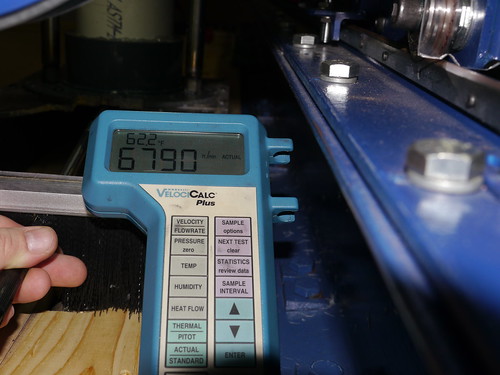 Center; 6790 LFM; 592.5 CFM, on Flickr 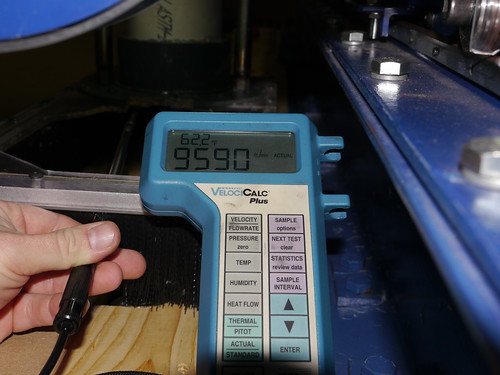 Left Side; 9590 LFM; 836.8 CFM, on Flickr
|
|
#574
Mon 20 January 2014, 20:57
|
|||
|
|||
|
I don't know how to make sense out of these number. Most appreciate if you would elaborate.
|
|
#575
Tue 21 January 2014, 05:30
|
|||
|
|||
|
Sure Ken, the base number I would use as average is 600 CFM. The other numbers are to me like inrush. The air velocity will always be highest at the edge of the inlet and most stable in the middle. I always do a check of 4 places along the edge of any pipe to verify I am am getting a even reading, this verifies the air is moving equally in from all directions. The calm suction in the middle is the conveying portion of the flow. My shoe ideally would be made so the envelope was to have the air pocket perfectly around the cutting tool so the center of the 600 CFM was aimed at the cutting tool. This way the higher velocities from the edge would be able to help assist in pulling the dust and debris moving at a high rate of speed back to the middle. Something I would like to work on further improving later. I use a reduction to 4" duct to go to the shoe. This gives me a higher air velocity but keeps my 6" main duct LFM at 4000 LFM. If I used 6" the whole way I would have 800CFM but my air velocity drops to a little over 4000 LFM. CFM is important but so is LFM (velocity). I liken it to using a 24" duct with 1000 CFM but it only moves 320 LFM. This would have no conveying properties. I have actually seen this in one of the manufacturing plants I worked at where the main trunk line was 24" and the dust and debris would fill and plug the duct over the course of a year and every year they paid a company to clean the ductwork. They eventually reduced the trunk line down to smaller size and it virtually eliminated the dropout in the main trunk and improved overall performance.
|
|
#576
Tue 21 January 2014, 06:29
|
|||
|
|||
|
Thanks Pete, its clear to me now. look like your dust shoe is a winner!.
Now... do I want to do something about mine... hmmmm
|
|
#577
Sun 26 January 2014, 09:08
|
|||
|
|||
|
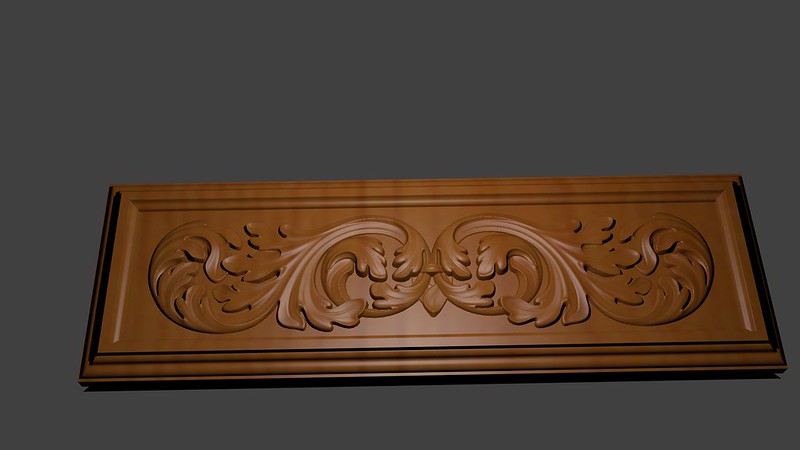
I was playing around with importing and exporting with Aspire. In the process I exported as a wavefront object from Aspire with a tolerance of 0.0001". I imported this into Blender, set the camera and rendered the object. I was surprised with the image with just the preset settings. So I tried the Christmas project and this is the rendered result.
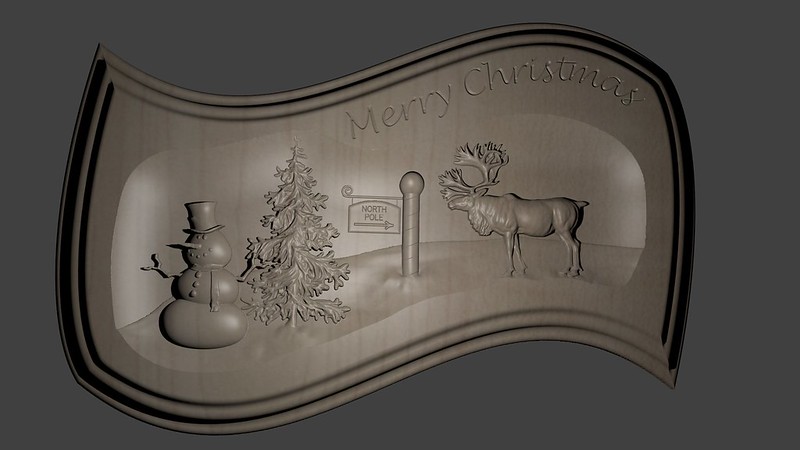 blenderRenderChristmas, on Flickr I can see where this could prove useful for different views and lighting. Coupled with different backgrounds it would be helpful I think. Your opinions?
|
|
#578
Sun 26 January 2014, 09:11
|
|||
|
|||
|
I'm no too familiar with the blender thing but the rendering certainly looks cool.
|
|
#579
Sun 26 January 2014, 09:18
|
|||
|
|||
|
This was my first trial at using render. I liked this one. I definitely gave me a better look at the part.
 blenderRendered , on Flickr
|
|
#580
Sun 02 February 2014, 15:52
|
|||
|
|||
|
I like that Pete, I like that a lot.
Well done.
|
|
#581
Mon 10 February 2014, 17:52
|
|||
|
|||
|
Working on further developing the 3D laser scanner and needed a reduction. So I thought I can cut out some gears. I took some scrap plastic and made these. Each pass was 0.083" cut at 60 IPM with an 1/8" upcut Onsrud bit. The cyclone is working great too. I see mounds of plastic in the barrel.
 Gears, on Flickr
|
|
#582
Mon 10 February 2014, 17:55
|
|||
|
|||
|
Nice, Nice, Nice!!
|
|
#583
Mon 10 February 2014, 18:04
|
|||
|
|||
|
I have the reduction assembly together just waiting on other components. Arduino Uno, Big Easy Stepper and a small stepper motor to be here tomorrow. Sure to be a learning curve but my original test proved promising using a servo for a telescope I have for moving the laser. Need something more dedicated to further my creations for the Mechmate.
|
|
#585
Thu 13 February 2014, 18:15
|
|||
|
|||
|
Very Cool, Pete.
You could put what I know about arduinos on the period at the end of this sentence, but I think I need to learn more. I spotted the interlocking puzzle laying there too. 
|
|
#586
Fri 14 February 2014, 17:47
|
|||
|
|||
|
Darren, they are no different than any other controller. Programming it is easier than programming an Oriental Motor SCX11 controller. It has been a fun project so far.
|
|
#588
Fri 21 February 2014, 20:02
|
|||
|
|||
|
Love that site.
Fascinating stuff
|
|
#589
Fri 21 February 2014, 22:17
|
|||
|
|||
|
Nice to see Art is still at his best work!!
|
|
#590
Fri 21 February 2014, 22:18
|
|||
|
|||
|
Those who have spindles, this is the best I have found for pricing on a set of collets for a ER20. http://www.maritool.com/Collets-ER-C...duct_info.html
|
|
#591
Tue 25 February 2014, 17:54
|
|||
|
|||
|
I should have posted this before but I lack the ability to always remember to take before and after pictures and videos. Here is a difference between the noise level of a 7518 router and a 2.2 kW wc spindle. Sorry no decibel meter.
  Click the image or here Click the image or hereLast edited by pblackburn; Tue 25 February 2014 at 18:07..
|
|
#592
Tue 25 February 2014, 19:31
|
|||
|
|||
|
Big difference.
Thanks for taking the time to post that.
|
|
#593
Tue 25 February 2014, 20:19
|
|||
|
|||
|
Sure, no problem.
|
|
#594
Tue 25 February 2014, 20:48
|
|||
|
|||
|
Darn ATC that blurry customs posted has me rethinking the superPID I just ordered....
|
|
#595
Wed 26 February 2014, 00:38
|
|||
|
|||
|
Pete,
I did not buy a complete set of collets because most of them I do not use. I bought individual collets, I have 1/8, 1/4, 1/2 and 3/8. I happen to use the 1/4 and 1/2 99% of the time and I bought an extra nut. I bought Techniks manufactured collets from All Industrial Tools Supply. I am happy that I did not buy a complete set. I am very happy that I no longer use a router and have an air cooled spindle. My 2 or 3 cents input.
|
|
#596
Wed 26 February 2014, 05:04
|
|||
|
|||
|
Very nice.
One of these days I will get one. The wife is getting fed up of washing ear plugs. Perhaps I should get her to watch the video. 
|
|
#597
Wed 26 February 2014, 09:05
|
|||
|
|||
|
So this is how to influence the wife, huh...
|
|
#598
Wed 26 February 2014, 14:49
|
|||
|
|||
|
Nils,
I have a 1/4, 3/8 and 1/2 collet. I just ordered the 1/8 last night. The only reason I could see for having a full set is for drilling with carbide drill bits on rare occasions. Most of my needs are accommodated with standard sizes I have listed above. It was more of an informative post than I bought this. The spindle upgrade is worth it in many respects. Whether you choose Fan Cooled or Water Cooled is a preference from what I have seen. There are more options with the fan cooled versions from what I have seen. ATC being one of them. Both have there strengths and weaknesses but it is a choice that we must make on our own. For me as a hobby, ATC is not an issue. For most of you with a business, it might be. The minute it takes me to change the tooling is not an issue for me. And your 2 - 3 cents is always appreciated.
|
|
#599
Wed 26 February 2014, 16:14
|
|||
|
|||
|
Pete,
Thanks Most people do not recommend that you drill that much with a spindle. The bearings are not meant for upward pressure.
|
|
#600
Wed 26 February 2014, 16:45
|
|||
|
|||
|
Nils,
The bearings are high precision contact angular bearings. I would not be afraid of drilling as Bridgeport mills (J2 and Series II) that I have replaced spindle bearings on use only a single set of high precision contact angular bearings with an additional radial bearing for the quill. This arrangement is not much different than the high speed spindles. If they did not allow for upward or downward forces, some of the plunges plus the upcut and downcut tooling would really wreak havoc over the spindle. I would think the reason for not drilling is more because high speed steel bit speeds are not even close to the low end of a the high speed spindles. Coated carbide drills have a much higher speed. I have used a lower speed for drilling soft plastic before but not wood as it is too damaging for the bits. Most times I would make an alignment bore with a cutter to be able to use a drill to finish to a given depth. Last edited by pblackburn; Wed 26 February 2014 at 17:06.. Reason: Bad term
|
 |
|
|
 Similar Threads
|
||||
| Thread | Thread Starter | Forum | Replies | Last Post |
| Parts arrived !!! Time to get to work !! - Pennsylvania USA | Rapid | Introduce yourself and start planning | 51 | Fri 06 June 2014 07:53 |
| Newbe here - Pennsylvania, USA | Dave | Introduce yourself and start planning | 19 | Wed 11 December 2013 17:30 |
| Sign for my self | danilom | The Show Room | 6 | Fri 04 March 2011 04:50 |
| Hot Rod Shop Sign | woody | The Show Room | 4 | Fri 23 April 2010 12:14 |
| Edge lit sign | Jayson | The Show Room | 4 | Fri 20 March 2009 22:55 |


