|
#151
 Tue 13 April 2010, 00:39
|
|||
|
|||
|
Aww man,... i want a corona
 
|
|
#152
Thu 15 April 2010, 04:26
|
|||
|
|||
|
Gantry in the Making
Hi,
Done a little bit of prep work setting up the gantry tonight, making sure it is level, straight, parallel and square. I used some threaded rods through the gantry rails to bolt the laser cut parts and the rails together nice and tight. so far so good lets hope it stays that way through the welding process. I am pretty sure I have everything around the right way and I'm sure you will all let me know differently if it is not  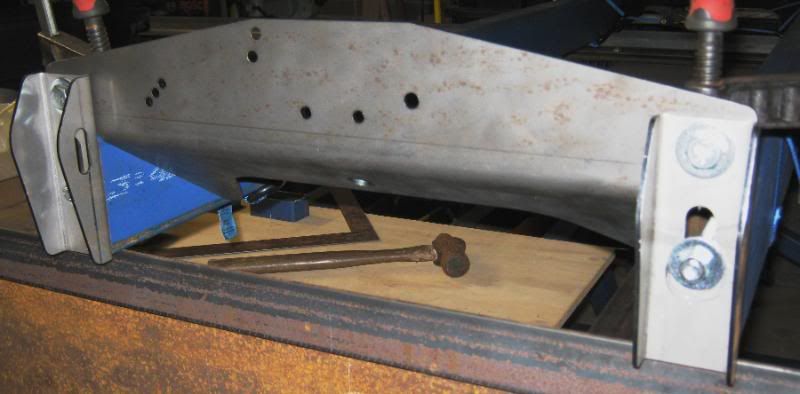 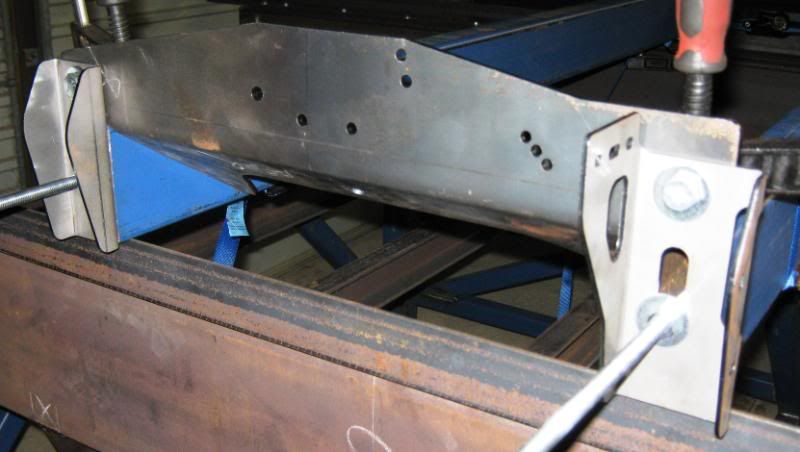 Clamps and straps holding everything in place. 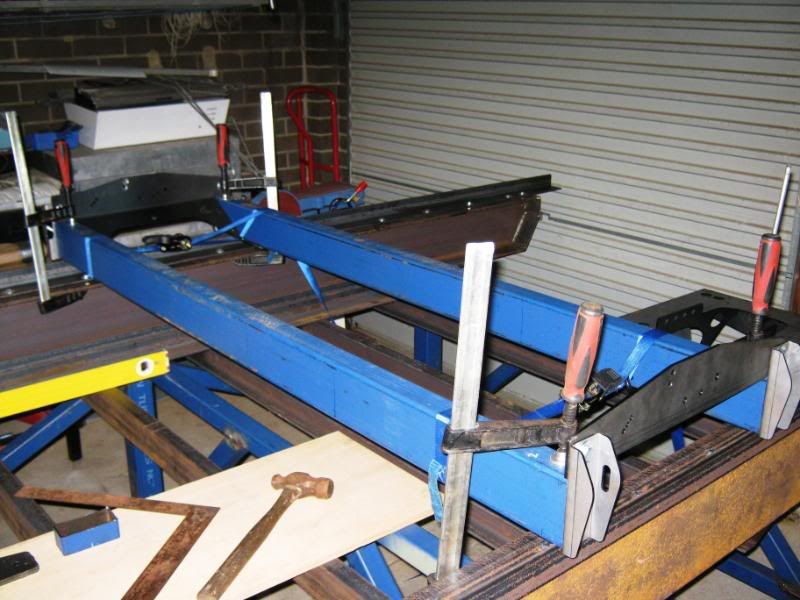 Cheers Tony.
|
|
#153
Thu 15 April 2010, 05:13
|
|||
|
|||
|
Superb job Mr Tony

|
|
#154
Sat 17 April 2010, 06:36
|
|||
|
|||
|
Todays Update!!
We worked on the welding of the both gantrys today as our first job. we used 2 x 2m of M10 threaded rod through the slots in the gantry end brackets which ran inside of each of the gantry tubes with washers and nuts at each end tightening the laser cut parts to the tube ends holding everything nicely together. With them bolted we also bolted the laser cut parts together with the temp M12 bolts again holding everything firmly in place. The gantry tubes were also clamped down onto the X axis rails, after much checking and squaring the welding sequence took place. The same process took place for the second gantry and again I am happy to report all went well, with very little to no propellor twisting taking place. With the gantry's now out of the way we started on the Y car for the first table. Setup again took some time and went through a few setup and checking processes before the welding sequence took place and it all paid of in the end  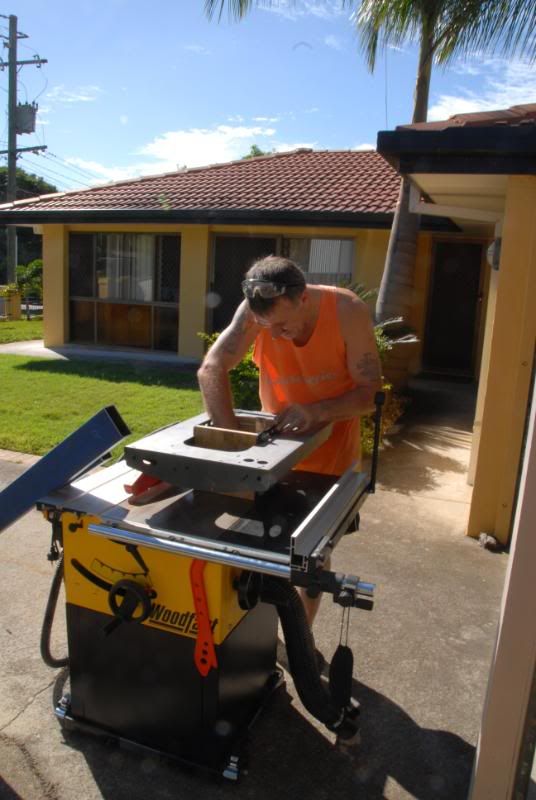 Ross (surfcnc) dropped in and brought along his little pieces of threaded rod for the car, and Ross I'm happy to report they worked a treat. 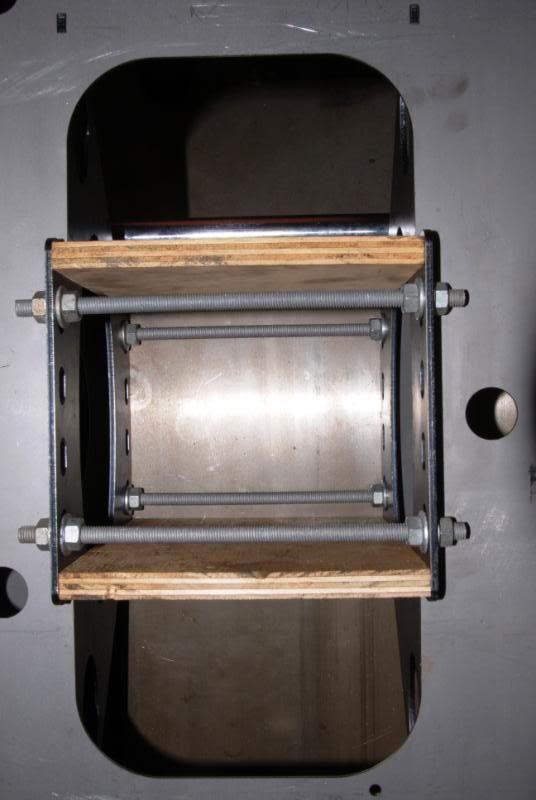 Clamp City here we come!! and let the welding begin!!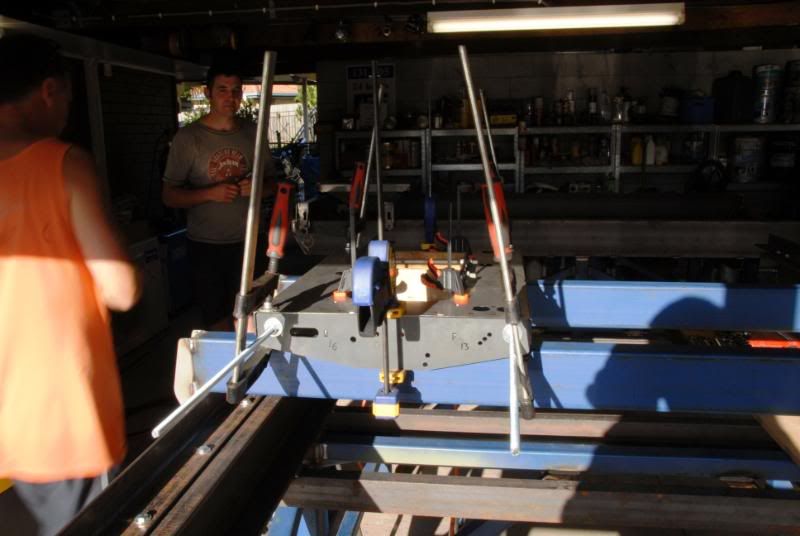 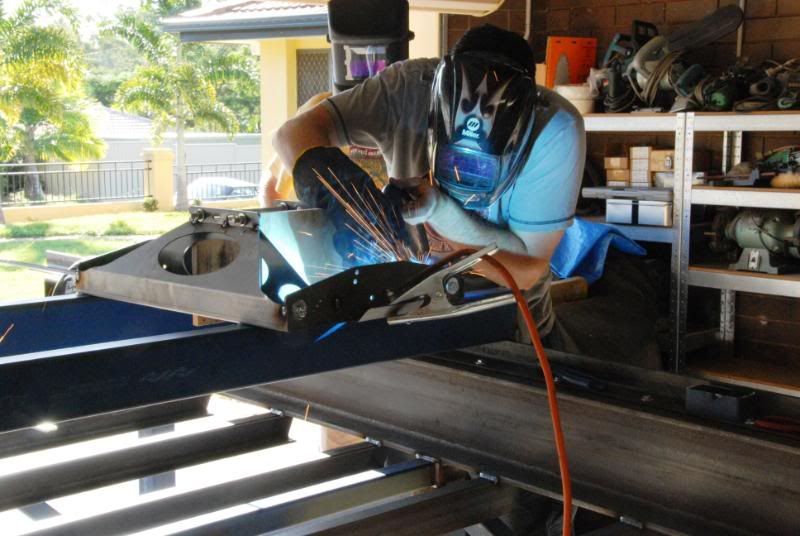 Ross, (surfcnc) picking up a few welding tips!! 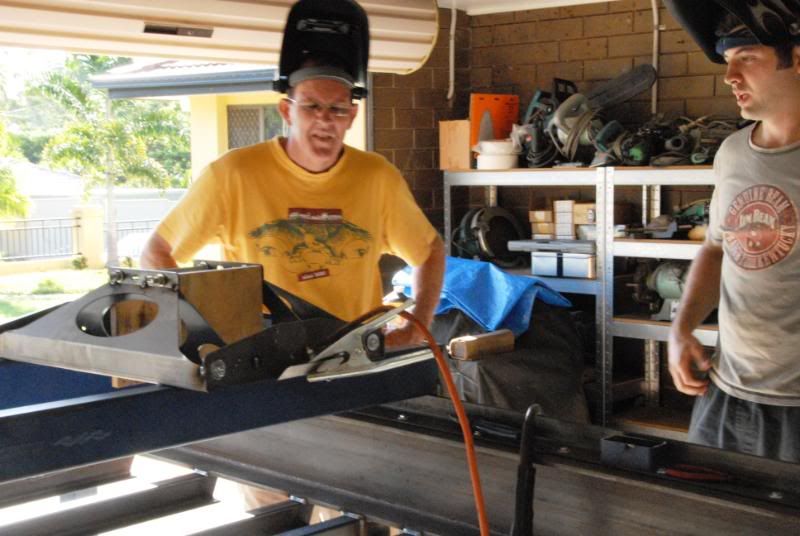 Car welds being cleaned up.  Cars all done and dusted.  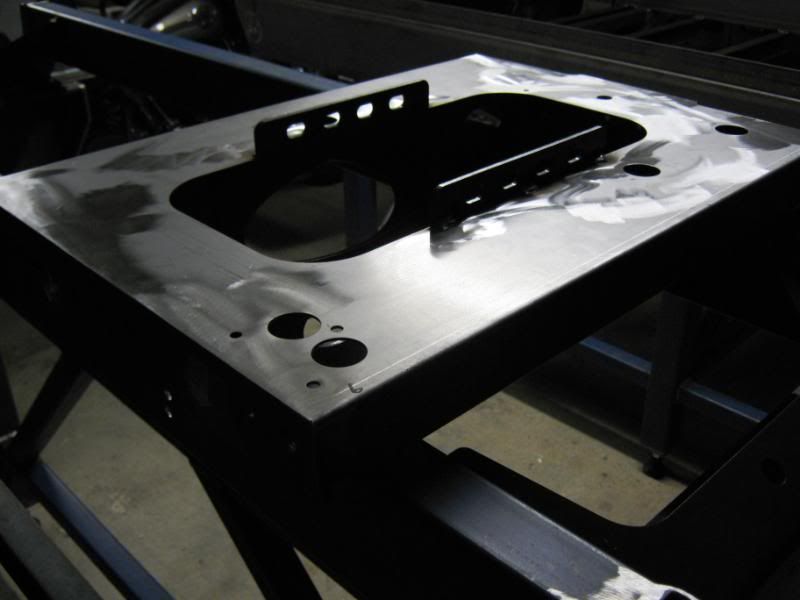 Couple of photos showing the gantrys and cars all finished. 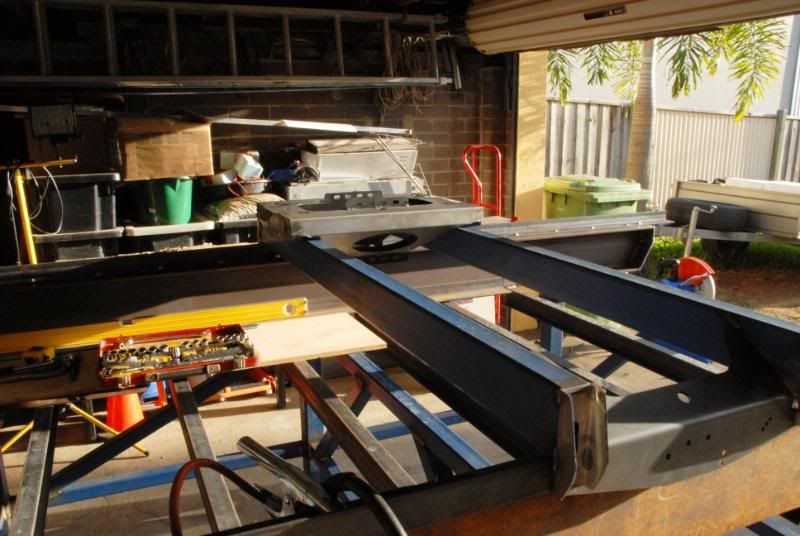 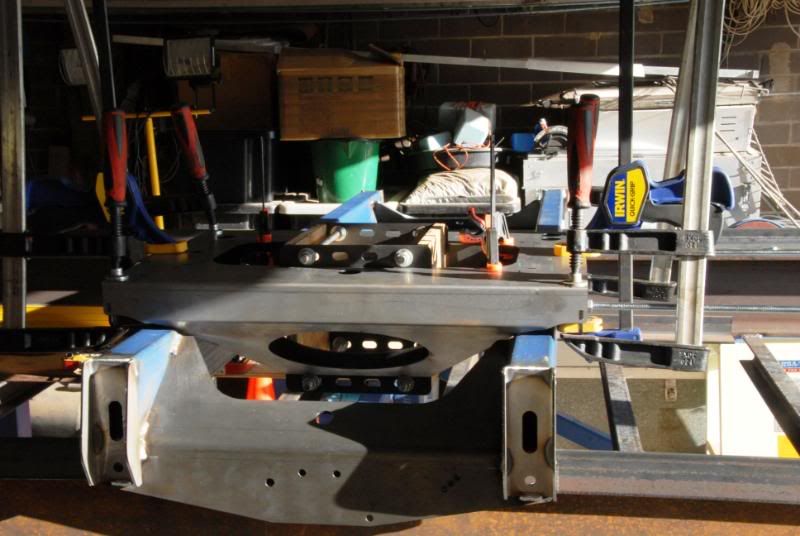 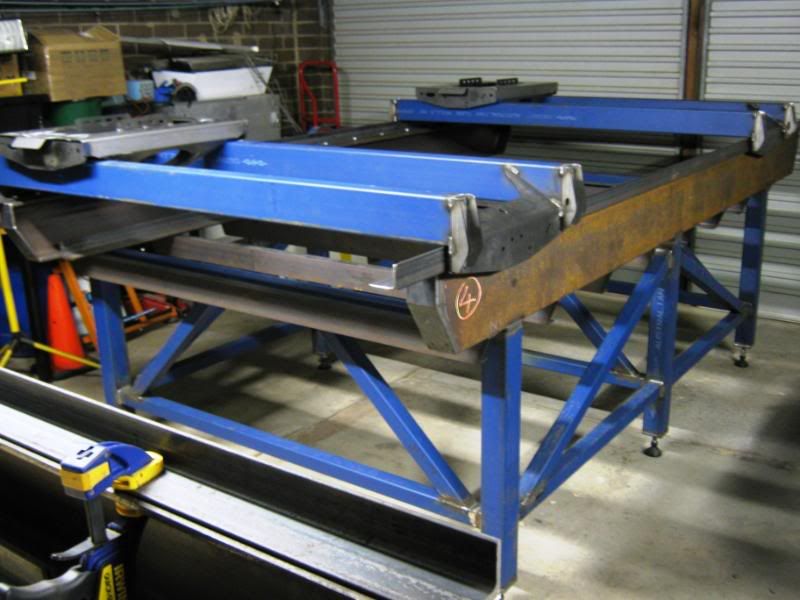 And lastly and not one of clearest photos, and specialy for kobus, the heavy lump of metal sitting next to its best mate MM!!  Cheers Tony. Last edited by AuS MaDDoG; Sat 17 April 2010 at 06:41..
|
|
#155
Sat 17 April 2010, 06:45
|
|||
|
|||
|
Must be a real pleasure riding this on the LONG OPEN road. enjoy.
|
|
#156
Sat 17 April 2010, 07:17
|
|||
|
|||
|
Cheers Tony
For those interested, on my mission to see the crack team in action, I got one sandwich, two drinks and enough hints to last me six months. Tony and Paul's tables are precise by no accident, as they are taking every opportunity to check, then recheck, the parts before they are welded. CONSIDERABLE thought has also gone into getting a good datum to work from and the accuracy they are getting is in a word - fabulous. Now when did you say those sandwiches were on again ? Regards Ross
|
|
#157
Sat 17 April 2010, 22:26
|
|||
|
|||
|
Thanks for the detail in this build and all the photos - they are really helping me to get my head around the planning.
I'd appreciate a guess at the time spent welding each table to date. I'm guessing 40+ hours?
|
|
#158
Mon 19 April 2010, 04:37
|
|||
|
|||
|
Hi Red,
I'm glad the detail and photos in my build thread are of help to others, I know that without the detail and photos that others have posted before me, I would certainly have struggled with my build. Big thanks really need to go to Gerald for this great machine and for this very informative public forum which once you learn how to read it and work out where to find things properly, it really makes the build so much easier. With regards to welding time, both tables, both gantrys, and both cars the total setup and welding timeall up is probably in the vicinity of close too 35 -40Hrs. A lot of cutting preperation and grinding was done prior with several hours being worked to get everything ship shape but it all appears to have payed off in the end so we are really happy with the results.Cheers and good luck Tony.
|
|
#159
Sat 24 April 2010, 02:21
|
|||
|
|||
|
Hi All,
Drilled and drilled and drilled and tapped  The good news is!! thats the largest part of the drilling and tapping done. Fitted the X axis rails to the second table and all the Y axis rails also fitted to both Y gantrys. 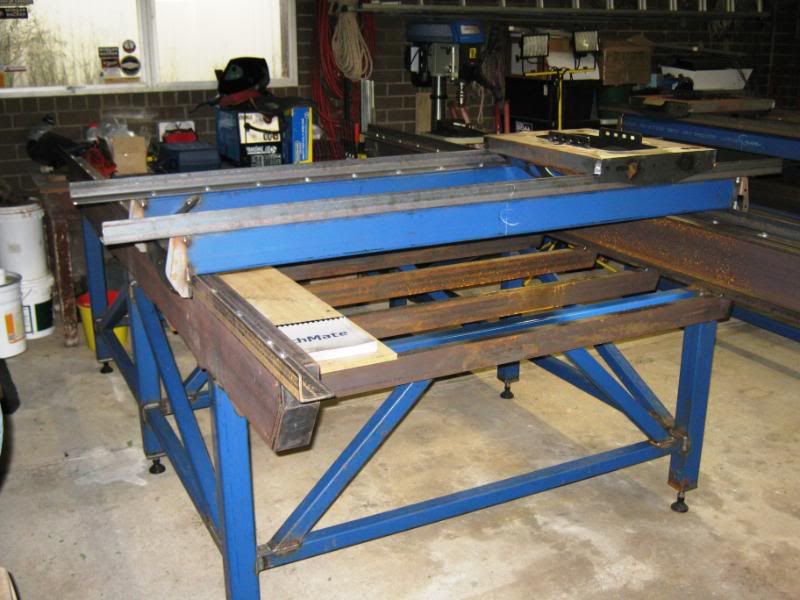 I decided to trial drilling a hole and then tapped it into an offcut of the gantry tube which is 3mm thick, I then used my ratchet and socket and screwed the bolt in applying enough pressure, and the bolt held strong with no sign of stripping. 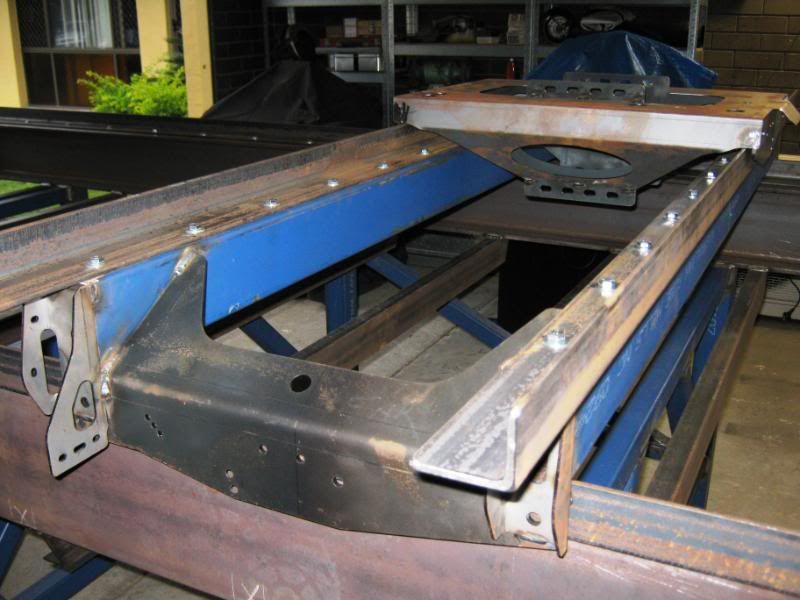 So I decided to not use the steel backing strip. I also reduced the bolt centres on the gantry rails to 150mm centres and will apply spring washers also. Should be more than enough. 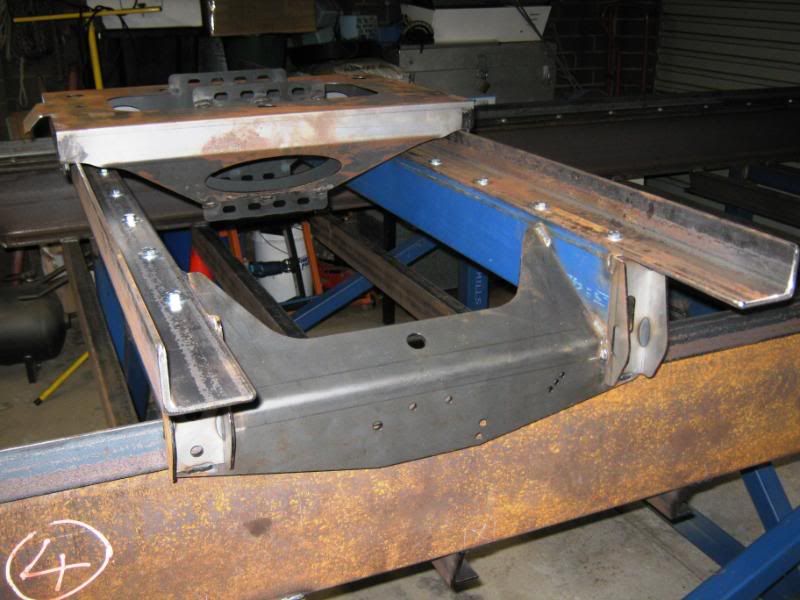 Hopefully the rain holds off tomorrow and we might get the tables all prepared and cleaned, and some primer on them to stop all the surface rust that keeps appearing. Cheers Tony.
|
|
#160
Sat 24 April 2010, 03:20
|
|||
|
|||
|
Looking good! Should see some serious dust manufacturing real soon!
|
|
#161
Sun 25 April 2010, 05:39
|
|||
|
|||
|
Hi Ken,
Thanks for your enthusiasim, but we are still a long way away from making any dust, a little bit slower than normal due to building both tables at the same time!! much quicker with just one  Anyway as usual here is todays progress and the obligatory photos to check out!! We started by moving the first table outside before then scrubbing and degreasing the whole table.  We then gave all the Y support channels and the 2 main X beams a hit with some rust converter which worked a treat. 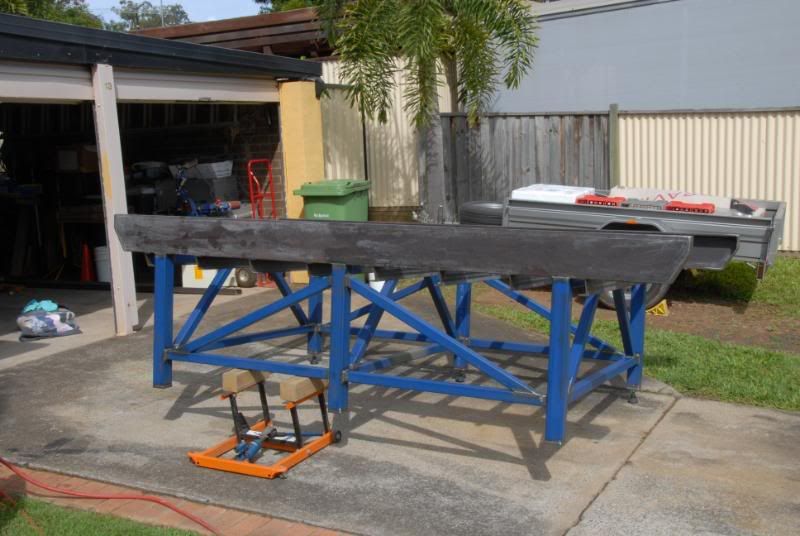 Then once the table was all wiped and air dried we then spray painted using a combination of a small and large gravity fed High Volume Low Pressure spray guns using a Heavy duty KillRust Primer. 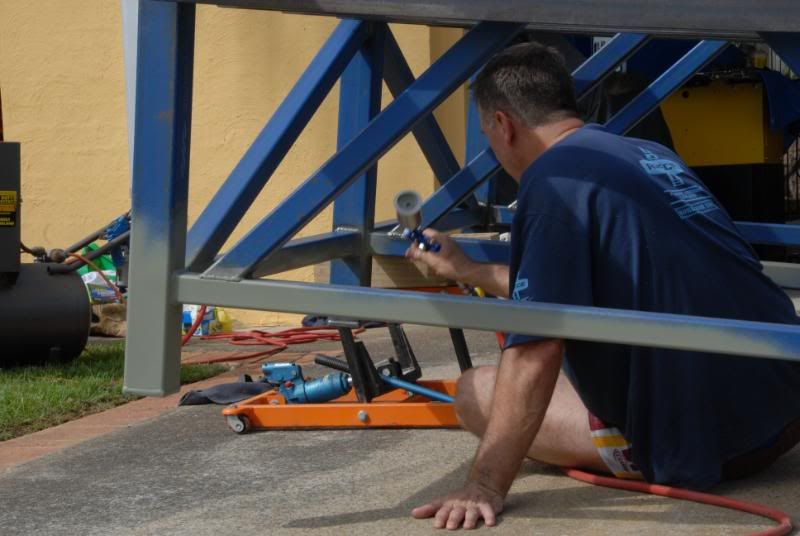 Photo of Paul aka Skippy here on the forums standing next to his now pride and joy 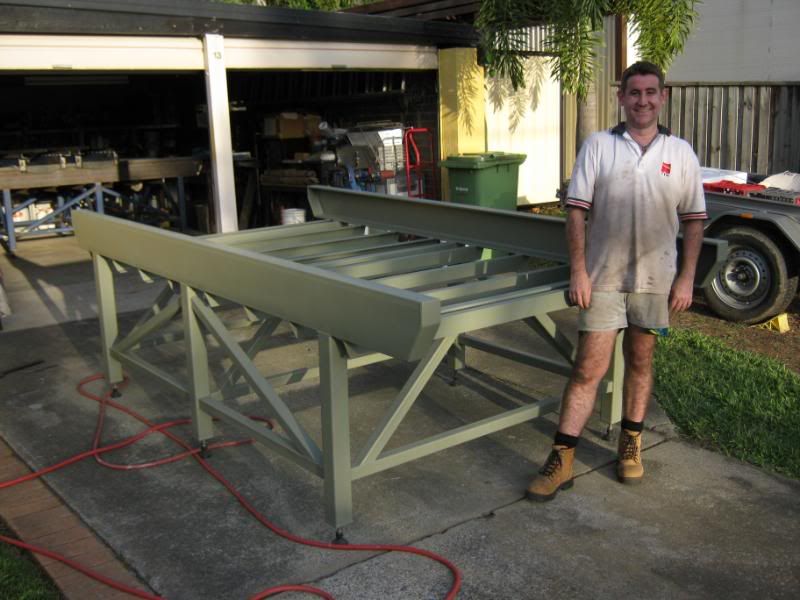 Thought I would throw in a couple of close up shots of the welding after being painted. 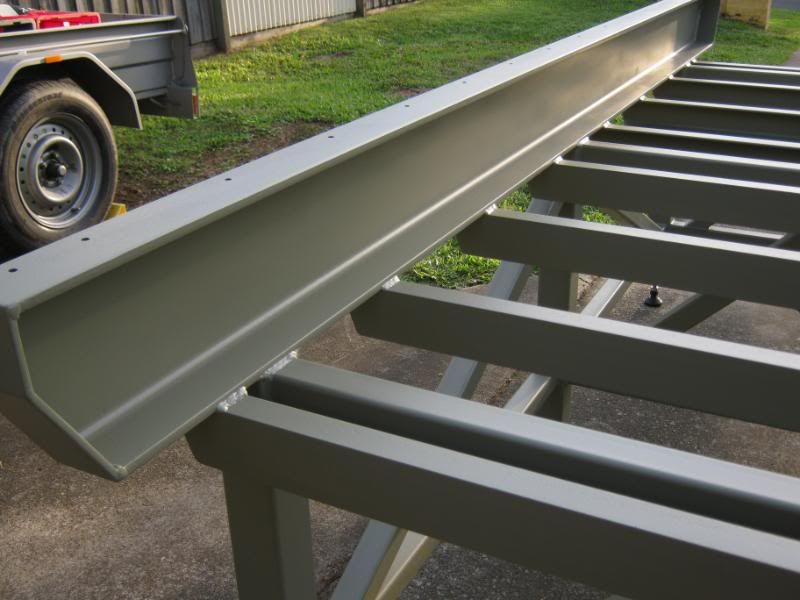 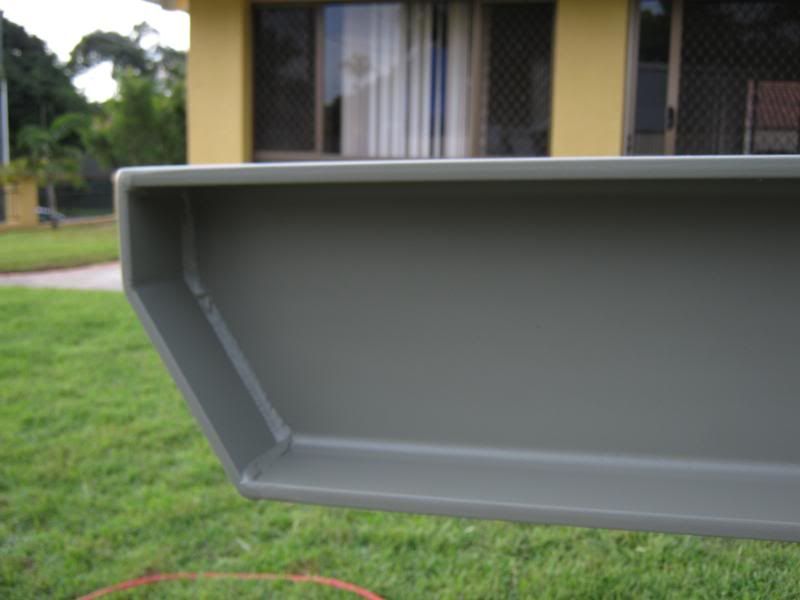 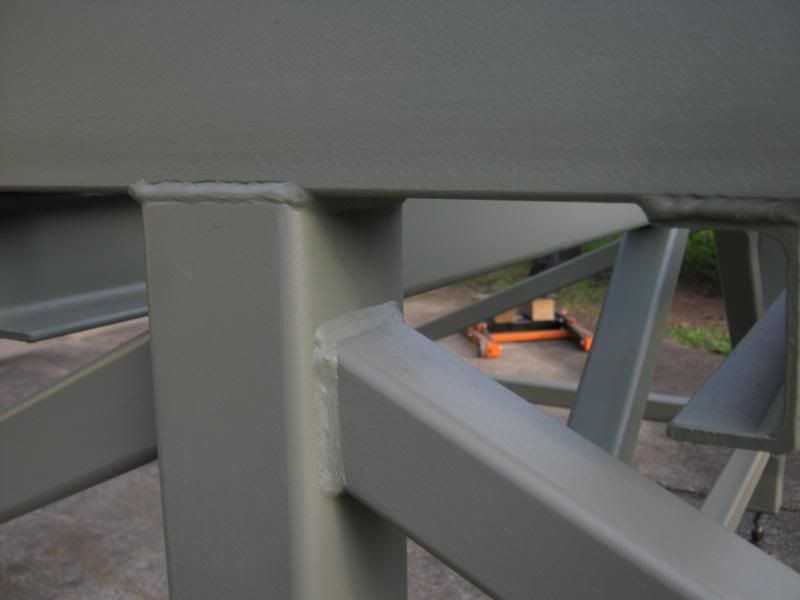 I am looking to make a start hopefully tomorrow on the rail cutting, so we shall see how we go I think I have put this part of the build off for long enough, and its time to put it behind us!! Cheers Tony.
|
|
#162
Sun 25 April 2010, 05:43
|
|||
|
|||
|
Hey - you forgot to clean down Paul !!
Ross
|
|
#163
Mon 26 April 2010, 01:16
|
|||
|
|||
|
Hahaha Good on ya Ross!!!
If Skippy stood there any longer admiring his MM I was going to give him a coat of primer just to tidy him up Lol. I managed to squeeze in a little bit more time to work on MM stuff again today, so set up for the rail cutting and made up a little jig which after trying it out, appeared to all work very well and was very easy to use!! Thanks for the idea Ross!! what was I worrying about 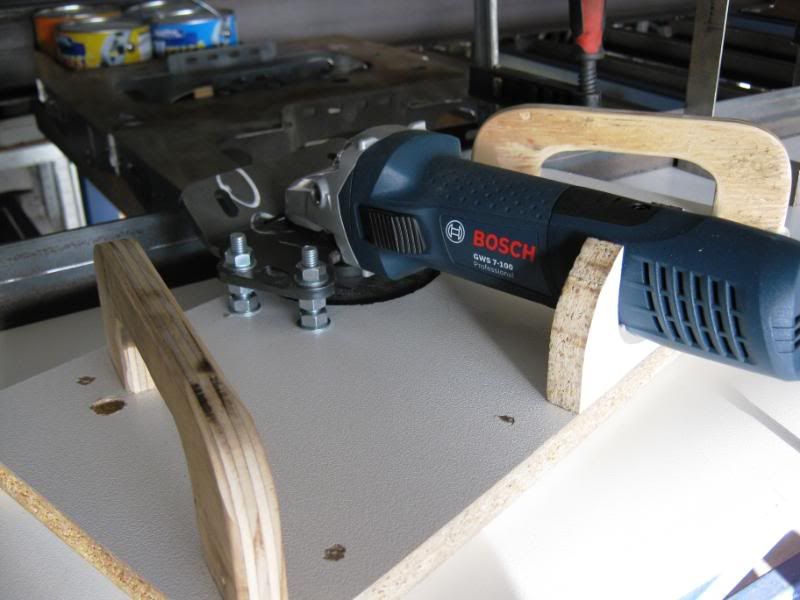 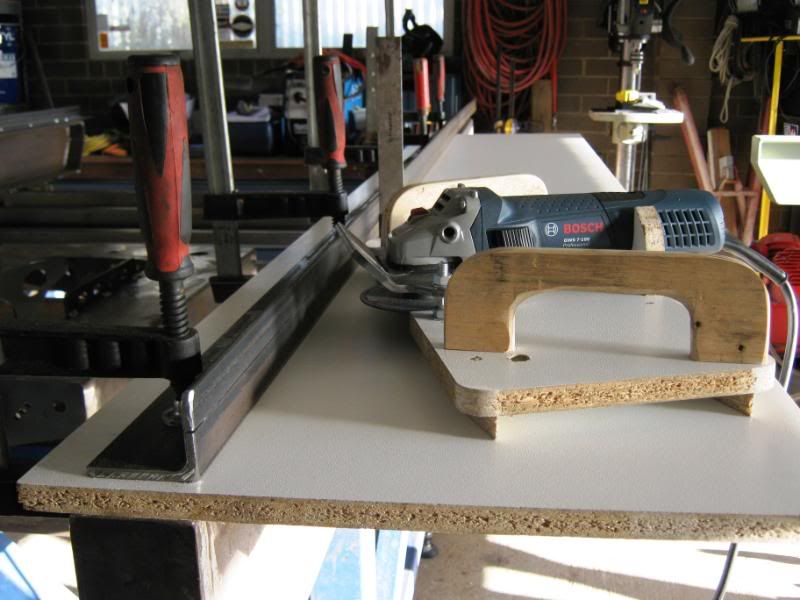 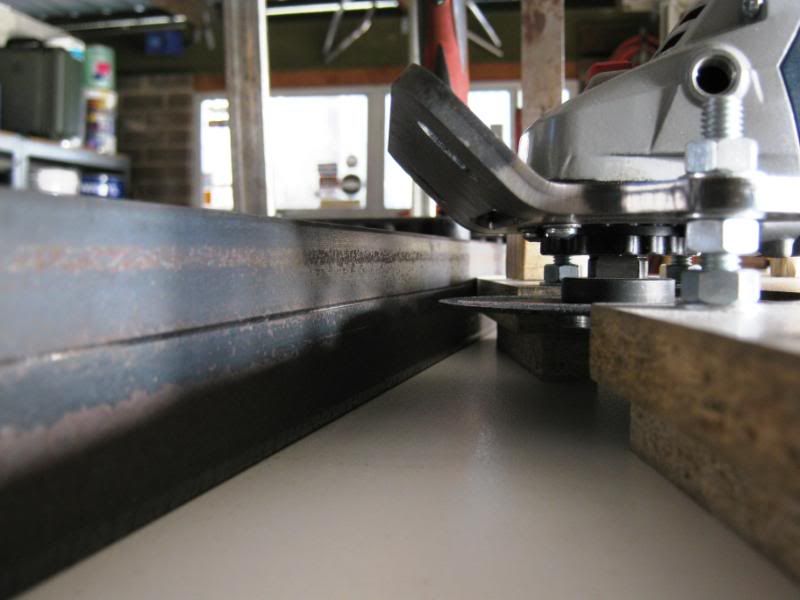 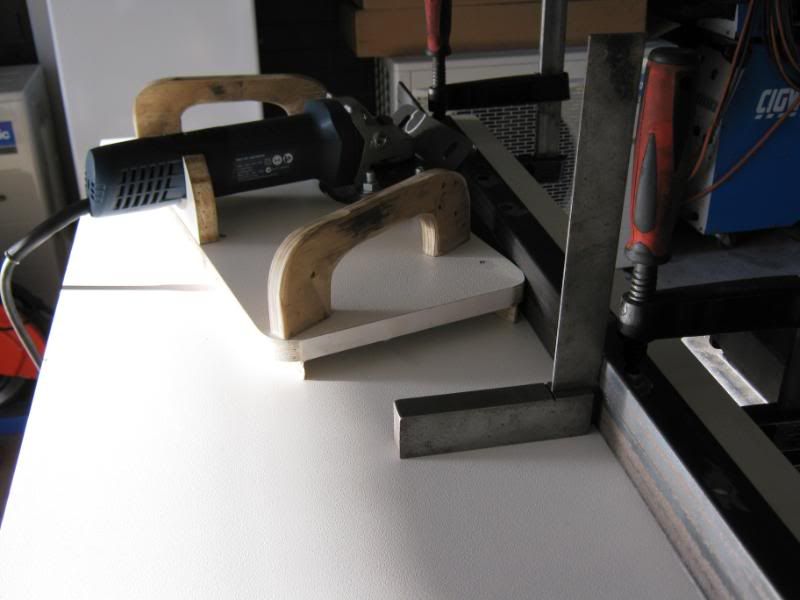 Cheers Tony.
|
|
#164
Mon 26 April 2010, 02:46
|
|||
|
|||
|
Looking very good Tony
The engineers square tells the story, those rails will be great. I'm sure lots of forum users will appreciate the nice clear photos of your set up. Regards Ross
|
|
#165
Tue 27 April 2010, 03:09
|
|||
|
|||
|
Hi All,
Thanks to Ross (surfcnc) for the contact I have ordered our E-Chains for both tables X & Y from http://www.alliedconnectors.com/home.html Ordered more than we need so we will have some parts as spares. This is what I ordered. CPS036N.075.R70.B2T @ 2000mm x 2 Set2 X Axis. CPS036N.055.R70.B2T @ 1500mm x 2 Set2 Y Axis. Hopefully I should have the rail cutting done soon and can get onto welding and painting the E-Chain support brackets. Cheers Tony.
|
|
#166
Fri 30 April 2010, 02:34
|
|||
|
|||
|
Rail Cutting On The Move
Hi All,
Still waiting on our E-Chains to arrive, they are on there way and should be here any day now. Managed to cut our first X axis rail and all went well. Going through a fair few cutting discs though, so I think we might need to go get some decent ones 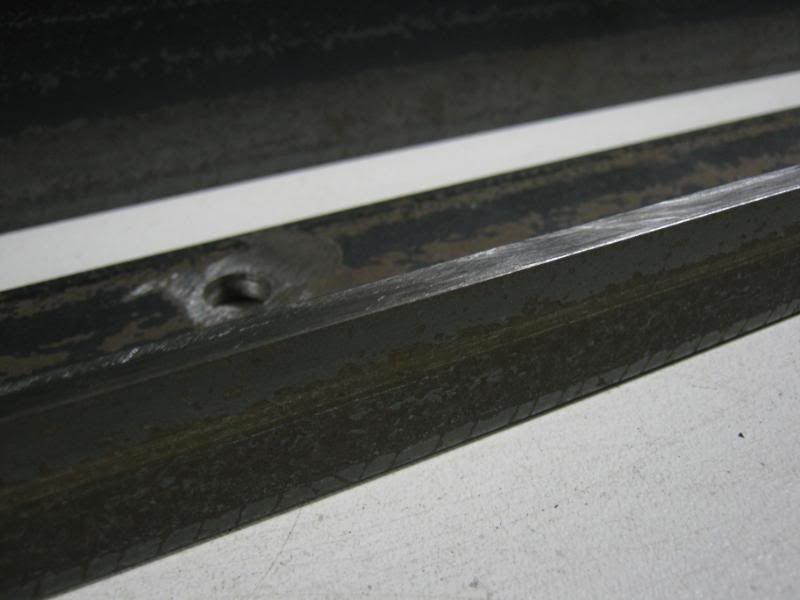 Cheers Tony
|
|
#167
Sat 01 May 2010, 03:28
|
|||
|
|||
|
Todays Progress!!
Not too hard once you get going It just seems to be one of them jobs you just want to keep putting off and off.Well I eventually got my brain into gear and hit the rail cutting head on today, I managed to cut all the X & Y axis rails for both Paul (Skippy) and my tables. I also started to grind the first of many rails for the V, finding this a little harder than I thought but I'm sure I will get there in the end. Or at least tomorrow Here is todays progress. 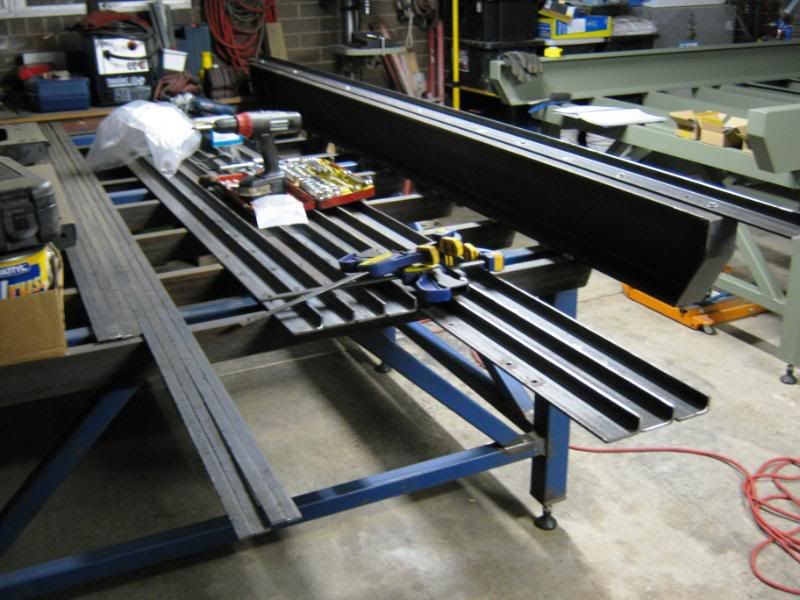 Cheers Tony.
|
|
#168
Sat 01 May 2010, 03:35
|
|||
|
|||
|
Tony pleased to see your rail cutting is behind you. So impressed by your get it done attitude.
Ross
|
|
#169
Sat 01 May 2010, 04:16
|
|||
|
|||
|
Hi Tony,
Rails are looking good. We started to grind the V's then noticed a little bit of uneven on the faces appearing. We then put the skate back together with a grinding disc and ground the tops of the cuts to a full square and flat surface. Then we went back to cutting the v's and they look really nice now. Just my 2c's worth. Chris
|
|
#170
Sat 01 May 2010, 08:05
|
|||
|
|||
|
Hi Chris,
Thanks for the heads up, I think thats what I will be doing tomorrow before any further grinding, as I am also experiencing some un-eveness with the grinding after cutting. Cheers Tony.
|
|
#171
Sun 02 May 2010, 05:59
|
|||
|
|||
|
Todays Update!!
Well I'm very glad to report that after getting the heads up from Chris regarding the rails not cutting perfectly flat which I presume is due to flex in the 1mm cutting disks, I ground the tops of the rails perfectly flat and square before then grinding the V. 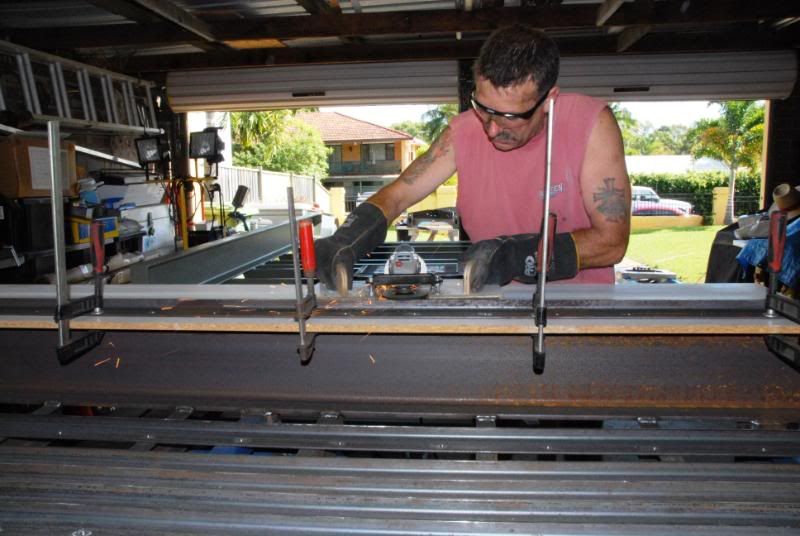 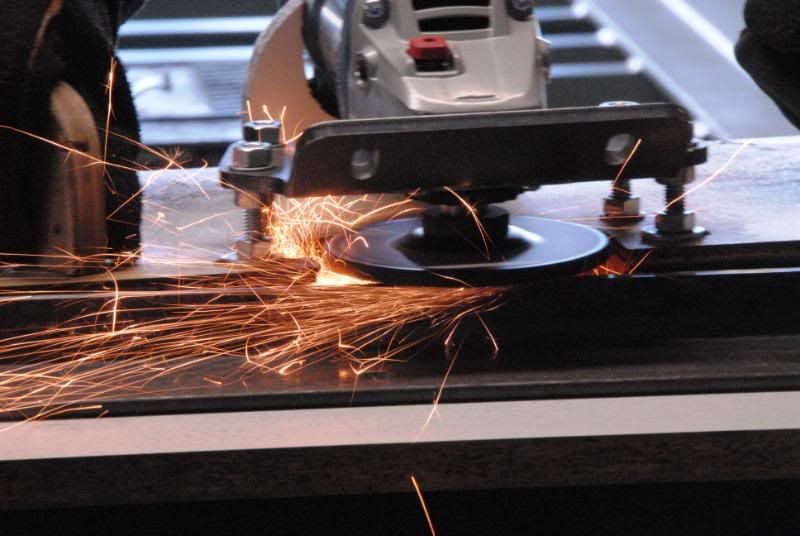 I also found that to get the skate to slide properly when cutting the V I used a chain lube on top of the rail which is just like a very fine lubricating oil, but the good thing is the metal filings from grinding do not stick to it and the skate slides much better rather than digging in and stopping. 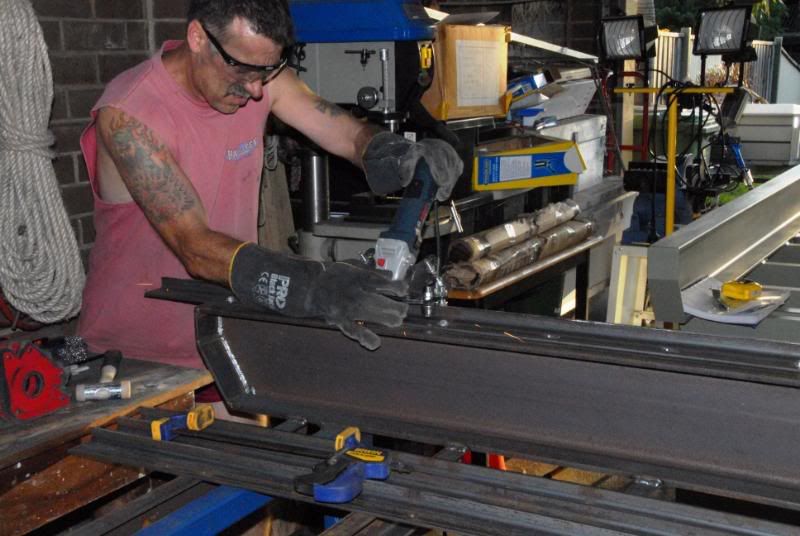 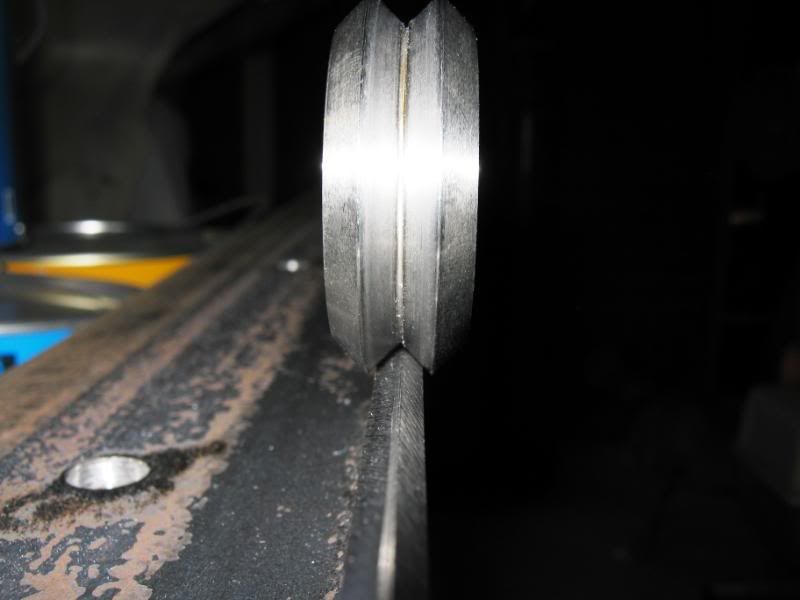 Paul degreased and rust converted both the Y gantry's and the Y cars before I then painted them with the Heavy duty Killrust primer. 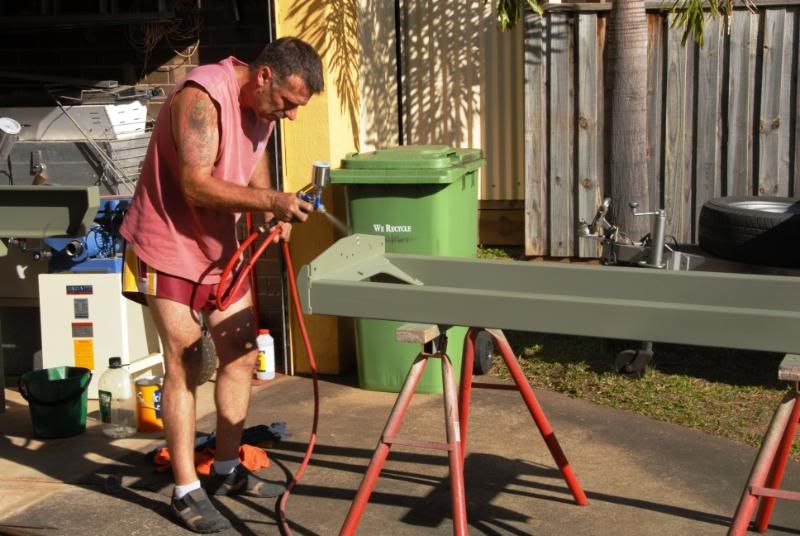 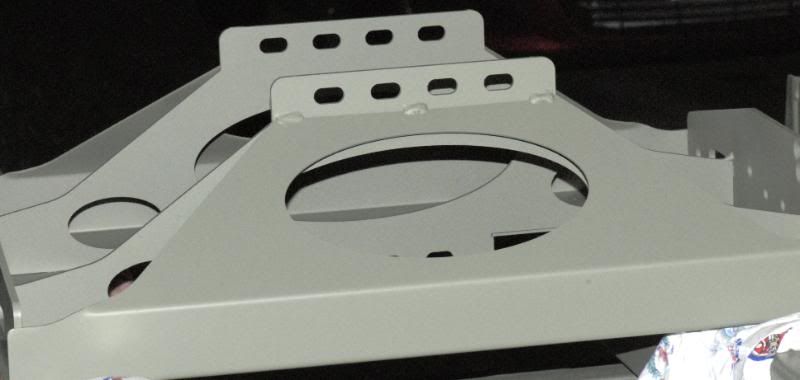 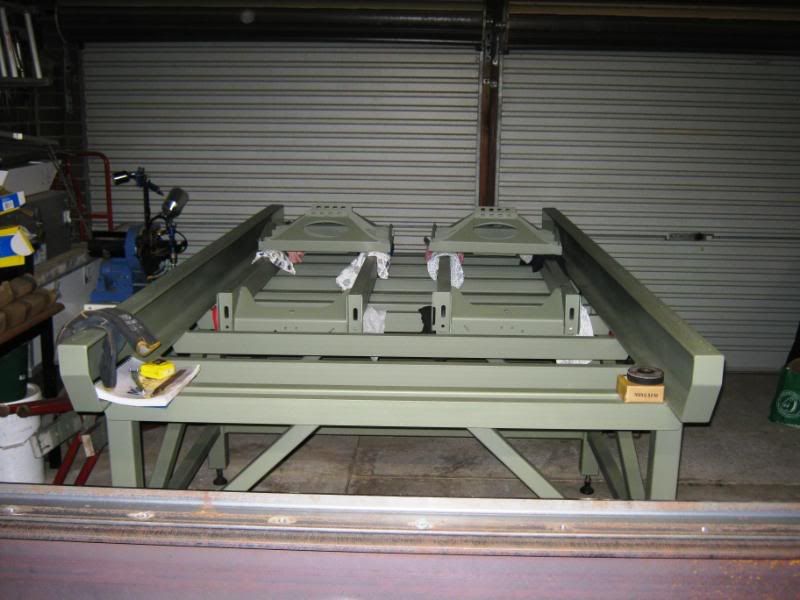 Now that I have the cutting of the rails back under control it will be back to grinding the rest of the V rails and also cutting them to length tomorrow. Hopefully thats the end of that Cheers Tony. Last edited by AuS MaDDoG; Sun 02 May 2010 at 06:02..
|
|
#172
Sun 02 May 2010, 06:28
|
|||
|
|||
|
Looking good guys, you are at the the stage in you build where Leon and I would love to be up to.
Keep up the good work. Chris
|
|
#173
Sun 02 May 2010, 18:43
|
|||
|
|||
|
Great work guys. Looks like you are def. breaking a sweat working on the mechmate!
|
|
#174
Sun 02 May 2010, 23:30
|
|||
|
|||
|
Thanks Brian!!
Lets re phrase that Brian, we were breaking out in a sweat, that is until today!! Work came to a sudden halt when our 4" Bosch angle grinder decided to stop!! no smoke either looks like the Bosch cannot go the distance with the build of two machines as I fell short on the grinding of the V rails by one set of rails for the second table.So rails will need to wait now until we can get another grinder  Cheers Tony.
|
|
#175
Sun 02 May 2010, 23:58
|
|||
|
|||
|
Tony, sorry to hear your misfortune. My skil grinder (DIY grade, light-duty, younger brother of Boshe) survived throught the ordeal very well. Just be gentle, hold back when the grinder groan in distress, goes a long way. BTW, no smoke is a good sign, maybe you just blew the fuse. This happened to my abrasive disc chopper.
|
|
#176
Mon 03 May 2010, 08:36
|
|||
|
|||
|
I tought about this, a month back I collected enough points in my gas station card and I changed points for a black&decker grinder, im confident I will be able to do everything on my previous one and this one
|
|
#177
Tue 04 May 2010, 04:21
|
|||
|
|||
|
New/ replacement grinder underway, so it will be back to grinding the rails shortly
75mm and 55mm E-Chains arrived for the X and Y axis's, still need to arrange the correct end brackets but will do that when I order the Z axis E-Chains which should be in the next week or so. 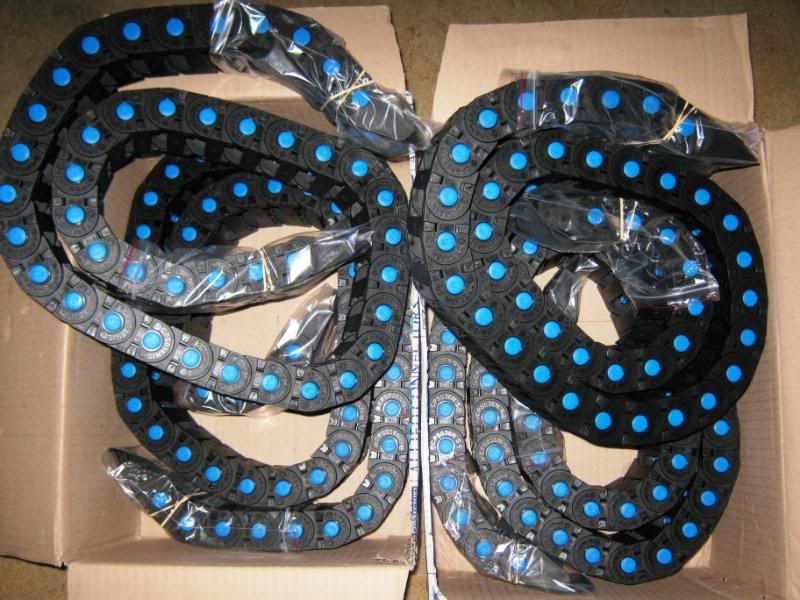 If any body can point me in the right direction as too what is required in the way of E-Chain for the Z it would be much appreciated in the meantime I will keep looking here on the forum. Thanks Ross for pointing me in the direction of Alan_c's build thread will check it out. Cheers Tony.
|
|
#178
Tue 04 May 2010, 04:57
|
|||
|
|||
|
Tony, I don't get your question on the E-chain for Z axis... BTW I did nothing to it...
|
|
#179
Tue 04 May 2010, 05:04
|
|||
|
|||
|
Quote:
As long as you don't bulldoze down the angle with the grinder in a big hurry, ANY working grinder (that fits your grinding skate) will survive the ordeal
|
|
#180
Tue 04 May 2010, 06:29
|
|||
|
|||
|
Ken,
Let me firstly say, I am quite capable of using and knowing the limits of power tools as I have worked with them my whole life, however and for whatever reason the Bosch just did not make the trip, I must say though that the cutting then grinding flat and then grinding the V on not one set of rails but two, over some very long days would tend to take its toll on any light use power tool. Quote "ANY working grinder (that fits your grinding skate) will survive the ordeal" thats a big statement Ken when so many others have lost grinders during their build of a MM. Ken, Not so much a question regarding the Z but more any usefull info like E-Chain size, length, assembly photos or any other info that may help the design and or construction of ours would be appreciated Cheers Tony.
|
 |
|
|
 Similar Threads
|
||||
| Thread | Thread Starter | Forum | Replies | Last Post |
| Making Skins #74 - Brisbane Australia | Surfcnc | MechMates already cutting | 1078 | Sun 20 September 2015 11:05 |
| Touch Probes Have Arrived #72 - Brisbane, Australia | skippy | MechMates already cutting | 130 | Mon 04 March 2013 04:31 |
| Do my legs look fat? - Brisbane Australia | tangocharlie123 | Construction started, but not cutting yet | 60 | Wed 22 June 2011 06:32 |
| New member - Brisbane Australia | stan stuart | Introduce yourself and start planning | 3 | Tue 11 May 2010 20:48 |
| Commercial Signs | Hugo Carradini | The Show Room | 17 | Wed 21 January 2009 22:51 |


