|
#181
 Fri 15 July 2011, 07:01
|
|||
|
|||
|
Ross, a random thought:
Could you also pre-blow a set of blocks that support the blank? 
|
|
#182
Fri 15 July 2011, 07:34
|
|||
|
|||
|
Hi Brad
Short answer - Yes for a specific design. Long answer - each board can be quite different so generally the set up needs to be flexible enough to accommodate these different designs. Here is one idea that uses a flat bed - http://www.youtube.com/watch?v=SgMGTEhspZ4 http://www.youtube.com/watch?v=Uvnl-R5Pkjg Here is an example of too little support or excessive plunge rate - note the tail flex on contact. http://www.youtube.com/watch?v=8viItUSoKx8 Regards Ross
|
|
#183
Sat 16 July 2011, 19:00
|
|||
|
|||
|
Hi Ross,
The WitchCraft videos are impressive. A whole separate control system for the vaccuum suckers. That's one looong bit they use to cut the outline. No surfing for me. Bit busy at present and baby is too cute, so I prefer to hang with him than drive 2 hours on a cold day to get hammered in freezing water. Also I'm trying to get the MM done. My intention has always been to cut from a block of foam leaving tabs, then flipping the block. I believe this will be the easiest for hold-down (clamp the edges that do not get cut) and for registration (use the block edges). Of course it's slower because of all the excess material. I've had boards done this way on a big 4 axis machine (5 boards at a time!) and it worked well. Of course, EPS only, so I don't have to worry about varying density of the blank. My longer-term solution to cutting too much foam will be to use the hot wire cutter I have to cut bottom curve and thickness (like the Witchcraft people appear to do), but leaving the rectangular outline. Then support the curve on rocker tables (one for the top and one for the bottom) to limit flex during cutting (excessive use of tabs could also be an option). If all pans out well, then my intention is to use vaccuum hold-down on EPS rocker beds. I only use one rocker on anything 5'10"-6'2", with slight tail kick variations. My boards are stringerless. I use vaccuumed-on veneer to hold the rocker shape, and do this on a rocker table (I see the Witchcraft people put the bottom veneer on before cutting the deck), so I may decide that some distortion during cutting is acceptable, and so review how I do things. I'm open to advice. Sean, feel free to chip in.
|
|
#184
Sat 16 July 2011, 22:05
|
|||
|
|||
 Hi Red Hi RedFamily first is always the best policy, the surf will come again. Thanks for your response and interesting that you use the veneer to hold the rocker. If I ever get on with it and do some shaping on my machine, I will post up what happens. Will probably just tear the glass off some old boards and cut them down progressively until they are just dust in the extractor as a practice. Other projects need to be finished before any shaping gets a run on my machine, its a long term goal for me but a goal none the less. Only time will tell if I deliver on that one . So many projects so little time.Regards Ross
|
|
#185
Sun 17 July 2011, 05:19
|
|||
|
|||
|
Red,
My thoughts on you application are this: If your working with a rectangular billet, then tabs and registration blocks on the table are a fine solution. The down side is you use "just a little" more material, but the extra mass=stability in size pending your number of tabs and placement. If your going to use the "preformed" blanks, then a cheap solution is make a "negative mold" that the board of choice fits in. Since your table size is large enough, the left side is for top cutting, the right for bottom cutting. Vac-holddown could be as easy as a shopvac and a few holes in the "negative" foam block and your holding everything down. The tool path for the hold down will be the same as the board, so registration will be spot on. If you have a high volume part that will be cut frequently, then the hold down negative part could be out of plywood, plastic or anything really. 3d is fun, you just have to think about the part and "z" change for clearance of tool bit vs. gantry height. (tip and trick) If you smartly build the hold down negative part, you can put "side draft" tunnels down the starboard and port sides of the blank as dust collection. It doesn't really pay off if your doing a few parts a day, but if your doing a hundred, then in makes sense! Last edited by smreish; Sun 17 July 2011 at 05:21..
|
|
#186
Sun 17 July 2011, 17:41
|
|||
|
|||
|
Ross,
I'm the same - too many projects! Cutting a few boards is just the start. Sean, Thanks. I hadn't thought of using each side of the machine for a separate purpose. My 'rocker table" is the 'negative" you recommend. If I do a good job with the hot wire, then I will end up with a positive and a negative. Nice idea about the holes through for vac hold-down. I had not considered this. And thanks for the tip on dust collection. You've got me thinking. Cut a few roadrunners this weekend. Trying to figure out feed rates and bit size so I don't have strings on the top surface (should I surface the wood first?). Still struggling with getting Z zero right. Time for a touch plate, I think. This may be a circuit involving a bulb, battery and crocodile clip, but I'll do a bit more research.
|
|
#187
Tue 19 July 2011, 06:09
|
|||
|
|||
|
Quote:
Red, can you help me? remember where you got these feet?? thanks! Francis
|
|
#188
Tue 19 July 2011, 12:36
|
|||
|
|||
|
I know where he got them
But I think Red has some spares
|
|
#189
Wed 20 July 2011, 07:07
|
|||
|
|||
|
Quote:
|
|
#190
Thu 21 July 2011, 16:45
|
|||
|
|||
|
Hi Francis,
Apologies for the slow response. I have no more feet. I got feet from Mike MetalHead. No issues shipping from the U.S. and the price is right. I also got bearing supports from Mike, so you might consider those at the same time. Good building. Regards Red
|
|
#191
Sun 07 August 2011, 20:37
|
|||
|
|||
|
Quick update
I had a few Mach 3 crashes. Traced them to continued residence of the trial version on my machine and use of that version's loader to start the licensed version (I think). Some uninstalling and installing and a few restarts later and redirecting Mach 3 to the correct .xml config file and things are running smooth again.
I'll get some decals cut, and post the Roadrunner cut to prove it works.
|
|
#192
Wed 21 September 2011, 05:47
|
|||
|
|||
|
MM in a bucket
The Rosencrantz and Guildenstern of MM construction.
I swept my drill shavings into a bucket. This is how much accumulated during the build... 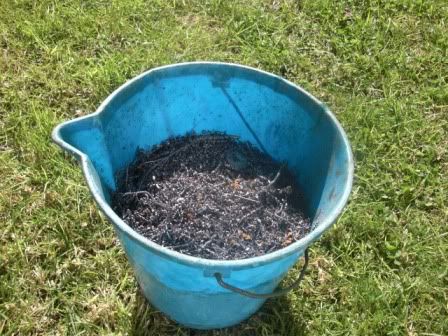 And here's the reason I've been so slow getting the decals on the machine and finishing the workshop so that I can move it in: 
|
|
#193
Wed 28 September 2011, 19:30
|
|||
|
|||
|
Help needed on sourcing foam router bit and other stuff
I've been spending time getting the tin shed garage into some sort of shape and nailing carpet to the walls for soundproofing. We'll have to see how that works out. Can't be worse than current practice of running machine in the open air.
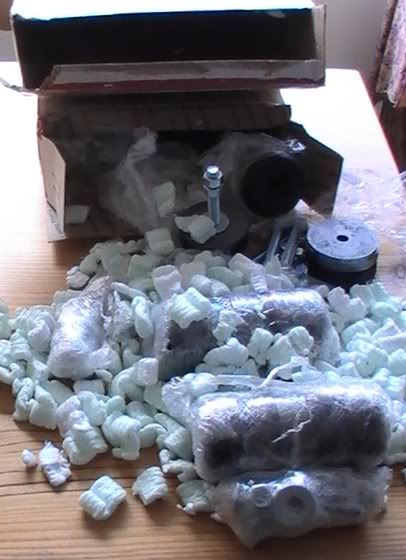
Touched up a few things on the machine like paint scratches and more permanent mounts for the proxy detectors. I have to cut a sign for the MM. and then shoot a film of it cutting. The wheels are in place, so now it's a question of rolling the machine into it's more new home that does not involve blocking the view out of the kitchen window. My gas shock can't lift the router, but does "help". Is this likely to be a problem over time? The motor lifts the Z without problem, but I don't want to overwork the motor (mind you, the same spec motor drives the Y-car). I've done a bit of looking around and only found one supplier of these kinds of bits for cutting polystyrene foam. They are rhino and wounded, judged by the way they charge. Anyone recommend a source or alternate?  CUTTER HEAD DIMENSIONS: 1.19" (31mm) Diameter X 2.83" (72mm) Length. RADIUS: 0.325" (8.25mm) SHAFT/SHANK DIMENSIONS: 1/2" Diameter X 1.5" (38.1mm) Length PS I have checked out the Frog3D range, but their bits are small and conventional.
|
|
#195
Thu 29 September 2011, 00:21
|
|||
|
|||
|
Thanks, Jed. Nice to see you still come around and help us beginners. I see Oliver.com have carbide burrs, but they seem limited to smaller sizes. Still, at $15 vs $300, I might give one a try.
|
|
#196
Thu 29 September 2011, 03:20
|
|||
|
|||
|
As smreish suggested try using long drill bit for foam, just sharpen it for a radius, it works really well
|
|
#197
Thu 29 September 2011, 12:14
|
|||
|
|||
|
Danilo....I told you!
You will find that if you use the wood ONLY type twist bit with a "full length" twist, it works best. I also found, that if I got above 12#/ft3 foam, it was not so pretty. But on the lighter standard foam density, just fine. Last edited by smreish; Thu 29 September 2011 at 12:17..
|
|
#198
Mon 28 November 2011, 18:49
|
|||
|
|||
|
Restarted the machine after a layoff of a few months. Had to learn to drive all over again.
Here it is, still outside the kitchen. Roadrunner video to follow. 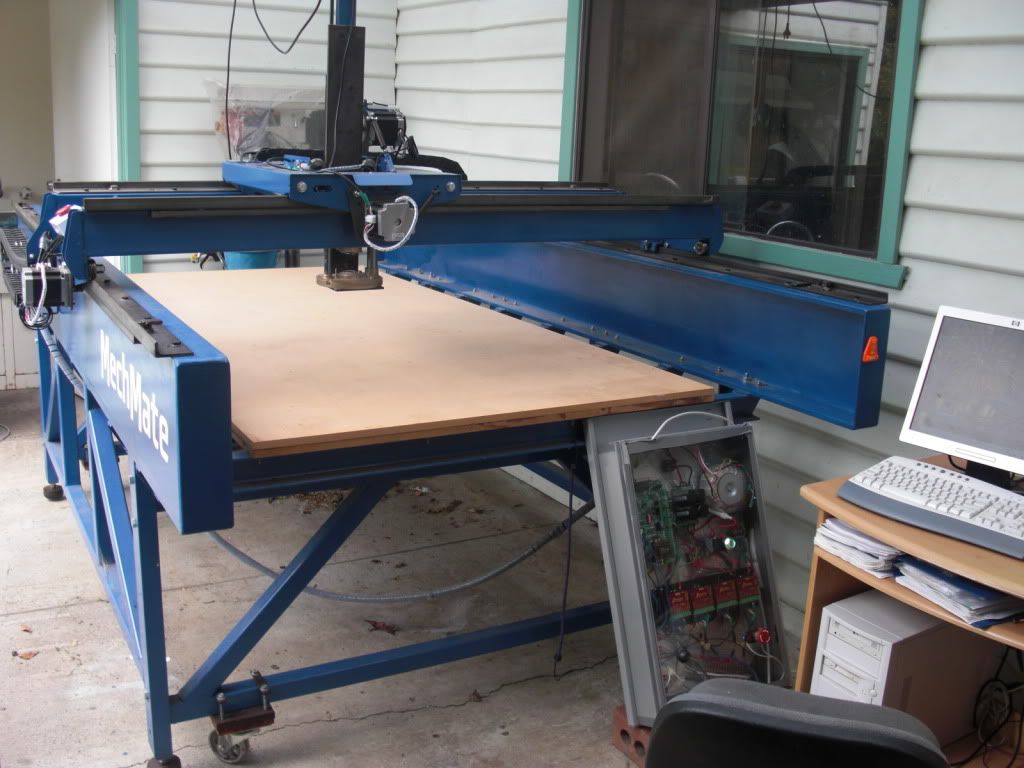 Mike - I looked up P-Sketty and got some reference to accents, dancing cats and a place in England. I'm missing something?
|
|
#199
Mon 28 November 2011, 18:56
|
|||
|
|||
|
I have 2m of cable chain left over. It's large (same as the pic above), does sag a bit over 1.5m, but it's doing the job.
|
|
#200
Mon 28 November 2011, 20:42
|
|||
|
|||
|
Ha Ha
 - P-Sketty is what us down south (US anyway) boys call pasta !!! Spaghetti - P-Sketty is what us down south (US anyway) boys call pasta !!! Spaghetti
|
|
#201
Wed 30 November 2011, 18:35
|
|||
|
|||
|
Quote:

|
|
#202
Tue 24 January 2012, 04:00
|
|||
|
|||
|
The official first cut
I finally got the garage (a strong word for a tin shed) "finished" (The floor is sort-of level and doesn't leak, and the sound is dampened using carpet on the walls and roof. Nailing used carpet to roof beams is not something I recommend, even with dust mask and goggles - eugh!).
Rolled the machine from its birthplace on the concrete slab outside the kitchen window into the shed, removed the wheels and leveled using Metlahead's highly recommended feet. Worked through some new computer stability issues. Discovered two earth wires had been busted loose in the move (well to be honest, one was poorly attached in the first place; the other was in the control box that suffered a few bumps in the move). Not nice to touch the machine rails and get a buzz. Turns out that my computer did not like sharing a 10amp circuit (the highest amperage I have available in this aged home) with the power box. Laid in another source and the computer crashing disappeared (and there I was blaming Mach 3). Anyhoo, it's somewhat telling that the machine has been running for 4 months and it's taken me that long to apply a nameplate and shoot a video. Here it is:  When I look back, I'm amazed that it's come together. Given my lack of skills in any of the departments: electrics, electronics, welding, drilling, measuring(!), it's testament to the plans and support from people on this forum that I've managed to construct something that looks pretty professional, speaks to the computer, and does things reproducibly. I have a few posts to come on my build lessons, and probably many more on how to actually run the thing somewhat effectively.
|
|
#203
Tue 24 January 2012, 04:17
|
|||
|
|||
|
Red - Great looking build !! You get #91 !! Congrats on getting you machine cutting !!!
|
|
#204
Tue 24 January 2012, 04:25
|
|||
|
|||
|
Mike, That was quick!
I was aiming to get in the first 100, so I'm happy. Thanks for your help and for this forum. Regards Red
|
|
#205
Tue 24 January 2012, 04:38
|
|||
|
|||
|
I'm on the clock early today
!!!
|
|
#206
Tue 24 January 2012, 04:45
|
|||
|
|||
|
well done Red - now the learning begins
regards, Rick
|
|
#207
Tue 24 January 2012, 07:22
|
|||
|
|||
|
Geluk Red, well done.
|
|
#208
Wed 25 January 2012, 02:05
|
|||
|
|||
|
Hi Red
Sent you a PM but so everyone else can see, well done. Regards Ross
|
|
#209
Sat 28 January 2012, 06:41
|
|||
|
|||
|
Updated Builder's Log
Red,
I apologize for being so tardy on updating the Builder's log. I check the forum everyday, but just missed your serial number award message from Mike. My hardiest congratulations to you on completing your MechMate and earning Serial Number 91. I appreciate your extensive build history and look forward to any "build lessons" to follow. The Updated Builder's Log is here. I looked, but didn't find the dimensions of your machine mentioned in your build thread. I did see the Z-axis dimension. Please let me know the cutting dimensions so that I can add them to your Builder's Log entry. Also, please review your Builder's Log entry and let me know any changes you want to make.
|
|
#210
Sat 28 January 2012, 11:50
|
|||
|
|||
|
Red,
Congrats on the build!
|
 |
| Register | Options | Profile | Last 1 | 3 | 7 Days | Search | Today's Posts | Mark Forums Read |
| Thread Tools | |
|
|
 Similar Threads
|
||||
| Thread | Thread Starter | Forum | Replies | Last Post |
| Making Skins #74 - Brisbane Australia | Surfcnc | MechMates already cutting | 1078 | Sun 20 September 2015 11:05 |
| A chip off the old block | quadtech | Miscellaneous / General / Whatever / Catchall | 0 | Tue 23 August 2011 07:30 |
| Anyone need more bearings? MELBOURNE | rotorzoomer | The Market Place | 1 | Fri 12 February 2010 06:45 |
| M1 18 000 Alternative Stopper Block | dmoore | 20. Gantry | 15 | Fri 13 June 2008 12:47 |
| Rail and Block | John | Archives | 2 | Mon 09 April 2007 15:25 |