|
#601
 Wed 26 February 2014, 17:25
|
|||
|
|||
|
On another note, anyone have experience with 0.063" cutters? Any tips would be helpful.

|
|
#602
Thu 27 February 2014, 03:03
|
|||
|
|||
|
What type of cutter Pete?
|
|
#604
Thu 27 February 2014, 06:15
|
|||
|
|||
|
I'm familiar with the company but never purchased any of their products.
|
|
#605
Thu 27 February 2014, 08:48
|
|||
|
|||
|
Pete,
I use some from skycraft and you will have to experiment. They break easily naturally. You breath on them too heavy and they break. I pay a $1 for mine so it doesn't matter if they break.
|
|
#606
Thu 27 February 2014, 21:15
|
|||
|
|||
|
Nils, I will see how I make out. Need to remove the copper film from copper-clad (Printed Circuit Board). The machinist I work with said he runs bits that small full out on the mill and I should not have much problem but I can not run below 6000 rpm on the spindle. I have seen chipbreakers recommended speeds of 20000 but I do not have one of them. I plan to make a true flat surface to mount the board to before trying to run this. I want to make sure I am only making a skim cuts and not hogging the material.
|
|
#607
Fri 28 February 2014, 03:06
|
|||
|
|||
|
usually, for bits that tiny, it should be cutting at light speed. I crank it up to whatever my VFD can give. 400hz, 24000rpm, that will do.
|
|
#608
Fri 28 February 2014, 13:53
|
|||
|
|||
|
Thanks Ken, I will give that a try.
|
|
#609
Tue 04 March 2014, 22:05
|
|||
|
|||
|
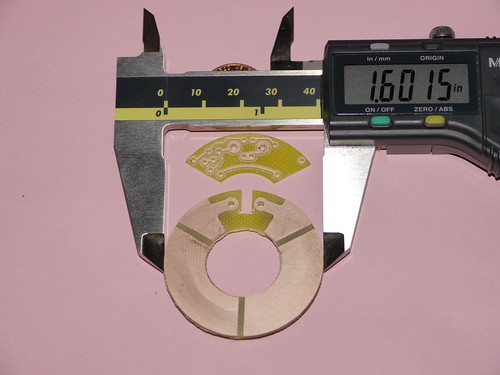
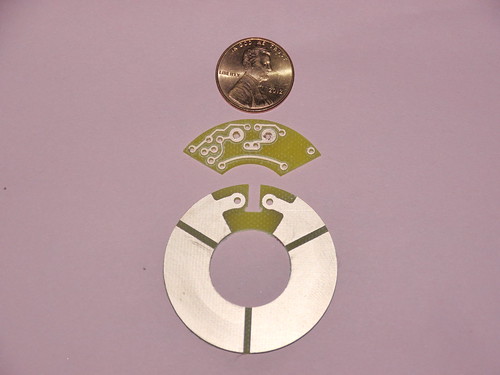
So I am waiting for a piece of wood to be glued together for me to carve. I was interested in getting another touch probe for centering on circles. I did some researching and found plans online for a probe. I only had to make some minor modifications as I think the original designer had much smaller lathe tooling. I have the metal assembly finished, now I just have to cut out the printed circuit board and order the electronics. Most was machined by a friend. I made the bearing spacer and the styli. As far as how precise the Mechmate can cut. The bearing spacer was a 2 part process. I had to machine the bottom first out of a piece of teflon and cut it out. So I had to first surface prep a piece of wood to a given height and in that area create a square to match the square cutout for the bottom half. I flipped it over and placed it in the pocket. I set my zero offset for my touch off probe to the pocket machined height of the square the cut out the other side. All the measurements are within one thousandth or less. You can get good accuracy and precision with this machine.
 Touch Probe, on Flickr
|
|
#610
Wed 05 March 2014, 06:18
|
|||
|
|||
|
That's awesome.
|
|
#611
Wed 05 March 2014, 07:30
|
|||
|
|||
|
You da man!
|
|
#612
Wed 05 March 2014, 10:51
|
|||
|
|||
|
Well made.....
It's amazing how we appreciate nice & tight work ! Congrats !
|
|
#613
Wed 05 March 2014, 11:09
|
|||
|
|||
|
Do you have an led in there for visual feedback !? An which plans did you follow !?
|
|
#615
Thu 06 March 2014, 03:04
|
|||
|
|||
|
Nice work, I like the knurling finish.
|
|
#616
Thu 06 March 2014, 03:34
|
|||
|
|||
|
Can you make another on the cheap?
|
|
#617
Thu 06 March 2014, 06:23
|
|||
|
|||
|
Tom,
I did not have much in it other than the circuit board, ball bearings and electronic components. The rest was laying around. All told, the cost to me was less than $20. So I cannot give an accurate estimate on the cost to make one from scratch.
|
|
#618
Thu 06 March 2014, 06:27
|
|||
|
|||
|
Andrew,
I like knurling on metal. I have a hammer made from 304 stainless (handle and head) with removable soft faces. Its weight is around 7 lbs but is the same length as a 4 lb hammer. I knurled the handle for grip.
|
|
#619
Thu 06 March 2014, 06:29
|
|||
|
|||
|
Fox,
The electronic components were ordered the other day. It has a 3mm led for visual indication.
|
|
#620
Thu 06 March 2014, 06:34
|
|||
|
|||
|
Well Pete, as long as you are willing to make us all one for 20 dollars each, the true cost is irrelevant.
 Seriously, nice job, sir.
|
|
#621
Thu 06 March 2014, 06:55
|
|||
|
|||
|
You know at that price that order is always at the bottom of the pile.
|
|
#623
Sat 08 March 2014, 12:08
|
|||
|
|||
|
Wow!!
|
|
#624
Sat 08 March 2014, 12:50
|
|||
|
|||
|
Alright Pete, How much do you charge?
|
|
#625
Sat 08 March 2014, 13:51
|
|||
|
|||
|
If you are interested in routing PCB's you might take a look at drillbitcity.com
They sell carbide PCB routing bits as well as drilling bits very cheaply. I have bought their drill sets for doing PCB work and they have worked very well for me. I will probably buy a set of the routing bits when my machine is running.
|
|
#626
Sat 08 March 2014, 21:22
|
|||
|
|||
|
Darren,
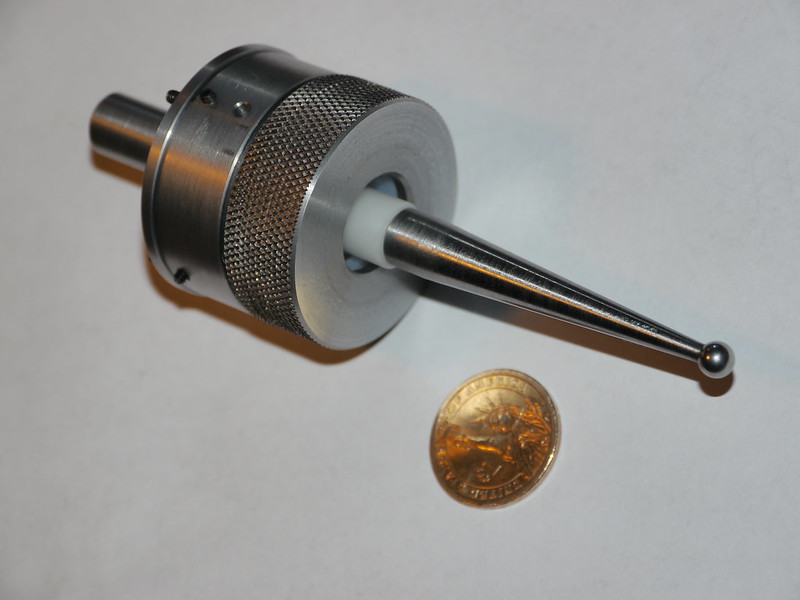
It was a joy to watch the machine cut out the PCB. I used an engraving bit to outline the traces before pocketing. I unfortunately turned a 0.005" engraving bit into a 0.015" bit because I was running to high of feed. So I had to start that section over again and set the z zero tool height with the touch of probe on the side of the table. Since I needed to hand drill I used a center drill to locate. I made a 0.005" plunge mark at the center of each point that needed drilled. That was nice to see it work so well. Tom, I don't charge anything for knowledge. I try to share it freely. But I am hobby only. I do some stuff for others occasionally but that is very rare and usually only for the cost of materials. Like I said before, this machine was for building my cabinets and other stuff. Even if I was willing to make this, I could not charge for it because of the proprietary and confidentiality requirements of the prints. Can only be made for personal use. DB, Thanks for the information. This is the first board I have made since college almost two decades ago. But I will look into the bits. Additional shots below 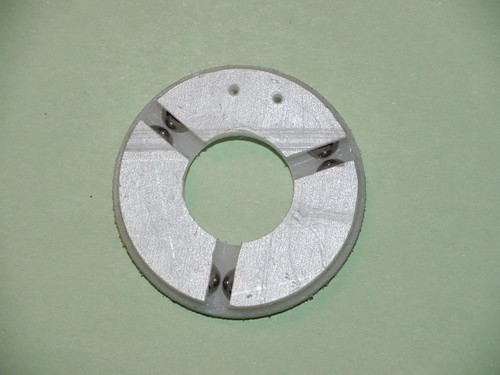 Bearing spacer Top, on Flickr 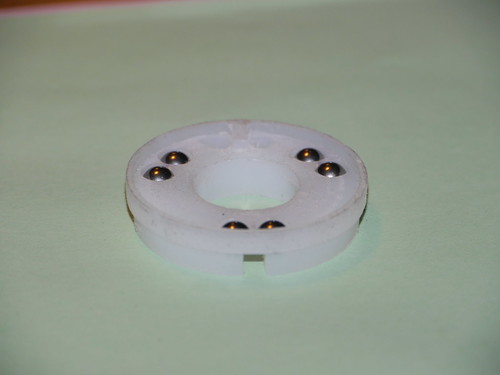 Bearing spacer Bottom, on Flickr 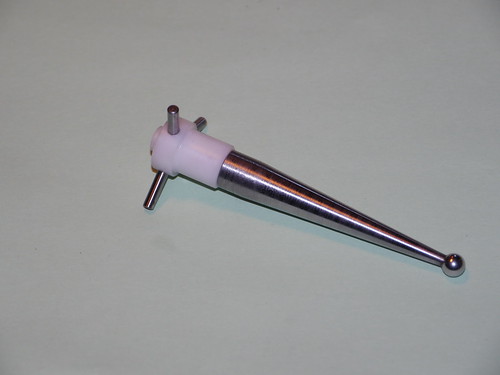 Styli, on Flickr
|
|
#627
Wed 12 March 2014, 17:05
|
|||
|
|||
|
Trying to find a board for additional 24VDC IO. Would be nice if modbus, any suggestions?
|
|
#629
Fri 14 March 2014, 04:23
|
|||
|
|||
|
Great! looks like it works. I wonder how much force is required to trigger a probe and if there's a certain amount of overdrive. Did you mill the probe tip or was that a purchase item? Are you going to use it just for finding zero points and/or image cloud mapping?
|
|
#630
Fri 14 March 2014, 16:56
|
|||
|
|||
|
The probe tip was done on a lathe. I center drilled a stainless steel ball bearing and made the tip of the probe a slip fit for the end and set it with loctite. It takes very little force to activate. I have at times needed a better way to edge detect certain pieces. I have used an edge finder but the slowest I care to push the spindle is 1500 rpm for this type of thing since there is zero load on the motor. Normally I never go below 6000 on plastic and 8000 on wood. I am curious to find out the accuracy of it but first I need to acquire more inputs. I have all 9 of the ones available on the 126 used. I have exchanged email with Steve Stalings at PMDX and I am looking elsewhere as well. I have some limited options I can move around on the 126 but I am not sure of the direction to go yet. My brain has been loaded down with an installation of a robot at work and not much time to work on this.
|
 |
|
|
 Similar Threads
|
||||
| Thread | Thread Starter | Forum | Replies | Last Post |
| Parts arrived !!! Time to get to work !! - Pennsylvania USA | Rapid | Introduce yourself and start planning | 51 | Fri 06 June 2014 07:53 |
| Newbe here - Pennsylvania, USA | Dave | Introduce yourself and start planning | 19 | Wed 11 December 2013 17:30 |
| Sign for my self | danilom | The Show Room | 6 | Fri 04 March 2011 04:50 |
| Hot Rod Shop Sign | woody | The Show Room | 4 | Fri 23 April 2010 12:14 |
| Edge lit sign | Jayson | The Show Room | 4 | Fri 20 March 2009 22:55 |