|
#91
 Mon 08 February 2010, 16:43
|
|||
|
|||
|
Way to go Blake, I hope to be cutting at end of month, Great Job!!

|
|
#92
Mon 08 February 2010, 17:20
|
|||
|
|||
|
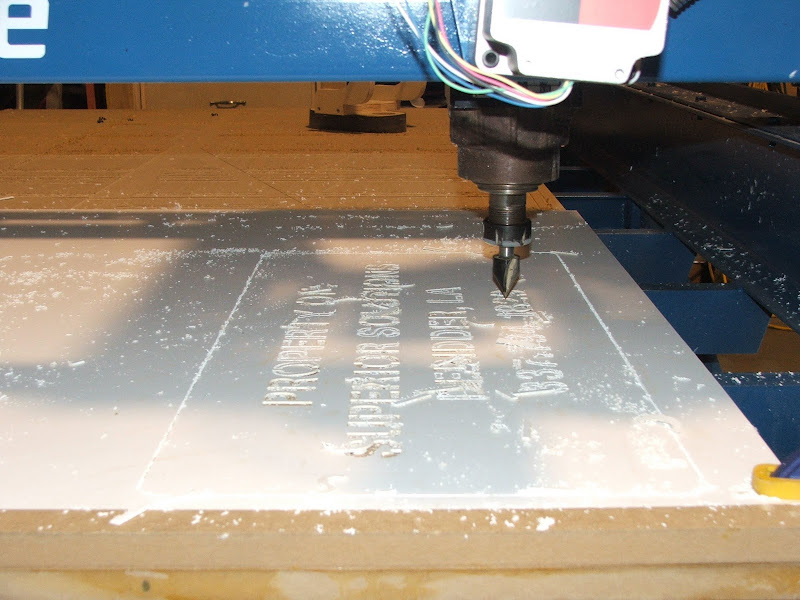
After watching the round parts pulled out by the upcut router bit, I was relieved to see that the final toolpath for the big part had bridges.
You're a quicker study that I was.  Very fast! Well done!
|
|
#93
Mon 08 February 2010, 20:12
|
|||
|
|||
|
Quote:
Had to post another video, you can see some closeups of the dust foot I cut out of 3/4 Birch and slapped together with a couple of drywall screws so I could surface the table. I used a rubber door sweep instead of a brush. http://www.youtube.com/watch?v=RL3M0n5sRLM
|
|
#94
Mon 08 February 2010, 20:32
|
|||
|
|||
|
just saw the surfacing video - i'm wondering about the ridges on the surfaced portion - does anyone have an idea why they appear?
cheers
|
|
#95
Mon 08 February 2010, 20:53
|
|||
|
|||
|
Two things. Often stripes are because the cutting face isn't absolutely parallel with the plane of travel.
Also because (like a lawnmower) the tool pushes the fibers of the mdf one direction on the left side of the cutting path, and the other direction on the right side of the cutting path. The rest of this discussion moved to: Setting the Z-slide square (perpendicular) to the table top
|
|
#96
Mon 08 February 2010, 21:22
|
|||
|
|||
|
I see Logo's , Paint and Dust - Don't that get a SN ?
|
|
#97
Mon 08 February 2010, 23:09
|
|||
|
|||
|
Quote:

|
|
#98
Mon 08 February 2010, 23:09
|
|||
|
|||
|
Congratulations for your machine, it`s looking great.
I like the dinamics of the moovements while surfacing...
|
|
#99
Mon 08 February 2010, 23:48
|
|||
|
|||
|
Well Done Blake!
|
|
#100
Tue 09 February 2010, 00:10
|
|||
|
|||
|
Ah - very good Blake - please post some more pics of the temp dust collection setup
|
|
#101
Tue 09 February 2010, 02:26
|
|||
|
|||
|
Blake,
Congratulations on finishing and #47. Interesting dust collection. The ridges are from the cutter not being parrellel as Jeff mentioned. It looks as though you need to adjust the Y or sideways movement of the spindle. I would also like to see more dust collection photos.
|
|
#102
Tue 09 February 2010, 06:56
|
|||
|
|||
|
Update Builder's Log
Blake,
Congratulations on a great looking MechMate and Serial #47, completed in record time. Here is the Updated Builder's Log. Please provide the "cutting" dimensions of your MechMate for the log. Also, please review your entry and provide any changes you would like.
|
|
#103
Tue 09 February 2010, 08:01
|
|||
|
|||
|
Congratulations!
That looks like a fine working machine Ries
|
|
#104
Tue 09 February 2010, 08:37
|
|||
|
|||
|
Dust Foot Pictures and DXF
47 WOW! That's Neat! Thanks Gerald!
Here are some pictures and a DXF of the dust foot. It worked great until the shopvac filled up.
|
|
#105
Tue 09 February 2010, 08:39
|
|||
|
|||
|
I used a door sweep similar to this one. http://www.itseasybeinggreen.com/sel...oor-sweep.html
|
|
#106
Tue 09 February 2010, 08:41
|
|||
|
|||
|
I can't edit the builder's log, but my table is 49 x 97 inches.
|
|
#107
Tue 09 February 2010, 10:28
|
|||
|
|||
|
Blake,
From my little experience, I wanted the dust foot to move with the router so it adjusts the height of the dust foot based on the height of the router. With a fixed dust foot you have to adjust it when you have different sizes of material.
|
|
#108
Tue 09 February 2010, 10:44
|
|||
|
|||
|
Nils, if you take 3 passes at 3 depths, do you adjust your dust foot height every time? Probably not. So why must one change the setting if changing board thicknesses slightly?

|
|
#109
Tue 09 February 2010, 11:16
|
|||
|
|||
|
When working with the lower vac of a shopvac I prefer a fixed foot and a door sweep over a spindle attached foot and a strip brush. A strip brush looses more vacuum thru the bristles. I can adjust the door sweep to just clear the workpiece and I lose no vacuum thru the sweep. It is a more efficient. You have to use all your vac when your vac is underpowered.
The other thing is when you change bits you just raise the spindle out of the dust foot and you can change the bit unobstructed.
|
|
#110
Tue 09 February 2010, 16:44
|
|||
|
|||
|
Gerald,
You talking to the wrong person. I don't have to adjust my dust foot. Blake, if you like that way, then it works for you. I like mine out of the way if I want to look at wants going on with the cut. I can pause the machine, move the router up and get a good view. Eveyone works differently. I like seeing what other people are doing. I also do not use a brush on my foot. I don't get the advantage.
|
|
#111
Tue 09 February 2010, 17:15
|
|||
|
|||
|
I have a question about Mach 3. In the Shopbot 3 software you could jog an axis a set distance. Say you wanted to move the X 2.25" you would put in the command JX2.25 and it would move exactly 2.25"
Is there a way to Jog an Axis a set distance in Mach 3?
|
|
#112
Tue 09 February 2010, 17:53
|
|||
|
|||
|
Update Builder's Log
|
|
#113
Tue 09 February 2010, 18:49
|
|||
|
|||
|
In Mach select MDI then high light the box at the bottom left. Type in G0 X1 Y1 F10 . Then hit enter the machine will then jog to that measurement.
|
|
#114
Tue 09 February 2010, 19:29
|
|||
|
|||
|
Had to go try it. Neat! Thanks!
|
|
#115
Fri 19 February 2010, 10:10
|
|||
|
|||
|
What are the implications of setting Mach 3 to operate on a faster Hz then 25000? I set mine to 45000 and my top speed went from 490 to over 800IPM.
|
|
#116
Fri 19 February 2010, 10:39
|
|||
|
|||
|
Blake,
you need to make sure that your computer can cope with that speed for hours in a row. The EMC people do have a tool to measure how stable you computer is called latency test. I think that Mach also has something like that. What is basically does is measure the maximum latency, how fast does software respond to hardware interrupts, and you need to take it's slowest value (simply said). The higher that KHZ setting, the more your computer spend in kernel, and the slower your computer will respond to mouse/keyboard input and screen updates. Set it to something you need. lastly, if you are seeking to get more speed out of your machine, then take a look at your acceleration values, slow acceleration will not bring your machine up to speed fast enough and it will slow down the whole cutting process. Personally I would not go above 800IPM, but I know Jeff did surface at 1350IPM, but you know... it's surfacing, not cutting into the material (unless you table is way off )For jogging I did set my maximum to 15000mm/minute (600IPM). Ries
|
|
#117
Fri 19 February 2010, 18:59
|
|||
|
|||
|
blake - mine is a intel atom board and daily works at 45khz, u just have to try it for a couple of days
|
|
#118
Wed 14 April 2010, 12:48
|
|||
|
|||
|
Some Recent projects
I thought I might bump my thread to the top with some recent projects. Nothing great, just pictures of the everyday use of my Mechmate here in the sign shop. I am loving this machine!
  This is the front of a small wooden box I built for my wife. I haven't taken a picture of it completed but I will soon. It sits by our back door and we throw our shoes in it when we come in.  This is an edge lit acrylic sign. I carved the design in reverse in the back of 1/4 acrylic with a 90 degree V bit. There is a strip of blue LEDs running along the bottom that illuminate it. Overall size: 6 x 12"  This wasn't done on my router, it is just some of the regular work we do here. This trailer was just plain white when we got it in, no artwork on it at all.  More coming soon!
|
|
#119
Wed 14 April 2010, 19:12
|
|||
|
|||
|
So lets get a comparison to your old ShopBot and the MechMate.
|
 |
|
|
 Similar Threads
|
||||
| Thread | Thread Starter | Forum | Replies | Last Post |
| Cutting and Making Dust! #40 - California, USA | Radishworks | MechMates already cutting | 27 | Mon 16 November 2009 10:47 |
| http://ms-motor.com/ steppers, stepper driver, spindles, VFD | javeria | The Market Place | 4 | Sat 11 July 2009 23:53 |
| Making a wish list | Medemt | 70. Control Systems | 1 | Wed 25 March 2009 18:22 |
| It's painted, moving, and making dust! #7 - Saskatchewan, CA | Roadkill_321 | MechMates already cutting | 180 | Wed 25 June 2008 22:34 |
| Dust-proofing stepper motors and consequences of dust ingress | Doug_Ford | Motors & their mountings | 25 | Thu 08 November 2007 19:09 |


