|
#271
 Mon 11 October 2010, 05:35
|
|||
|
|||
|
LOL! how did I miss that!
great built! 
|
|
#272
Mon 11 October 2010, 09:41
|
|||
|
|||
|
Ken, don't worry, I did a double take too...then saw the "hunk of metal with a hole" on the other side of the spider! LOL
GREAT build....Jealous I am. Sean
|
|
#273
Mon 11 October 2010, 18:44
|
|||
|
|||
|
very nice build,
i think that the pipe clamps dont fit on your machine as everthing else is so well made and those brackets look cheap.
|
|
#274
Tue 12 October 2010, 03:14
|
|||
|
|||
|
LOL !!
Guys C'mon!! did you all think I was going to start cutting corners at this late stage of the project  mrghm, I agree with you regarding the look of the pipe brackets  they just do not look right. However I do think they will look very different when they are painted MM Blue and the bolts are changed over to nice shiny Zinc ones they just do not look right. However I do think they will look very different when they are painted MM Blue and the bolts are changed over to nice shiny Zinc ones If they still do not look good after that then I will make something else up. If they still do not look good after that then I will make something else up.Cheers guys and thanks for the comments, considering my concerns in my first initial post I think I have overcome them all, and more. Big thanks has too go out to all on the forums as without them and the forums we may never have got these builds off the ground!! Cheers Tony.
|
|
#275
Tue 12 October 2010, 17:45
|
|||
|
|||
|
Tony,
I personally think the dust collection bracket looks perfect. Nice depth and clamping is simple. "less is more" Sean
|
|
#276
Wed 13 October 2010, 00:44
|
|||
|
|||
|
The dust collector pipe, if rigidly attached to the foot, needs regular adjustment for foot height, plus complete removal/installation for various types of jobs. A pipe clamp system with only one screw and a quick-release would be perfect . . . . . . . .
|
|
#277
Wed 13 October 2010, 06:00
|
|||
|
|||
|
Thanks Guys,
Have not put the finall thoughts into the dust foot yet, however the plan would be to have flexi pipe from the rigid pipe held in the brackets to the dust foot, so the dust foot would travel up and down with the spindle. Also looking to have flexi pipe from the top of the rigid pipe up to the dust extraction. But that said, I do need to put a little more thought into it, and how it is going to work. Cheers Tony.
|
|
#278
Wed 13 October 2010, 07:07
|
|||
|
|||
|
Moving dustfoot is cool to look at but Rigit foot is more practical. especially when changing tool bits...
|
|
#279
Wed 13 October 2010, 07:14
|
|||
|
|||
|
Ken,
Changing bits with the dust foot on does not need to be hard if you accomodate this in the design of the dust foot Cheers Tony.
|
|
#280
Wed 13 October 2010, 07:22
|
|||
|
|||
|
With my simpleton rigid dust foot, I just need to raise the spindle & the whole tool bit is ready for changing...
I also treat the dust foot as a finger guard... no hard feeling when the tool bit chew on it... Best of all, I don't have to cut corners as there are no corners to cut
|
|
#281
Thu 14 October 2010, 02:56
|
|||
|
|||
|
What I intend to do is rigid pipe in the brackets and a short length of flexible between the bottom of the rigid pipe to the dust foot at is attached to the spindle that way we only need to change a short length of flexible as it wears. also this give us solid pipe to the clamp too. And a longer flexible pipe will attach to the top and this will go to the Dust Collection pipe that is mount to the roof in the center of the table
Skippy
|
|
#282
Thu 14 October 2010, 04:14
|
|||
|
|||
|
See post 277 Skippy already said mate!! lol
Cheers Tony.
|
|
#283
Sat 16 October 2010, 07:35
|
|||
|
|||
|
Table Wiring Started
Hi All,
skippy and I started wiring up both the tables today probably another day to a day and a half, and we should be all done!! then it will be onto modifying and installing all the electrics and electronics into the control boxes we have with the touch screens.We are starting to see the light at the end of the tunnel now so should not be too much longer before we are cutting hopefully A couple of photos of Skippy hard at work today and a couple of our progress after the fitting of all the cable glands to the boxes as well as getting the spindle connected and the water lines for the spindle cooling.Hope you enjoy!! 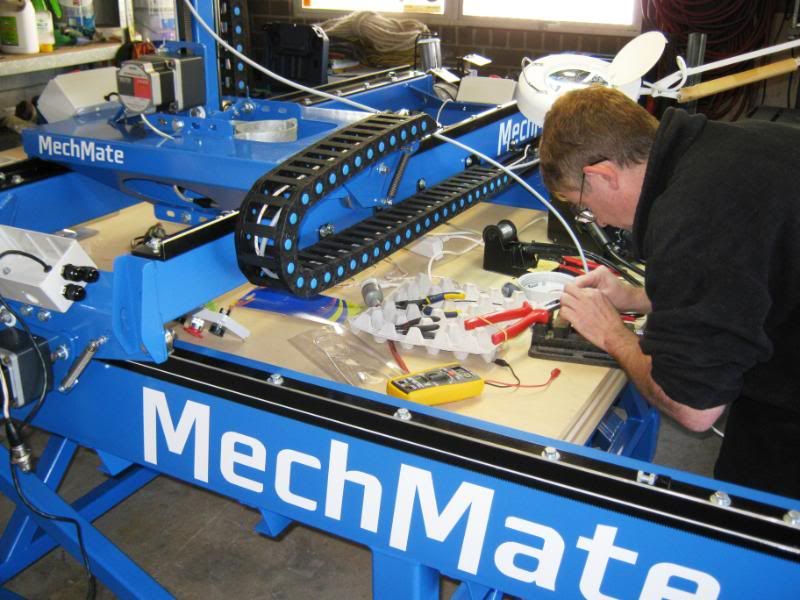 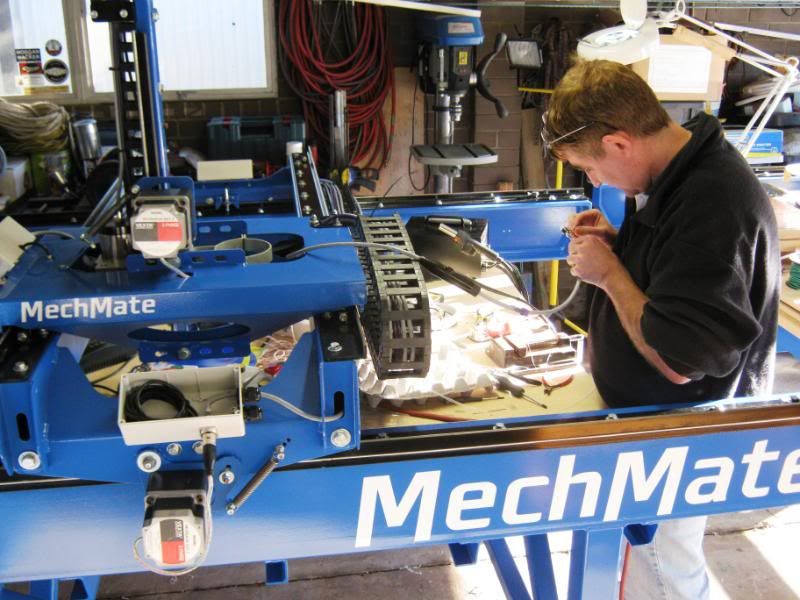 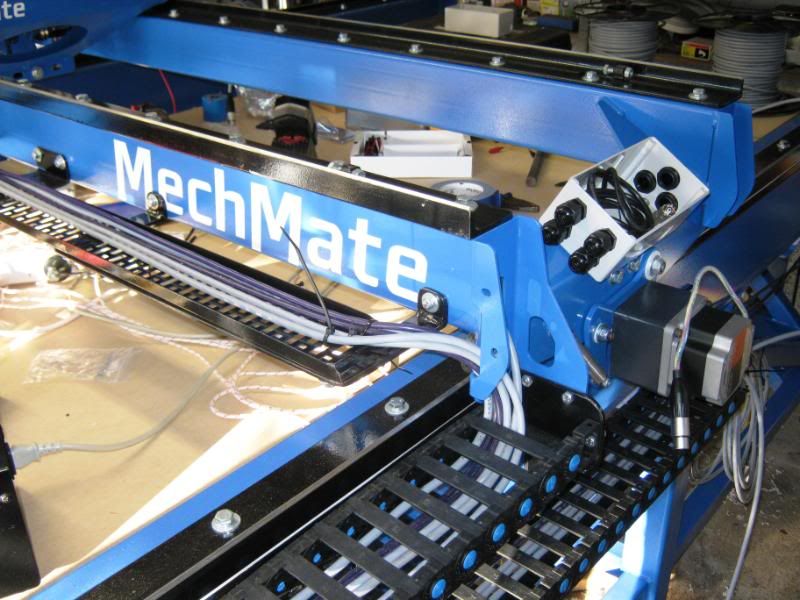 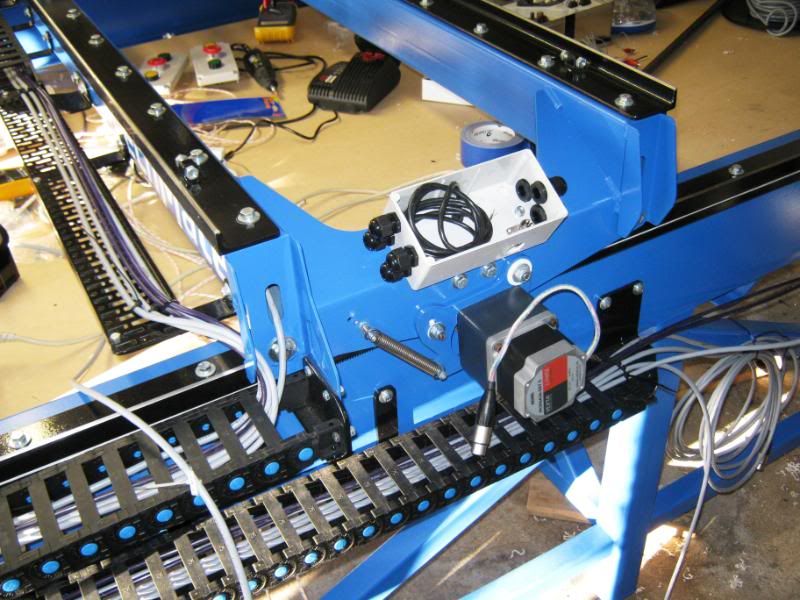 Cheers Tony.
|
|
#284
Sat 16 October 2010, 08:55
|
|||
|
|||
|
Looking good guys, wont be long now.
Just one question, why do you have adjustable stops on the gantry for the Y car? and why on both rails?
|
|
#285
Sat 16 October 2010, 09:25
|
|||
|
|||
|
..wow that looks familiar. Fantastic work.
I never thought to put a panel mount connector in the button station box for motor connections. Nice detail. Sean
|
|
#286
Sat 16 October 2010, 09:44
|
|||
|
|||
|
Nice work!
Very interesting to watch the evolution of the MM. By the time I get around to building another one, they won't have rails, but magnetic levitation for the gantry and Y car.
|
|
#287
Sat 16 October 2010, 10:29
|
|||
|
|||
|
Great work guys! Good to see Aussies being kept away from the sports fields
Unshielded motor cables close to unshielded signal cables is generally not a good idea. I suppose it depends on how close, how much unshielded and whether parallel or perpendicular . . . . .
|
|
#288
Sat 16 October 2010, 12:26
|
|||
|
|||
|
Hmmm. Good point since i seem to get really bad emf problems everytime i build a machine.
|
|
#289
Sat 16 October 2010, 18:04
|
|||
|
|||
|
Quote:
At the time I did not realise that the second stops on the gantry were not required. I had also pre drilled and tapped all the stop blocks I had cut, so rather than waste them and the time I had put in to making them I decided to fit them Cheers Tony.
|
|
#290
Sat 16 October 2010, 18:17
|
|||
|
|||
|
Quote:
Thanks for your encouragement Gerald, such a great thing you got started here, Aussies & Sports comment gave me a good laugh!! All our motor, spindle and 7core cables being used are all shielded, with the shield connected at the control box end. I am a bit of a slow starter with the electrics, and really only starting to get my head around some of it now  however that said the electrics falls under Skippys guidance as that is his area of expertise and I guess I will be watching, helping and asking lots of questions during the wiring and commissioning as we go. however that said the electrics falls under Skippys guidance as that is his area of expertise and I guess I will be watching, helping and asking lots of questions during the wiring and commissioning as we go.So hopefully with all the reading here on the forum and the hands on stuff wiring both machines I will have a better understanding Cheers Tony.
|
|
#291
Sun 17 October 2010, 16:27
|
|||
|
|||
|
I hope to see lots of video. Great Job guy's.
|
|
#292
Sun 17 October 2010, 21:15
|
|||
|
|||
|
Looking good. Please keep us updated about tuning the machines.
Red
|
|
#293
Sat 23 October 2010, 04:47
|
|||
|
|||
|
Todays Update!!
We had to replace one of the cable boxes on our gantry's with larger one's today as everything was getting to tight and we were going to struggle to fit everything in. We are almost finished all the wiring to my machine with only the Pause, Resume and E-Stops to connect. We also ran a few more cables on Pauls machine with probably another days work to complete his table. I also made a small start on the control box removing a few parts that will not be required and adding wheels to the base to make it easy for moving. We plan to complete the control box as soon as we are finished with the table, so not long now hopefully 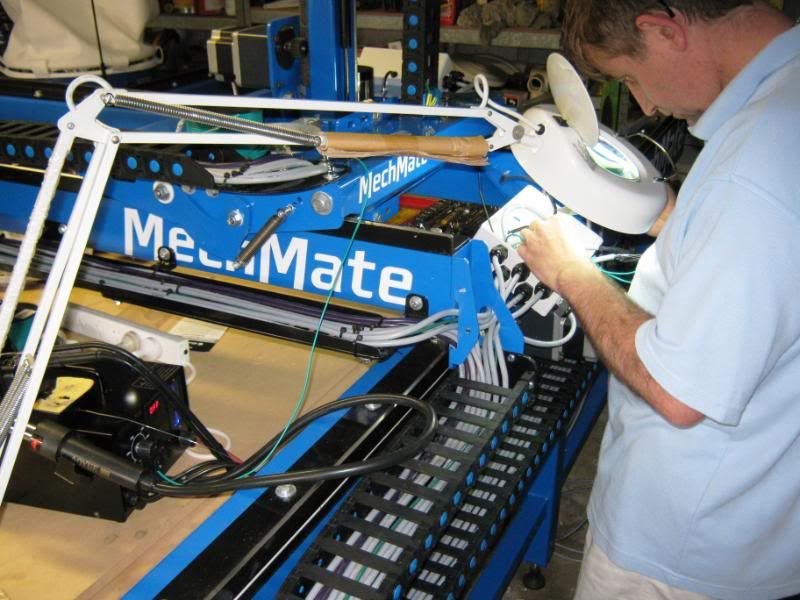 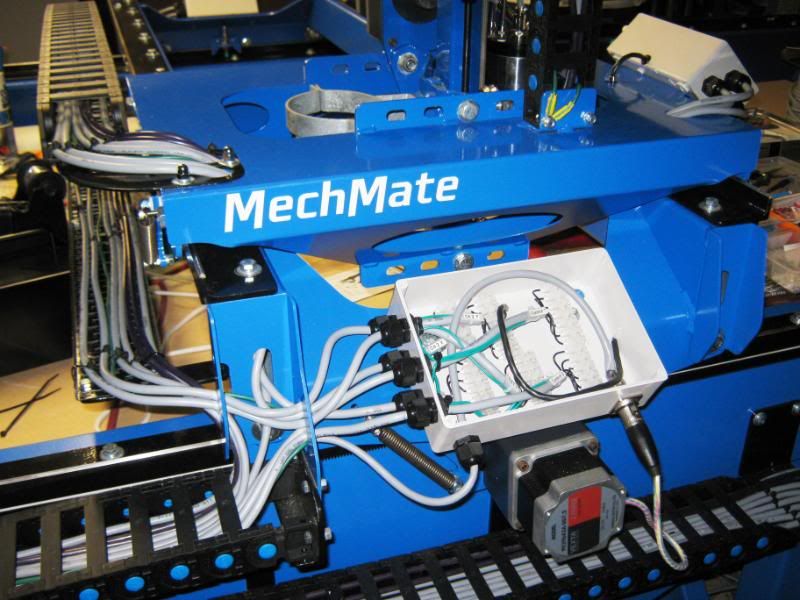 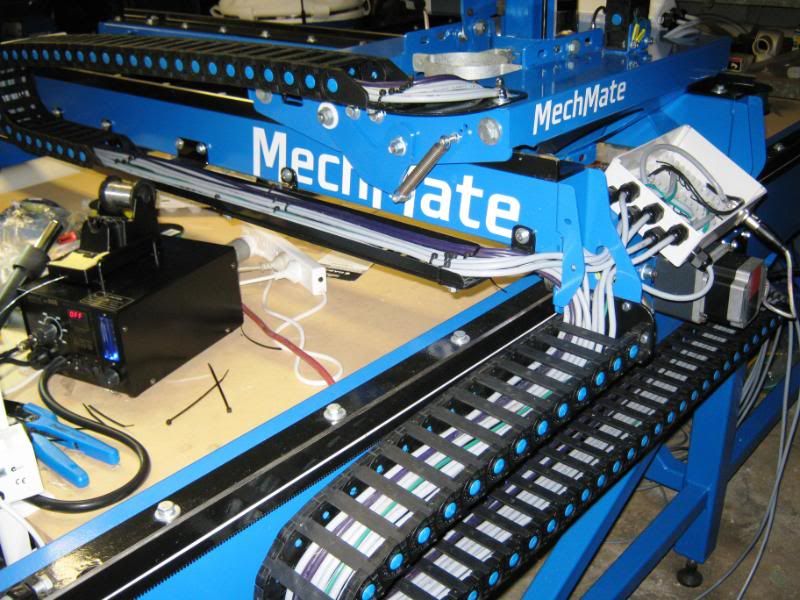  Cheers Tony.
|
|
#294
Sat 23 October 2010, 05:58
|
|||
|
|||
|
Tony,
You have a good lot of cables in the box mate...what else is in there except for the motor cables?
|
|
#295
Sat 23 October 2010, 07:18
|
|||
|
|||
|
Hi Tony and Paul
Super neat cabling there Paul. No point trying to squash cables where they don't want to go, so a good idea to increase that one control box size. Keep up the good work and I hope to see you guys cutting up stuff real soon. Regards Ross
|
|
#296
Sun 24 October 2010, 01:01
|
|||
|
|||
|
Quote:
We have also run a couple of 7 core sheilded cables which loops to all the cable junction boxes for connecting up all the E-stops, pause and resume, with a few spare connections for anything else we may wish to wire in. Cheers Tony.
|
|
#297
Mon 25 October 2010, 05:52
|
|||
|
|||
|
Hi All !!
With the Australian dollar very very slightly under parity with the US dollar Paul and I have decided to bite the bullet and order our Vectric Aspire software for each of our machines Now we have something else to play with when we are not working on the MM's at least until they are finished, then we can start to get serious onto the next learning curve now Cheers Tony
|
|
#298
Mon 25 October 2010, 09:40
|
|||
|
|||
|
Good move Tony...I am also thinking of jumping in. I am just waiting for the NEW release due end November I think. I am sure if you buy now you are entitled to the upgrade for free.
|
|
#299
Mon 25 October 2010, 16:47
|
|||
|
|||
|
Hi Kobus,
Yes you are correct, if you buy now you not only save a few $$$ you also recieve the update to version 3 which they are looking to release the end of November, all going well. I have been playing around with the trial version prior to the purchase, Vectric Aspire appears to be a fantastic and fairly easy to use program with heaps of functionality. I am really looking forward to using it and designing all sorts of stuff to cut Cheers Tony.
|
|
#300
Mon 25 October 2010, 22:52
|
|||
|
|||
|
I like the word's UNWRAP 3D STL....in the new V-3. My indexer should be more productive....with the help from Fabrice..
I have been a Vectric fan from day one. Looked at most CAM programs when I started, and found Vectric to be very user friendly for a stupid oke like me. This was the first program that I could take and within 5 minutes generated the CORRECT G-Code for cutting. First bought Cut2D...then V-Carve Pro...now serisously looking to get Aspire....I need it to go forward and hopefully it should satisfy my fantasy for a while...or forever.
|
 |
| Register | Options | Profile | Last 1 | 3 | 7 Days | Search | Today's Posts | Mark Forums Read |
| Thread Tools | |
|
|
 Similar Threads
|
||||
| Thread | Thread Starter | Forum | Replies | Last Post |
| Making Skins #74 - Brisbane Australia | Surfcnc | MechMates already cutting | 1078 | Sun 20 September 2015 11:05 |
| Touch Probes Have Arrived #72 - Brisbane, Australia | skippy | MechMates already cutting | 130 | Mon 04 March 2013 04:31 |
| Do my legs look fat? - Brisbane Australia | tangocharlie123 | Construction started, but not cutting yet | 60 | Wed 22 June 2011 06:32 |
| New member - Brisbane Australia | stan stuart | Introduce yourself and start planning | 3 | Tue 11 May 2010 20:48 |
| Commercial Signs | Hugo Carradini | The Show Room | 17 | Wed 21 January 2009 22:51 |


